Are you on Ubuntu and need a Windows virtual machine to use Windows programs that don’t work on your Linux installation? Don’t know the first thing about how to set up a Windows VM on Ubuntu? We can help! Follow along as we show you how to set up a Windows VM on Ubuntu!

How to set up Windows VM on Ubuntu – Installing VirtualBox
The first step in setting up a Windows virtual machine on Ubuntu is installing software that allows for the creation of VMs. There are many excellent VM tools on Linux to use. In this guide, we’ll focus on VirtualBox.
Why VirtualBox? It’s super user-friendly for new users. Furthermore, it’s straightforward to install and doesn’t require the user to tinker with Systemd or other system-level settings.
To get VirtualBox working on your Ubuntu PC, do the following. First, open up a terminal window. You can open up a terminal window by pressing Ctrl + Alt + T on the keyboard. Or by searching for “Terminal” in the app menu.
Once you’ve opened up a terminal window, install the “Virtualbox” app package using the following apt install command below.
sudo apt install virtualbox
After entering the command above, you will be prompted to enter your password. Type in your user account password, then press the Enter key. It is OK if you do not see any password feedback; this is normal.
Once your password is entered, the terminal will ask if you want to continue installing the package. Press the Y button on the keyboard to continue.
When you select Y on the keyboard, Ubuntu will install VirtualBox. When the process is complete, you will be able to launch VirtualBox by searching for the app in your app menu.
How to set up Windows VM on Ubuntu – Downloading Windows 10
To make a Windows VM on Ubuntu, you will need to download a copy of Windows 10. Luckily, Microsoft makes the Windows 10 ISO available to users free of charge (though you need to activate it to get full use out of it) on the internet.
To download the latest version of Windows 10 to your Ubuntu PC, head over to Microsoft.com. Once there, scroll down to the “Select edition” area. In this section of the website, you will be able to specify the version of Windows 10 you would like.
After selecting an edition of Windows 10, click on the “Confirm” button. When you select the “Confirm” button, you will see “Select the product language” appear. In this menu, choose the language you speak. Then, click the “Confirm” button.
Once your language is confirmed, the Microsoft webpage will generate 32-bit and 64-bit download options. Select the option you prefer to start the download. The download shouldn’t take long.
When the download is complete, reboot your Linux PC. After installation, the system must be rebooted to load in the new “Vboxdrv” Linux kernel driver. This driver will not work without a reboot.
How to set up Windows VM on Ubuntu – Configuring VM
To get the VM up and running, follow the step-by-step instructions below.
Step 1: Find the “New” icon in VirtualBox, and click on it with the mouse to create a new VM. After that, find the “Name” box and type in “Windows 10.”
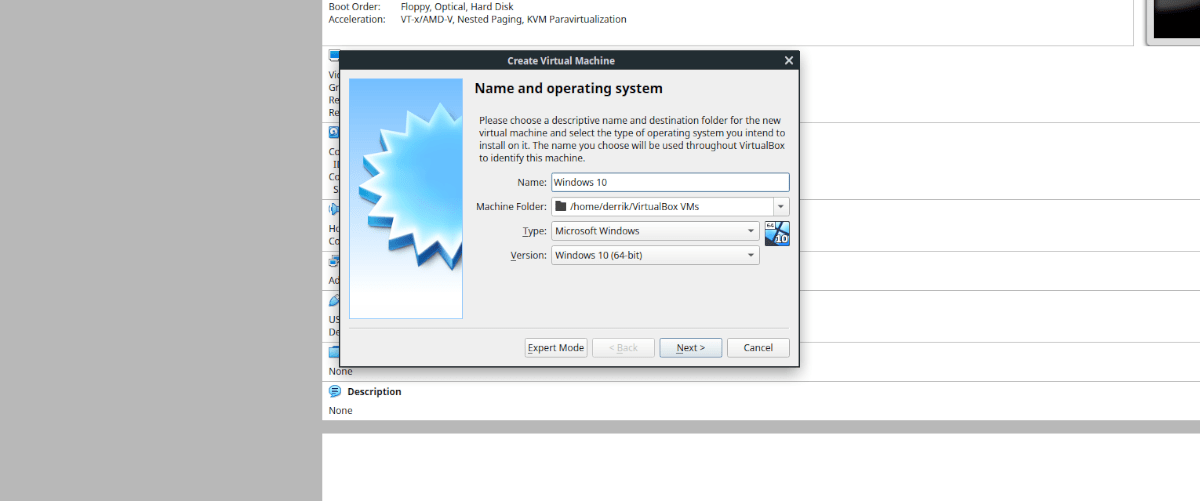
Click “Next” to continue.
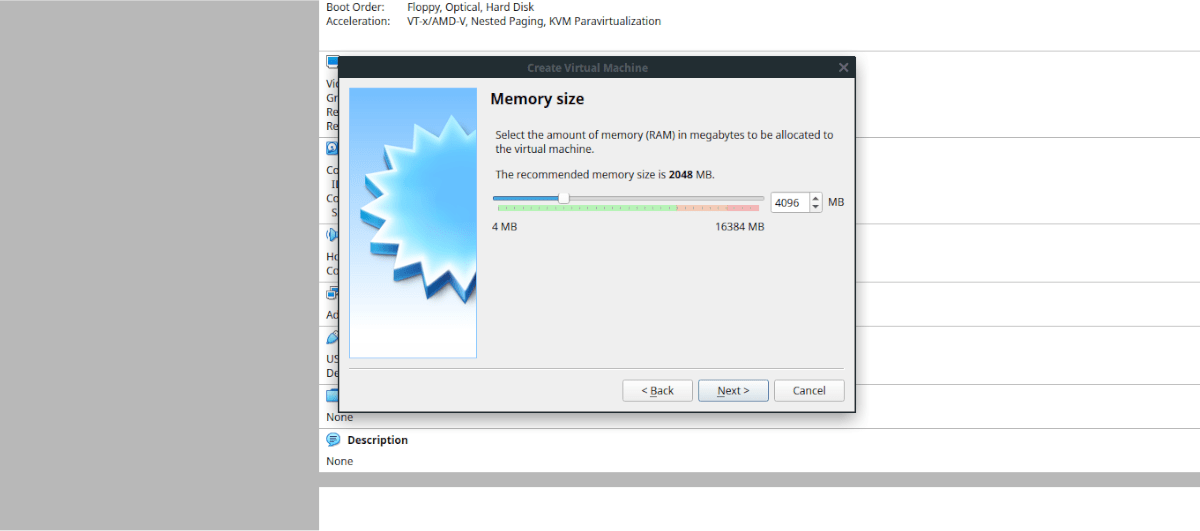
Step 2: Using the RAM slider, select system memory for your Windows VM. For best results, use at least 2 GB of RAM.

Click “Next” when done to continue.
Step 3: On the “Hard disk” page, select “Create a virtual hard disk now” and click “Create” to continue to the next page.
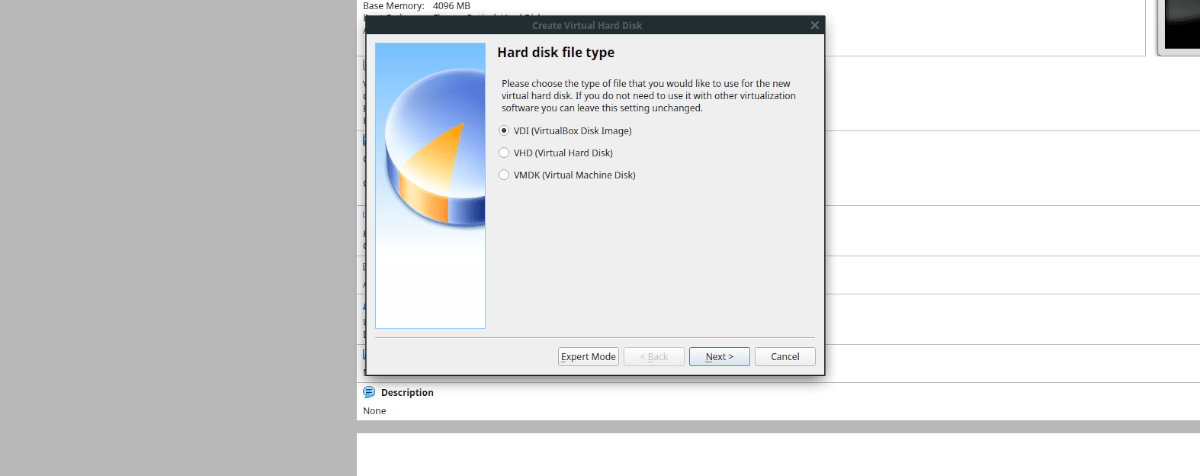
Step 4: On the “Hard disk file type” page, select “VDI (VirtualBox Disk Image) and click the “Next” button to continue to the next page in the VM creation wizard.
Step 5: In the “Storage on physical hard disk” page, find the “Dynamically allocated” option and click on it to select it. Dynamic allocation will allow you to have a large hard drive that only takes up as much space as is used.
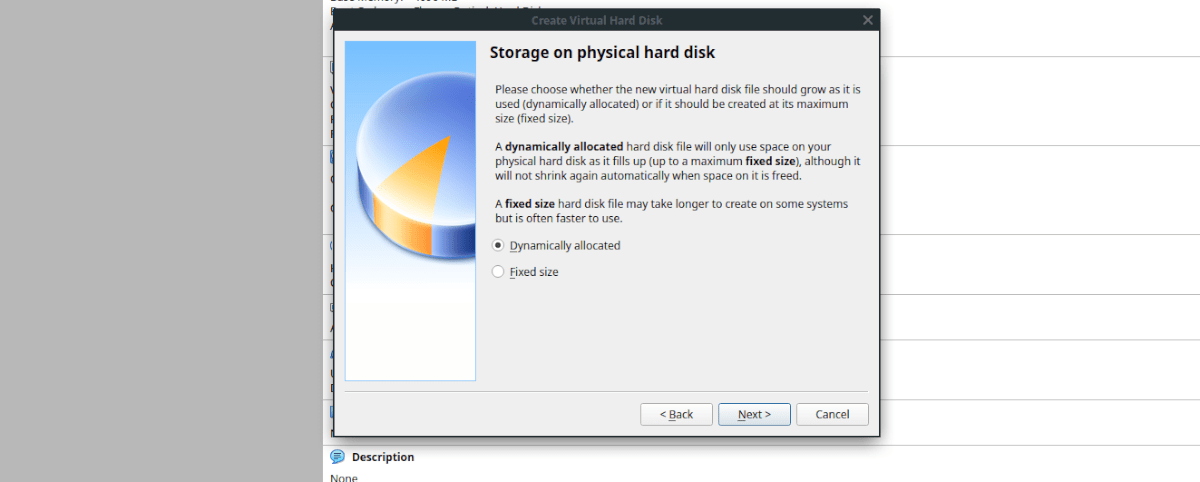
For example: if you have a 50 GB HDD for your Windows VM, but only 10 GB is in use, the disk image file will only be 10 GB.
Click “Next” when done to continue.
Step 6: On the “File location and size” page, leave it at 50 GBs (the default size) unless you require more space in the Windows 10 VM. Then, click on the “Create” button to create your new VM.
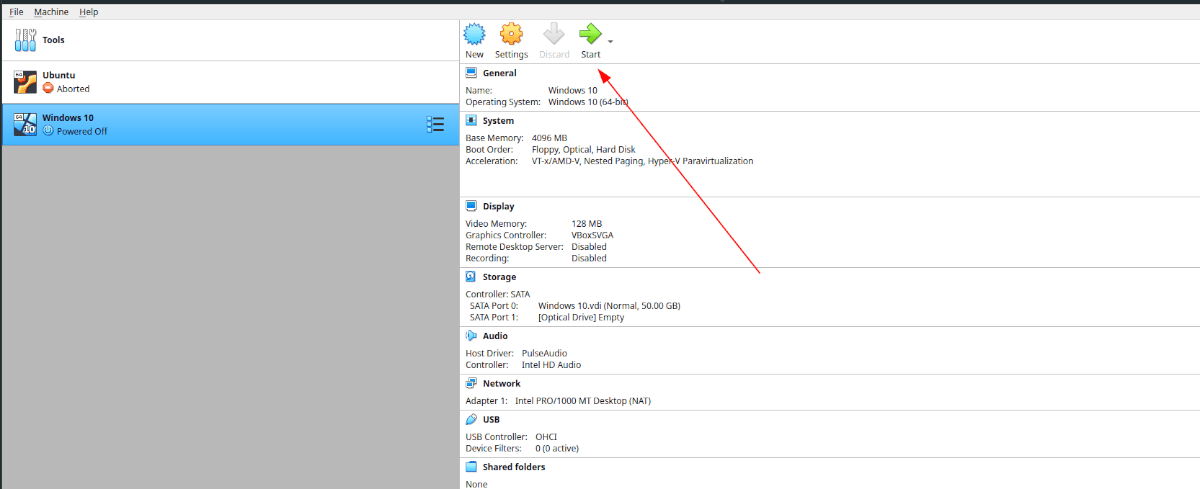
Step 7: Select your Windows 10 VM with the mouse. Then, click on the “Start” button to start up the VM. When the VM starts up, you will see a pop-up window that says “Select start-up disk”. Choose the Windows 10 ISO file downloaded earlier and click “Start.”
Step 8: Once you’ve selected the Windows 10 ISO and booted it up, you’ll be presented with the Windows 10 installation screen. Use the installer to get Windows 10 installed on the virtual VM hard drive.
When Windows 10 is installed on the virtual VM hard drive, you’ll be ready to use your Windows 10 VM on Ubuntu!
Troubleshooting
You may have trouble starting up your VirtualBox VM due to how Ubuntu grants ownership to the /usr/ folder. To fix this, change ownership of the folder from your user account to the root account with the command below.
sudo chown root:root /usr/