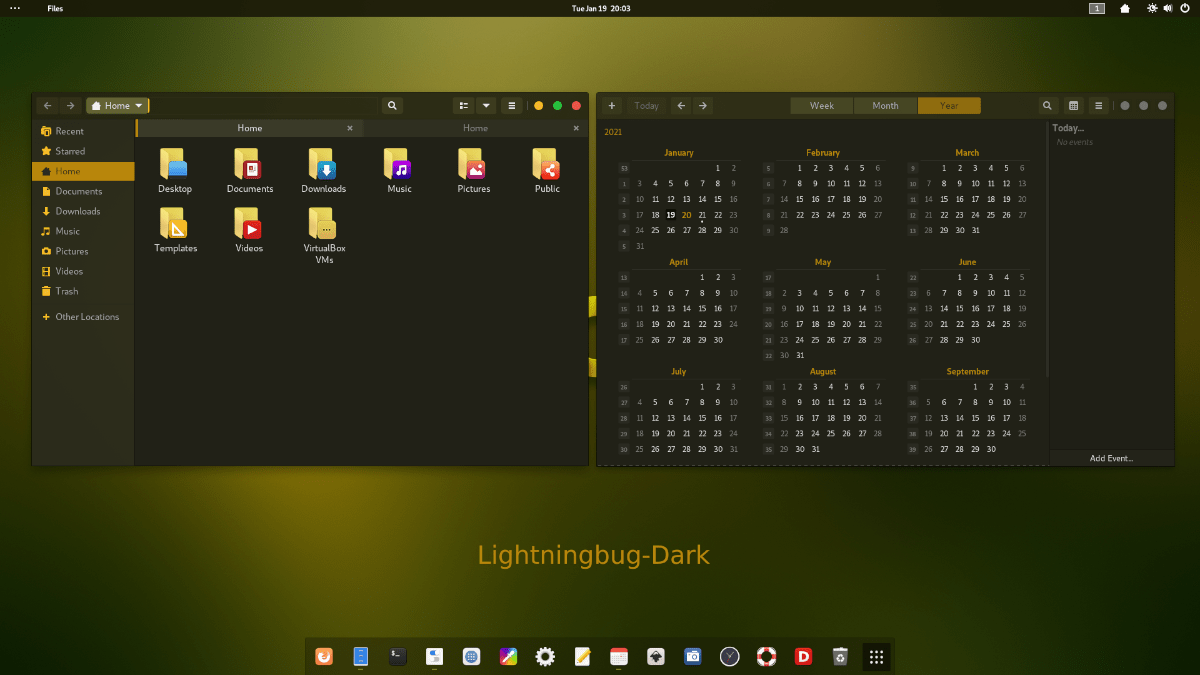
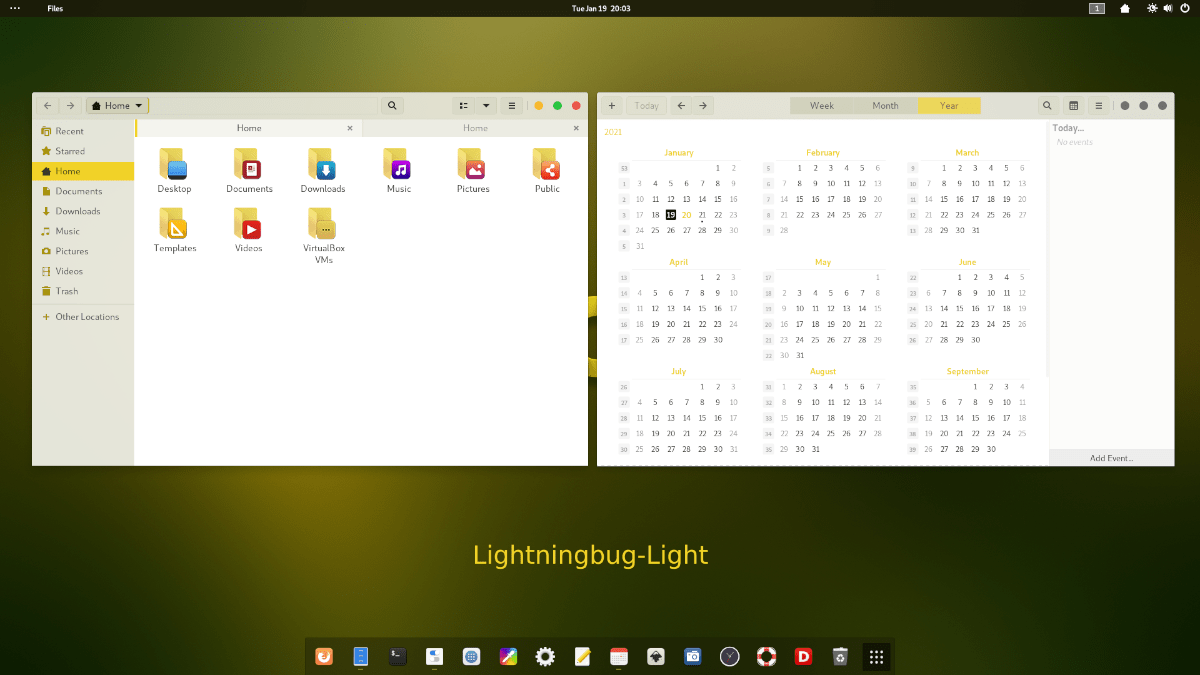
LightningBug is a beautiful, Yellowish GTK theme for Linux. It comes in two variants: dark and light. The design is reminiscent of Mac OS but with a unique yellow tinge. Here’s how to install it on Linux!
Downloading LightningBug
The LightningBug GTK theme is available to all Linux users via the Gnome-look.org theme website. To get your hands on this theme, start by heading over to the LightningBug Gnome-look.org page.
Once on the LightningBug page, find the “Files” button. The “Files” area has a wide variety of LightningBug theme package files to download. The choices include LightningBug Dark, LightningBug Light, LightningBug Light Solid, and LightningBug Dark Solid.
Inside the “Files” area, look to the “DL” column. Once in this column, click on the blue “DL” button next to the theme you wish to download to grab your LightningBug theme package.
Extracting LightningBug
The LightningBug theme is distributed on the internet through Tar XZ archives. These archives are handy and allow Linux creators to distribute theme files efficiently. However, you cannot use theme files that are packed in the Tar XZ format. They must be extracted first.
To start the extraction process on your computer, you must launch a terminal window. To launch a terminal window on the Linux desktop, press the Ctrl + Alt + T keyboard combination. Or, search for “Terminal” in the app menu and launch it that way.
When the terminal window is open and ready to use, make use of the CD command to enter the “Downloads” directory where the LightningBug theme package was downloaded.
cd ~/Downloads
Inside the “Downloads” directory, the extraction can begin. Using the tar command to decompress the LightningBug theme pack you downloaded from Gnome-look.org.
To extract the LightningBug Dark GTK theme package, make use of the command below.
tar xvf Lightningbug-Dark.tar.xz
To extract the LightningBug Light GTK theme package on your computer, execute the following terminal command.
tar xvf Lightningbug-Light.tar.xz
To extract the LightningBug Light Solid theme package on your computer, you’ll need to run the command below.
tar xvf Lightningbug-Light-Solid.tar.xz
Want to extract the LightningBug Dark Solid GTK theme on your computer? Execute the command below.
tar xvf Lightningbug-Dark-Solid.tar.xz
Installing LightningBug
Now that the LightningBug GTK theme is fully extracted in your “Downloads” folder, the installation of the theme can begin. There are two ways of installing the LightningBug GTK theme on Linux. These two methods of installation are known as “single-user” and “system-wide.”
The single-user installation method is ideal for Linux users who do not share a PC and do not want other users to access the LightningBug GTK theme. The system-wide installation method is best for users who have multiple accounts on their Linux system and want every user to access the LightningBug theme.
In this guide, we’ll cover both methods. To start the installation process, open up a terminal window on the Linux desktop. You can open up a terminal window on the desktop by pressing Ctrl + Alt + T or searching for “Terminal” in the app menu.
Single-user
The first step in installing LightningBug in single-user mode is to create a new folder with the name “.themes” in your home directory. This folder will allow Linux desktop environments to load themes just for your user account.
To create the new folder, make use of the mkdir command below.
mkdir -p ~/.themes/
After creating the new theme folder, use the CD command to move the terminal window into the “Downloads” directory where the LightningBug GTK theme was previously extracted.
cd ~/Downloads/
Once inside of the “Downloads” directory, use the mv command to install the LightningBug GTK theme to the “.themes” folder.
mv Lightningbug*/ ~/.themes/
When the command completes, the installation is finished. Confirm the installation was successful by executing the ls command below.
ls ~/.themes
System-wide
To install the LightningBug GTK theme in system-wide mode, start by accessing the “Downloads” directory in your home folder, where the theme package was previously extracted.
cd ~/Downloads
Once in the “Downloads” folder, you must log in to the root user account, as installing in system-wide mode requires modifying some system folders.
sudo -s
Now that the terminal has root access install the LightningBug GTK theme into the /usr/share/themes/ folder by making use of the mv command below.
mv Lightningbug*/ /usr/share/themes/
After the command completes, the LightningBug GTK theme is installed. From here, use the ls command to confirm it was successful.
ls /usr/share/themes/
Activating LightningBug
The LightningBug GTK theme is now installed onto your Linux PC, but it isn’t the default GTK theme. The reason for this is that simply installing a GTK theme doesn’t make it the default look on your Linux desktop. These things must be changed manually.
If you’re unsure about how to change your default GTK theme on Linux to LightningBug, we can help! Follow along with one of the guides linked below to learn about changing the default GTK theme on Linux!