Apache is an excellent web server tool that works on Ubuntu. However, it’s not the easiest to set up. Thankfully, if you use Webmin on your Ubuntu Server system, you can set it up real easy right in the Webmin UI.
This guide will show you how you can set up an Apache web server on Ubuntu Server with Webmin. We’ll also show you how you can manage it with the Webmin web UI interface.

Getting Webmin installed on Ubuntu Server
To use the built-in Apache server module in Webmin, you’ll first need to configure the Webmin web UI interface. However, setting up Webmin isn’t very difficult. To install it, launch a terminal window, SSH into the Ubuntu server (or sit at it physically) and access the command line.
Once you’ve got access to the Ubuntu Server command-line, do the following to get the Webmin web UI up and running.
wget http://prdownloads.sourceforge.net/webadmin/webmin_1.981_all.deb
sudo apt install ./webmin_1.981_all.deb
If you need more guidance in setting up Webmin on your Ubuntu Server, please check out our guide on how to set up Webmin on Ubuntu Server.
Setting your root password
If you wish to use the Webmin web UI on your Ubuntu Server, you will have to have access to the root password and the root account. Ubuntu locks off the root password by default for security purposes.
To set the root password, first, log into root using the sudo -s command.
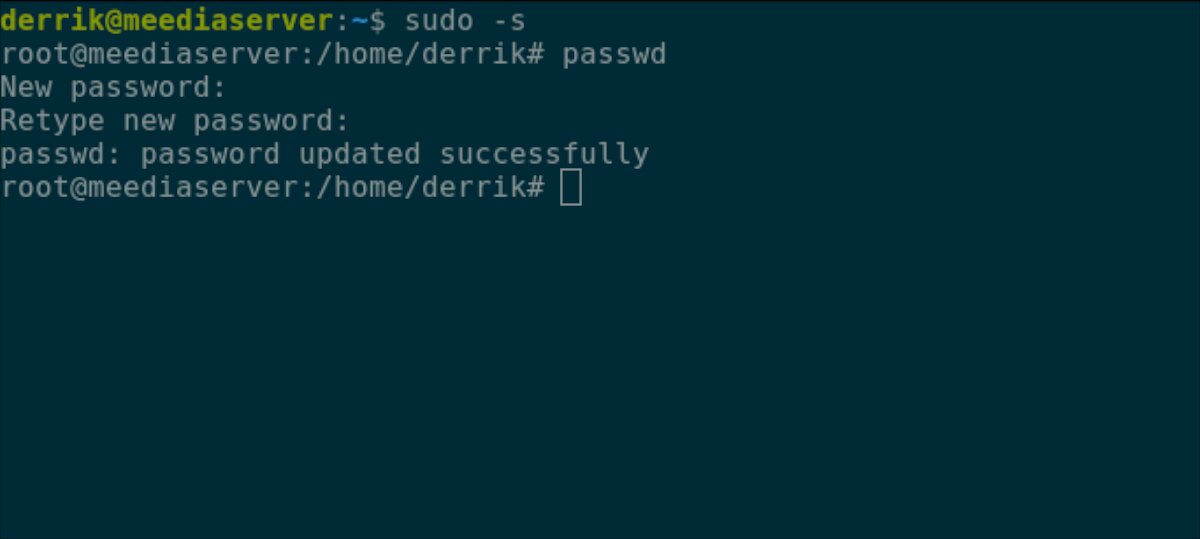
sudo -s
Once you’ve gained root access, the password can be set. Using the passwd command, tell Ubuntu you wish to set the root password. Be sure that the root password is memorable and secure.
Note: if you need help generating a secure password, click here.
passwd
With the root account configured, you’ll be able to log into the Webmin web UI. To access the Webmin web UI on your Ubuntu Server, open up a new browser tab. Then, go to the URL listed below.
http://YOUR_UBUNTU_SERVER_IP_ADDRESS_OR_HOSTNAME:10000
Note that you must put “root” in the username box for the Webmin login and the newly created password in the password box to log in.
Installing Apache web server packages on Ubuntu Server
To set up Apache on Ubuntu Server with Webmin, follow the step-by-step instructions below.
Step 1: Click on the menu on the left-hand side to reveal its options. Then, find the “Webmin” section next to “Dashboard,” find the “Un-used Modules” button, and click on it.
Step 2: Inside of the “Un-used Modules” section, locate the “Apache Webserver” button and select it to access the Apache Webserver module section.
Step 3: In the Webmin Apache Webserver module area, you’ll see a message. This message states, “The Apache server executable /usr/sbin/apache2 does not exist. If you have Apache installed, adjust the module configuration to use the correct path.”
Find the green “Install Now” button to launch the installation process on your Ubuntu Server system.
Step 4: When the green “Install Now” button is selected, it will become a blue “Install Now” button. Select this button to install all packages required to use Apache on Ubuntu Server.
Configuring your Apache web server in Webmin
While the default settings for your Apache web server are adequate, you may wish to change some configuration settings. Here’s how to do that.
Step 1: Find the Webmin sidebar and click on it with the mouse. Then, find the “Servers” section and click on it with the mouse.
Step 2: Inside the “Servers” area, click on the “Apache Webserver” option. This option will take you to the Apache Webserver configuration area.
Step 3: Find the setting you wish to change in your Apache Webserver. Options include “Processes and Limits,” “Networking and Addresses,” “MIME Types,” Miscellaneous,” “Per-Directory Options Files,” etc.
Adding files to your Apache web server
Now that you’ve got your Apache server up and running, it is time to add some HTML files to it. Here’s how to do it with Webmin.
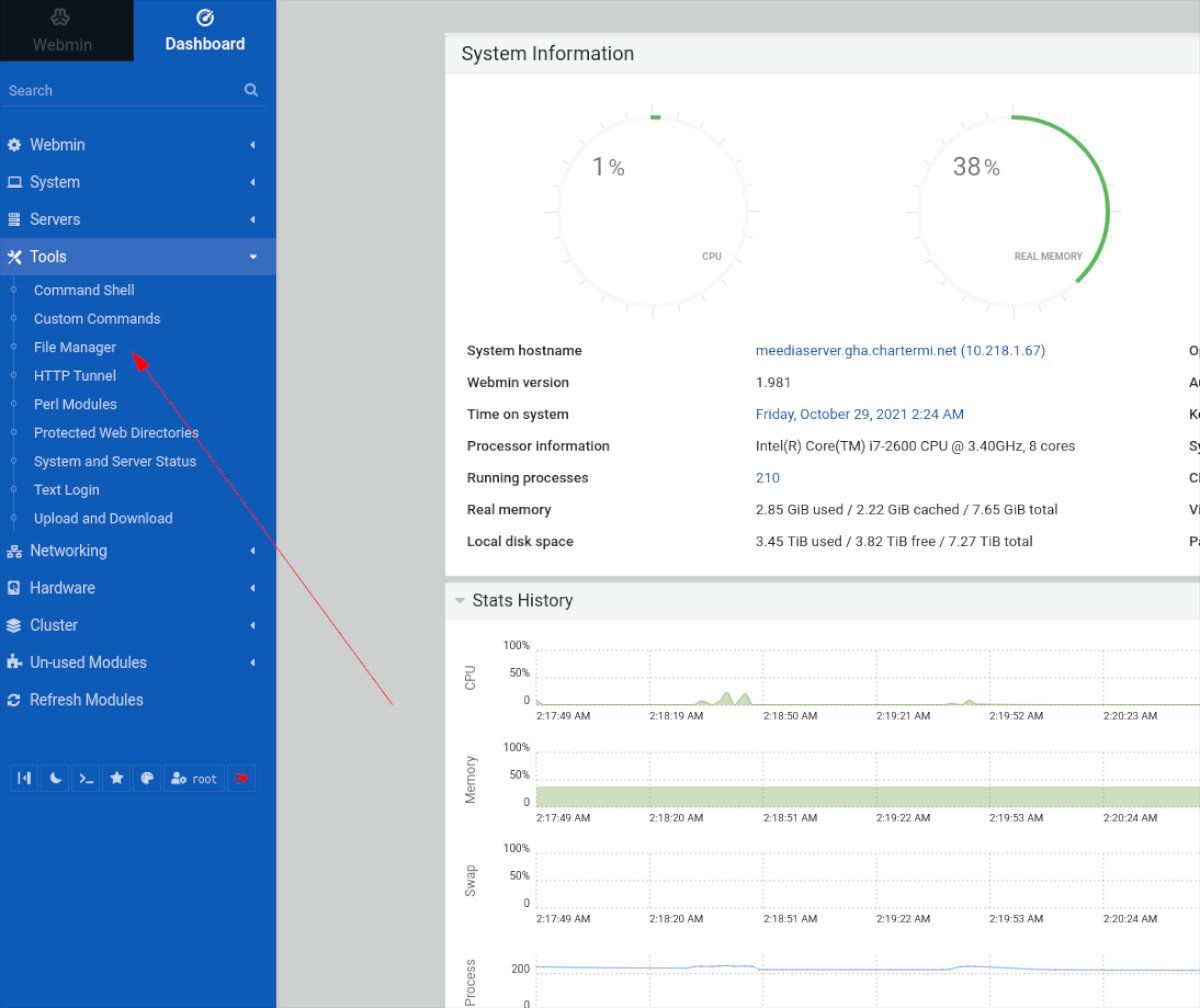
Step 1: Click on the left-hand sidebar in Webmin. Then, choose the “Tools” menu option with the mouse.
Step 2: Inside the “Tools” area, find the “File Manager” option and click on it to open up the Webmin file manager app.
Step 3: Inside the file manager, find “var” and double-click on it to access the /var/ directory. Then, select the “www” folder and double-click on it to access the /var/www/ folder.
Step 4: In the /var/www/ folder, find the “html” folder and double-click on it to access the web directory for your Apache web server.

Step 5: Inside of the Webmin file manager, select the “File” button with the mouse. Then, select the “Drag and drop files here or click to select” text to upload a new HTML document to your Apache server.