Outlook can set up an Out of Office reply that is sent to everyone within date and time range. The Out of Office reply is the same for everyone. You can set up some rules for it but at the end of the day, the same reply is sent to everyone.
If you’d like to send an auto-reply to someone or a group of people, you can create a custom auto-reply instead of tweaking the Out of Office feature.
Check out how you can set an Out of Office message in Microsoft Teams.
Custom auto-reply in Outlook
Before you start, you should know that this solution comes with the following conditions/limitations.
- This can only be set up from the Outlook desktop app.
- You must be using an @outlook or @microsoft account to use the feature.
- The auto-reply can be sent to a single person, multiple people, or an entire group.
- Outlook must be running on your desktop to send the reply.
Create reply template
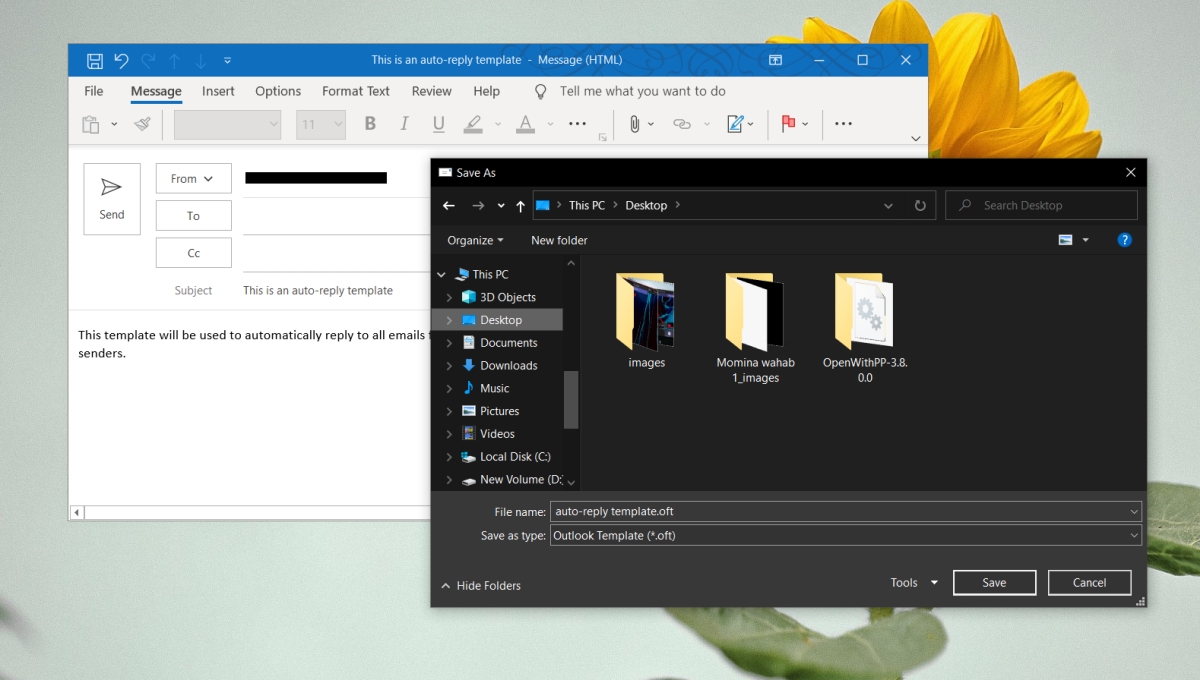
The first step to creating a custom auto-reply is to create a template message. This template will be the reply that will be sent.
- Open Outlook.
- Compose a new message.
- Enter a subject and a body. Skip adding a recipient.
- Go to File>Save as.
- Open the Save as type dropdown and select the Outlook Template .oft format.
- Enter a name for the template and save it.
Set up auto-reply
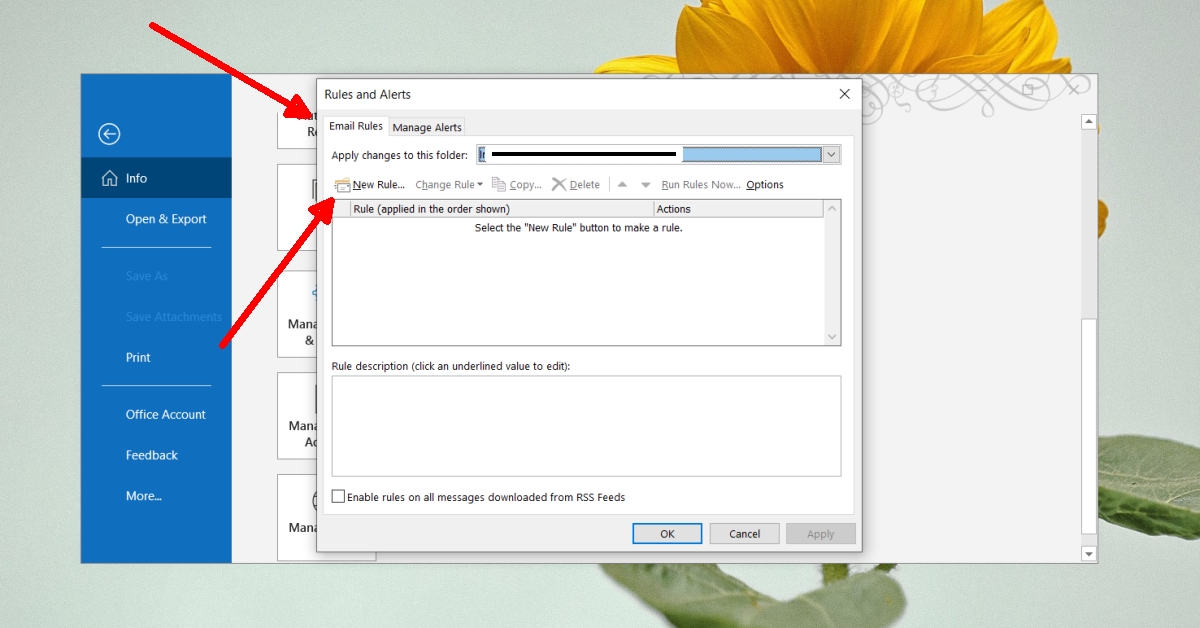
Now that the template is ready, we can create the rules that will send it.
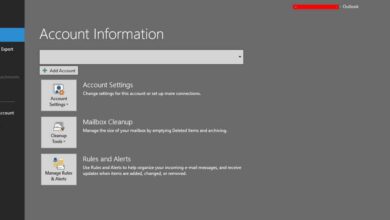
- Open Outlook.
- Go to File.
- Click Manage Rules & Alerts.
- In the new window that opens, click New Rule.
- In the Rules Wizard window, click the Apply rule on message | Recieve option at the bottom.
- Under Step 1: Select Condition, select From people or public group.
- In the section at the bottom, click the linked people or public group.
- Enter the email or emails you want to set up an auto-reply to.
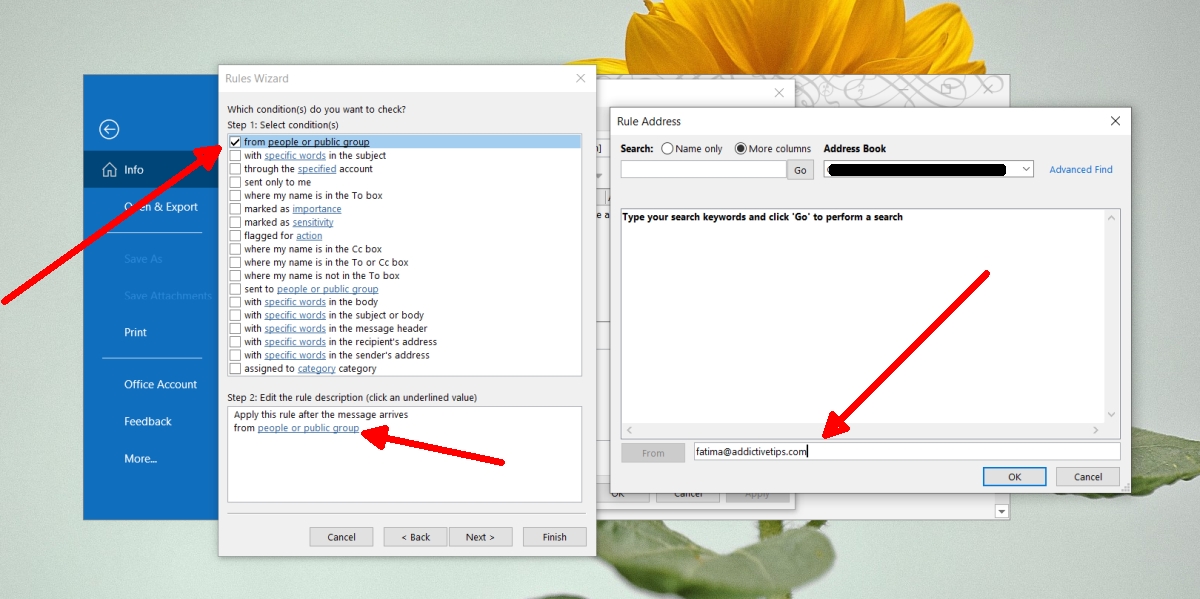
- Click OK, and then click Next.
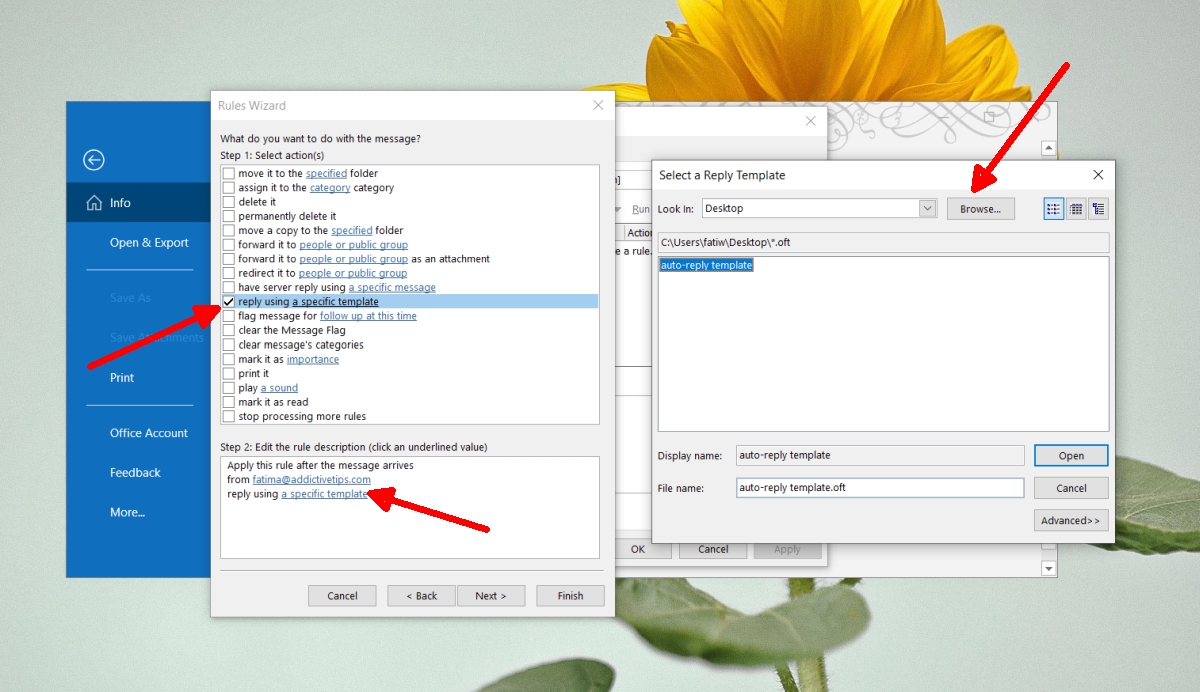
- On the What do you want to do with the message screen, select Reply using a specific template.
- In the panel at the bottom, click a specific template.
- On the new window, click Browse and select the folder you saved the template to.
- Select the template from the panel at the bottom.
- Click OK, and then click Finish.
- You will see a prompt telling you to keep Outlook open for the auto-reply to be sent. Click OK and you’re done.
Conclusion
Outlook supports lots of different rules for automation. You can choose to mark a message as read, archive it, etc., all from the rules. Go over them and customize your auto-reply further.