Xubuntu is an excellent desktop operating system, but did you know you can also use it on the Raspberry Pi 4? That’s right, thanks to Ubuntu for Raspberry Pi, it is possible to run your favorite Linux desktop distribution on the Pi 4. Here’s how to set it up.

Installing the Raspberry Pi Imager on Linux
To use Xubuntu on Raspberry Pi 4, you’ll have to install the Raspberry Pi Imager tool. This program is by far the easiest way to get Xubuntu set up on an SD card.
There are many ways to install the Pi Imager tool; however, we’ll focus on the Snap package and Flatpak releases in this guide, as they are compatible with most Linux operating systems.
Note: if you are setting up Ubuntu on your SD card from a Windows or Mac OS system rather than Linux, you’re in luck. The Raspberry Pi Imager is also available for other operating systems here.
Snap package
To get the Snap package version of the Raspberry Pi imager up and running on your system, you’ll need first to have the Snap package runtime configured on your system.
You can configure the Snap runtime on Linux by following this guide on the subject. Once it is set up, the installation of the Raspberry Pi Imager can be done with a simple snap install command down below.
sudo snap install rpi-imager
Flatpak
Raspberry Pi Imager is also available on the Flathub app store as a Flatpak, if you prefer Flatpak. To start the installation of Raspberry Pi Imager as a Flatpak, set up the Flatpak runtime on your computer.
You can set up the Flatpak runtime on your computer by following our guide on the subject. When Flatpak is configured and set up, the installation of Raspberry Pi Imager can be done with the two commands below in a terminal window.
flatpak remote-add --if-not-exists flathub https://flathub.org/repo/flathub.flatpakrepo
flatpak install flathub org.raspberrypi.rpi-imager
Flashing Ubuntu to an SD Card
Xubuntu can be used on a Raspberry Pi; however, Canonical only makes an Ubuntu release for the Pi 4. So, you’ll have to flash standard Ubuntu and install it on the Pi and set up Xubuntu later.
To flash Ubuntu to an SD card, insert your SD card or USB SD card reader into the computer. Then, launch Raspberry Pi Imager on the Linux desktop and follow the step-by-step instructions below.
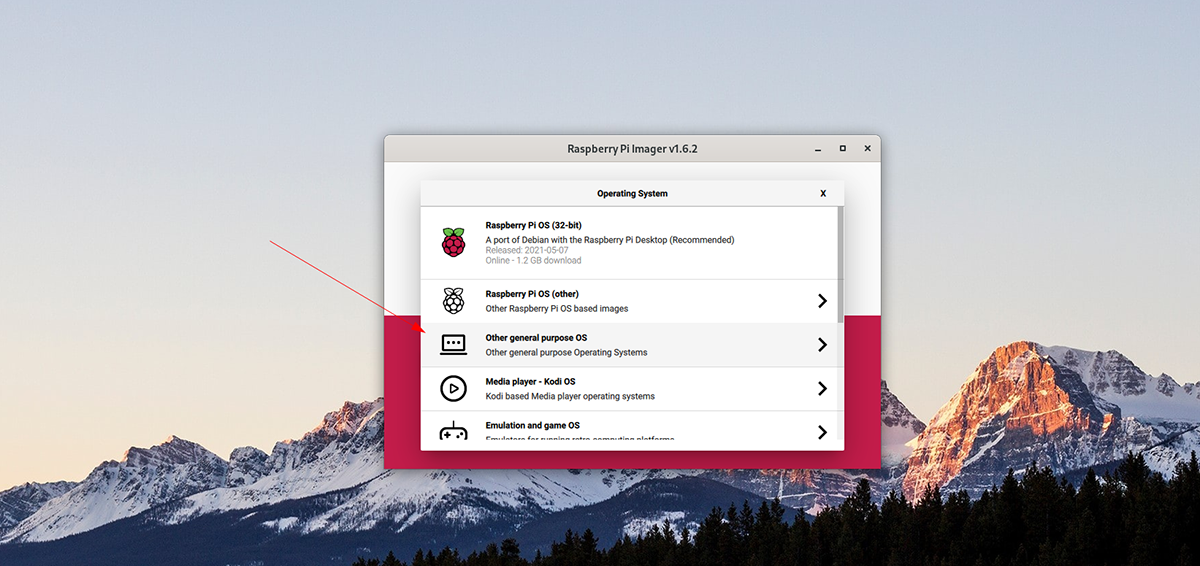
Step 1: Find the “Choose OS” button in the imager, and select it with the mouse. After choosing this button, find the “Other general purpose OS” button, and select it with the mouse to access other OSes.
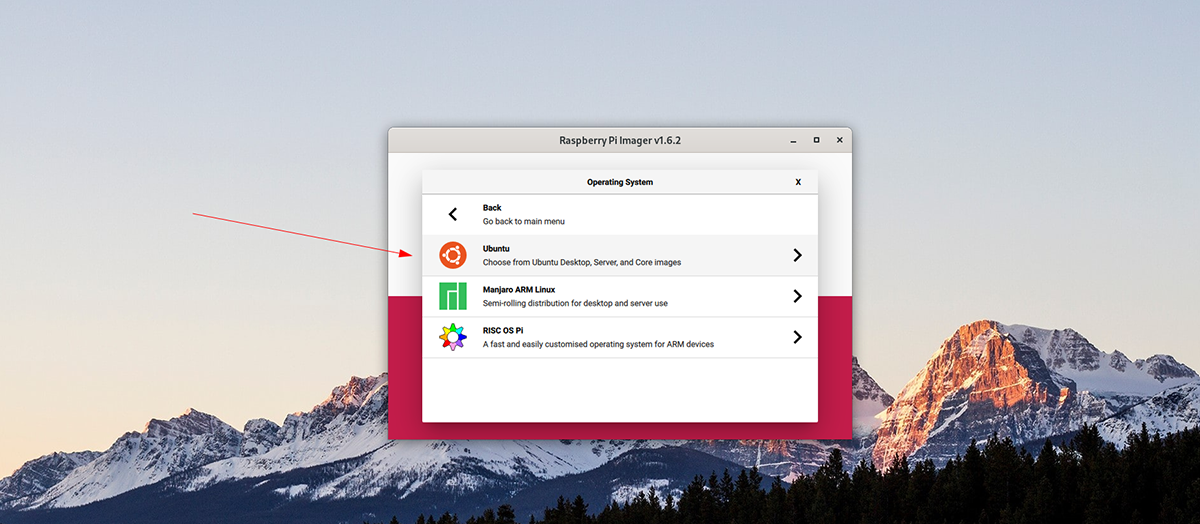
Step 2: Look through the list of operating systems and select the “Ubuntu” option to access all of the Ubuntu choices that Raspberry Pi Imager has to offer. Then, choose “Ubuntu desktop 21.04 (RPi 4/400)”.
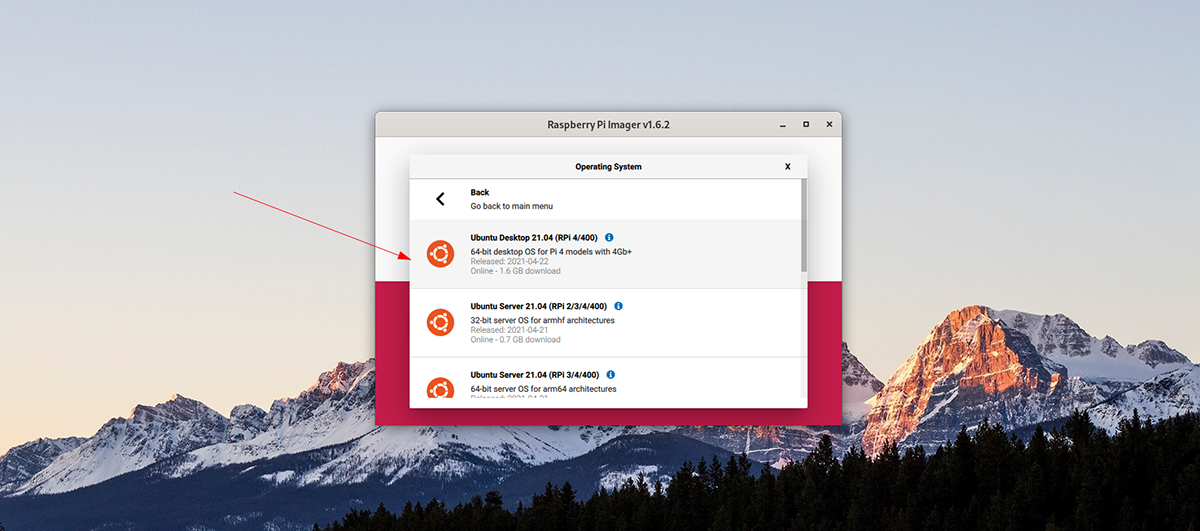
Step 3: After selecting Ubuntu as the OS to flash, you’ll need to choose a place to flash the OS. Click on “Choose Storage” and select your SD card to use with the Raspberry Pi imager.
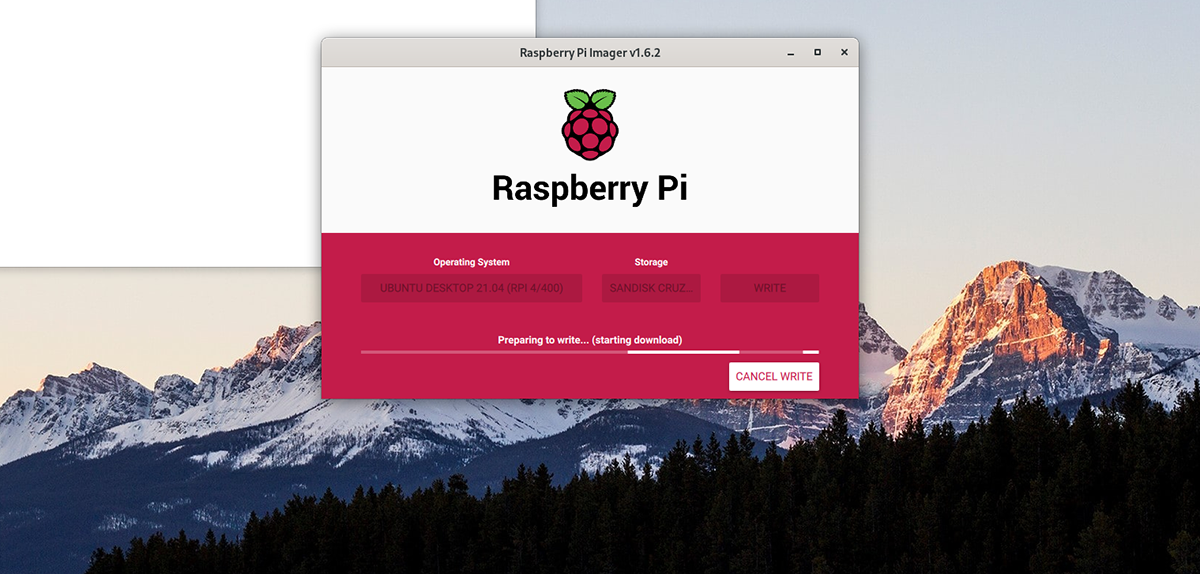
Step 4: Now that your storage choice is selected, find the “Write” button in the Raspberry Pi Imager and click on it. When you choose this option, it will flash Ubuntu to your SD card.
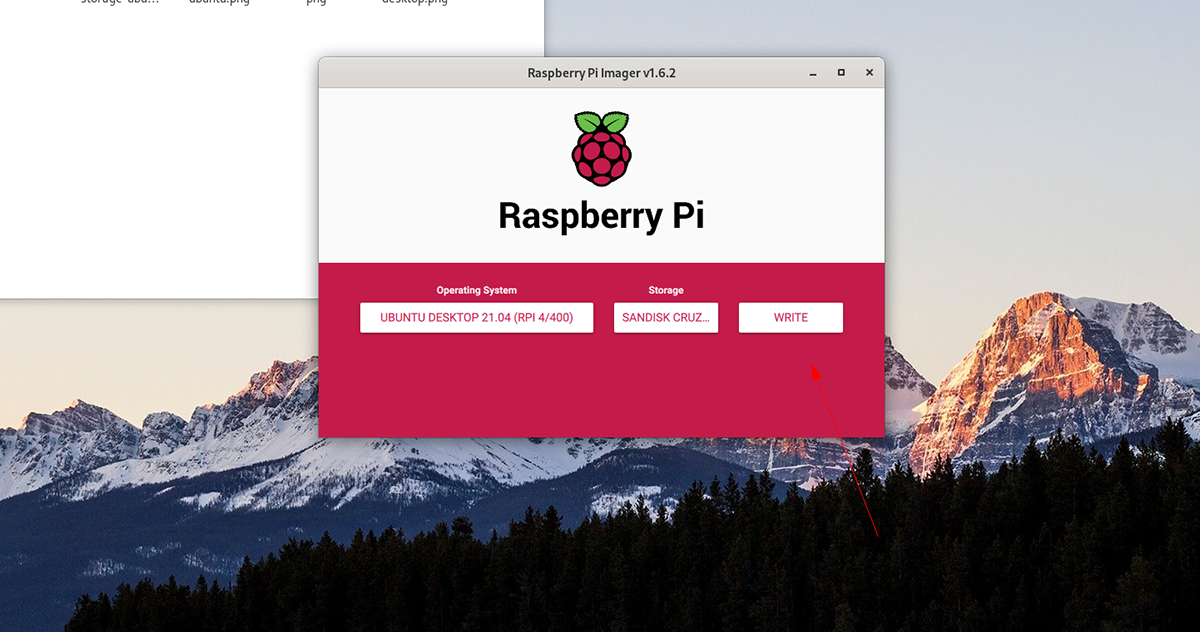
Step 5: Unplug your SD card and close the Raspberry Pi Imager when the flashing process is complete. Then, plug in the SD card into the Pi 4, and go through the process of setting up Ubuntu by following the prompts on the screen.
Setting up Xubuntu

With the Ubuntu operating system installed and booted up on your Raspberry Pi 4, you’ll be able to set up Xubuntu. To do that, launch a terminal window on the Ubuntu desktop. Press Ctrl + Alt + T on the keyboard or search for “Terminal” in the app menu to launch it.
With the terminal window open, use the apt install command to set up the “xubuntu-desktop” package. This package contains everything you need to use the Xubuntu desktop environment on your Raspberry Pi 4.
sudo apt install xubuntu-desktop
Following the command above, Ubuntu will ask you for a password. Then, using the keyboard, type in your user account’s password. Then, press the Enter key to continue.
After entering your password, Ubuntu will collect all of the packages for the Xubuntu desktop. There are a lot of packages, so it may take a bit. Ubuntu will ask you to press the Y key on the keyboard when everything is ready to install.
By pressing the Y key, you’ll be able to start the installation of the packages. Keep in mind, as there are many packages to install for the desktop, it may take a few minutes.
When the installation process is complete, log out of the Ubuntu desktop and select the Xubuntu or XFCE session. Then, log back in to use Xubuntu on your Raspberry Pi 4. Enjoy!

