Are you using Windows 11 on your desktop or laptop? Wish you could install Ubuntu alongside it? If so, this guide is for you! Follow along as we go over how to dual-boot Ubuntu and Windows 11.
Note: you must have a computer that meets the system requirements of both Windows 11 and Ubuntu Linux to dual-boot them. For best results, check the system info pages on Microsoft.com and Ubuntu.com.
Downloading the latest Ubuntu
If you plan to dual-boot Ubuntu with your current Windows 11 installation, you’ll need to get your hands on the latest Ubuntu ISO. Here’s how you can download it to your computer.
First, head over to Ubuntu.com/desktop. Once on the desktop, locate the green “Download Ubuntu” button, and select it with the mouse. After that, download either Ubuntu 20.04.3 LTS or the latest release of Ubuntu.
After downloading the latest Ubuntu ISO file to your computer, you’ll be able to move on to the next step of the process.
Creating a bootable Ubuntu USB
In order to dual-boot Ubuntu with Windows 11, the ISO you’ve downloaded must be flashed to a USB drive. There are many ways to do this on Windows 11, but by far, the best way to go about it is Etcher.
Why Etcher? First, it is cross-platform and works on Windows, Mac OS, and Linux. Secondly, it is an easy-to-use program, and it will help you get Ubuntu set up on a USB quickly.
To start, download the latest Etcher application to your computer. Then, install it and open it up. Once open, plug in your USB flash drive and follow the step-by-step instructions below.

Step 1: Find the “Flash from file” button with the mouse. Then, browse for the Ubuntu ISO file on your computer.
Step 2: Find the “select target” button inside Etcher and click on it with the mouse. Then, choose your USB flash drive as the target for Etcher to use.
Step 3: Find the “Flash!” button, and click on it with the mouse. When you select this button, Etcher will begin copying the Ubuntu ISO file to your USB drive. Be patient.
When the process is complete, reboot your Windows 11 system. Then, load up your computer’s BIOS and select the Ubuntu USB to boot from.
Setting up the Ubuntu/Windows 11 dual-boot
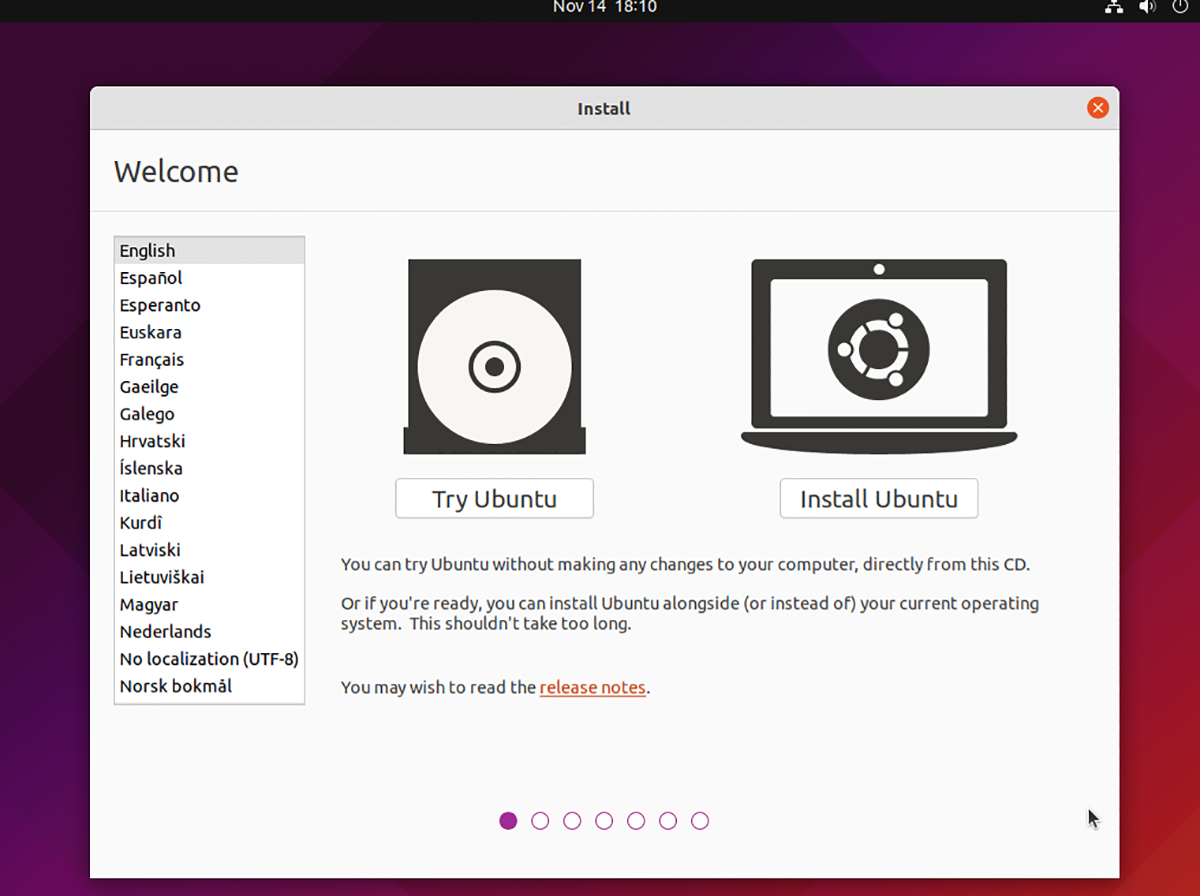
Now that Ubuntu is installed on a USB flash drive, you’re ready to set it up alongside Windows 11. To start, select the “Install Ubuntu” button inside of the Ubuntu installer. Then, follow the step-by-step instructions below.
Step 1: Inside of the Ubuntu installer, select your keyboard layout (if the installer hasn’t autodetected yours already.) Click on the button at the bottom when done to continue.
Step 2: After selecting a layout, Ubuntu will present you with the “Updates and other software” page. Select “Normal” installation and “Install third-party software graphics and Wi-Fi hardware and additional media formats.”
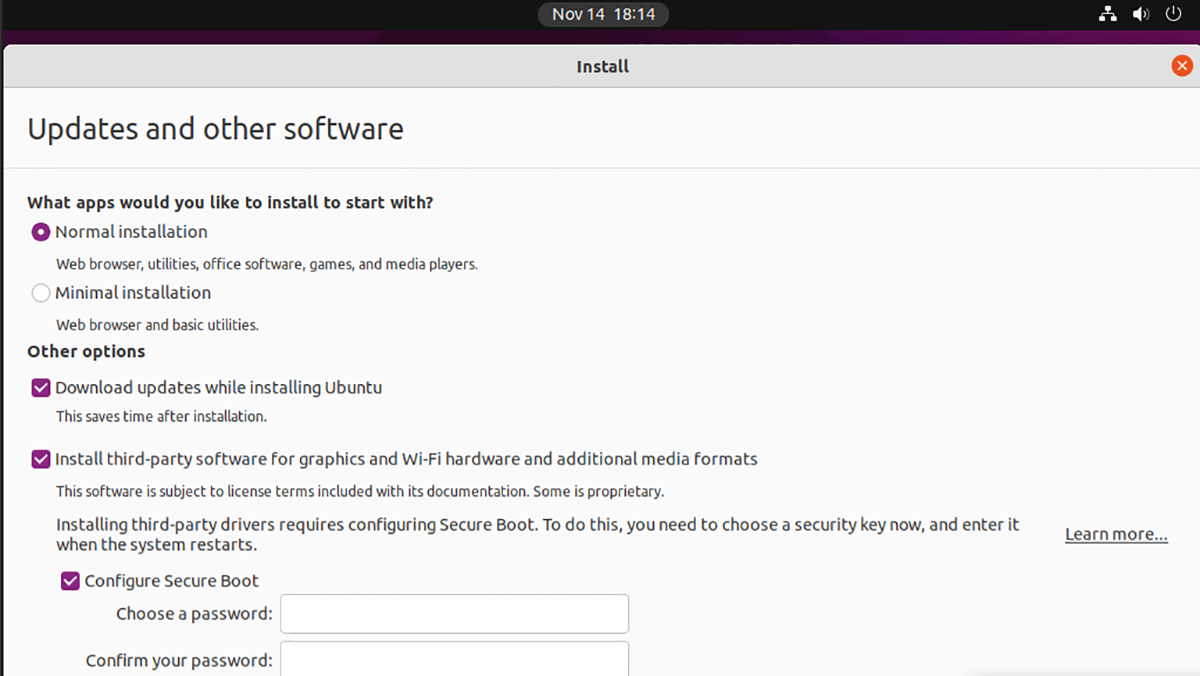
After selecting these two boxes, check the “Configure Secure Boot” button. Then, enter your secure-boot password for Ubuntu. Click “Continue” when done to move on to the next step of the process.
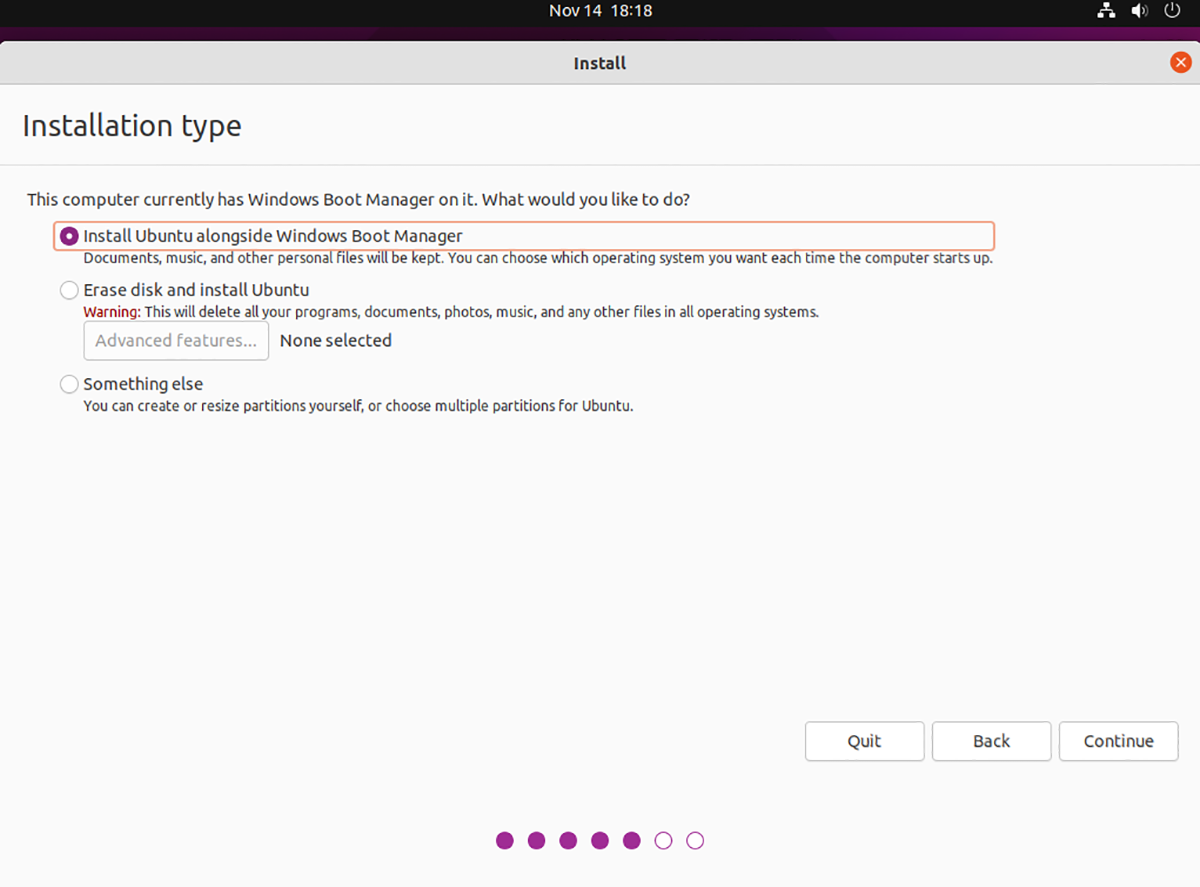
Step 3: On the “Installation type” page, Ubuntu will show you that your computer already has “Windows Boot Manager” on it (AKA Windows 11.) Select the “Install Ubuntu alongside Windows Boot Manager” to set up a dual-boot.
Note: Ubuntu may not detect Windows 11 in the installer if Windows 11 was not powered down safely. Boot back into Windows 11, then safely shut down before attempting to load the Ubuntu USB installer.
Step 4: Upon selecting your installation type, Ubuntu will ask you to choose how the hard drive should be split. Using the slider, determine how large you want Ubuntu and Windows 10 to be on the drive.
Select the “Install Now” button to continue.
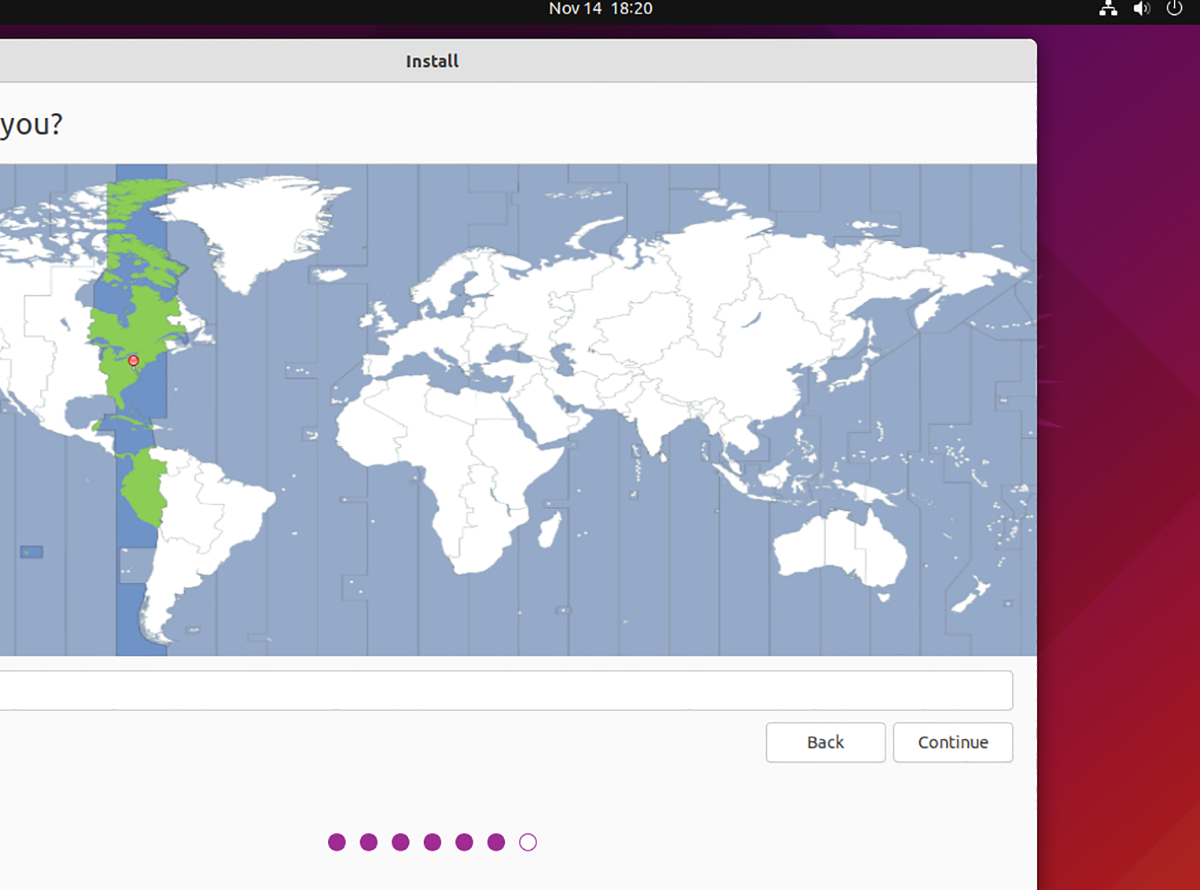
Step 5: After setting up the dual-boot, you must choose your time zone. Find where you live on the global map, and click with the mouse. When you’ve set your timezone, click on the “Continue” button move on.
Step 6: With the time zone set in Ubuntu, it is time to set up your username, hostname, and password. Using the keyboard, set up your username, set a password, and set your computer’s name.
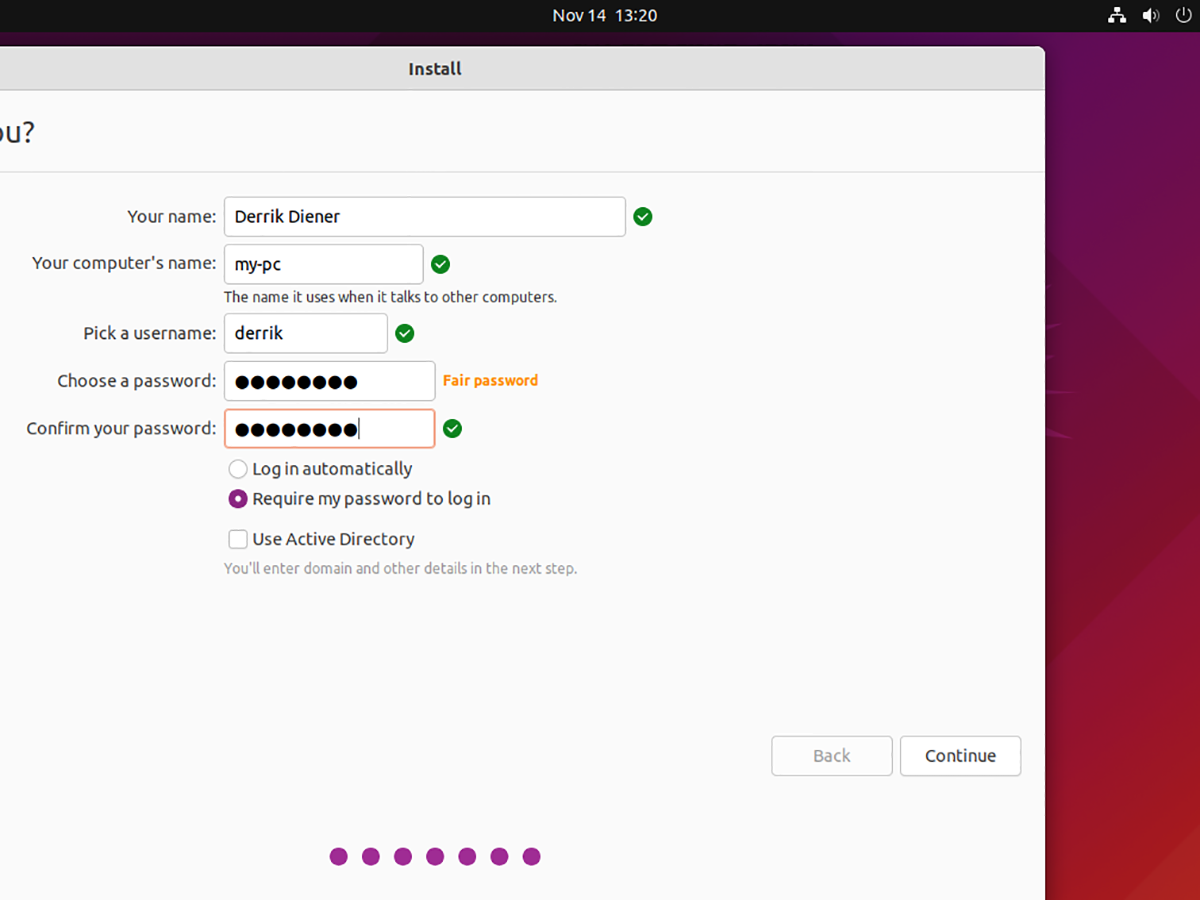
Click on the “Log in automatically” button if you wish for Ubuntu to start up automatically without needing a password.
Step 7: When you’ve set a password, your work is done. From here, sit back and allow Ubuntu to install onto your computer. This process takes about 20 minutes (or longer depending on disk speed).
When the installation is complete, reboot your PC and unplug the USB flash drive. Ubuntu is now installed alongside Windows 11.
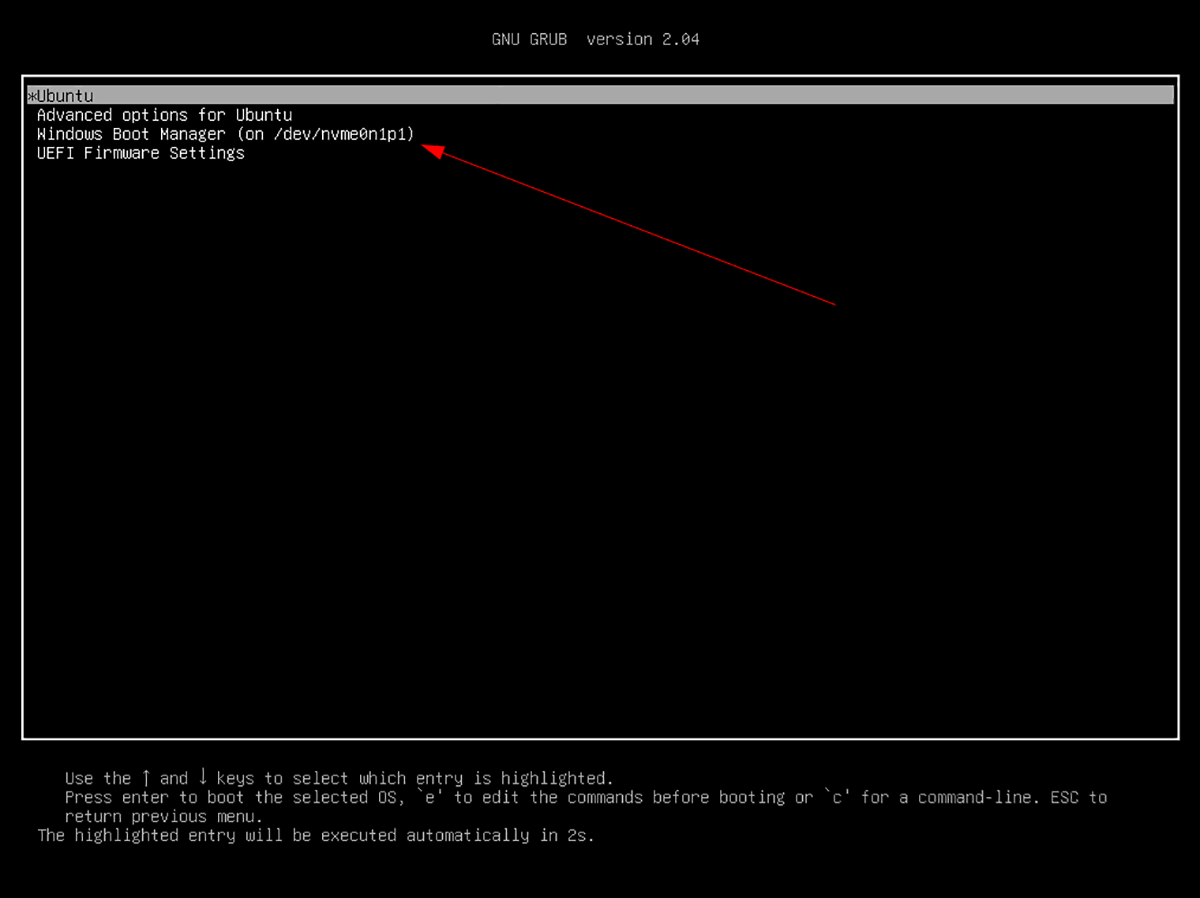
Enroll Ubuntu in BIOS
As you are dual-booting Windows 11 with Ubuntu, your system has a secure-boot setup. You must enroll your Ubuntu installation into the secure boot if your computer doesn’t automatically prompt you.
For more information on how to enroll Ubuntu into your BIOS, please check your computer manual.