Do you have Windows 11 installed on your PC but also want to dual-boot Arch Linux? This guide will show you how you can run Arch Linux alongside Windows 11.
This guide assumes you’ve already installed Windows 11 on your computer’s hard drive. Consider installing Windows 11 on one hard drive and dedicating a second hard drive for Arch Linux for best results.
Before we begin
In this guide, we will be using the Calam Arch Linux installer to dual-boot Arch Linux with Windows 11. The Calam Arch Linux installer uses an easy-to-use GUI to set up vanilla Arch Linux.
We are using Calam Arch Linux as opposed to the traditional Arch Linux installer because it configures partitioning and UEFI automatically. However, if you would prefer to set up Arch Linux by hand, please follow our guide to installing Arch Linux.
Downloading Calam Arch Linux installer and Etcher
The Calam Arch Linux installer is distributed via an ISO file. To get your hands on it, head over to the project’s SourceForge page. Once on the page, find “Calam-Arch-Installer-2021-12.iso” and download it.
Note: if there is a newer release of the Calam Arch ISO file, download that version instead of the one listed in this guide.
After downloading the Calam Arch Linux ISO file to your computer, you will need to download the latest release of Etcher to the computer. Head over to the official Etcher website to get the newest Etcher app.
Once on the website, download the latest release of Etcher to your computer, install it and start it up.
Creating Calam Arch Linux USB

To create the Calam Linux USB, follow the step-by-step instructions below.
Step 1: Locate the “Flash from file” button inside of the Etcher application and click on it with the mouse. After you select this button, a pop-up window will appear. Using this pop-up window, browse the Calam Arch Linux ISO file and click on it to add it to the app.
Step 2: After adding the Calam Arch Linux ISO to Etcher, plug a USB flash drive into your computer. Then, find the “Select target” button. Upon clicking on “Select target,” select your USB flash drive in the menu.
Step 3: Find the “Flash!” button and click on it to start the USB creation process. Keep in mind that this process will take time to complete. When the creation process is finished, close Etcher.
Step 4: After closing the Etcher application, reboot your computer. Then, log into your PC’s BIOS. Look through the BIOS and configure it to boot from USB so that you can access the Calam Arch Linux installer.
Installing Arch Linux alongside Windows 11
To install Arch Linux alongside Windows 11, start by booting up the USB installer from BIOS. Once it is booted, you should see a desktop with blue wallpaper. Next, locate the black Arch Linux logo and click on it to launch the installer on the desktop. Then, follow the step-by-step instructions below.
Step 1: On the “Welcome to the Arch Linux Rolling installer” page, click on the “Next” button with the mouse.
Step 2: Using the UI, select your timezone. You can choose your timezone by choosing where you live on the map. Click “Next” when done.
Step 3: Choose your keyboard layout in the installer. Then, select the “Next” button to move to the next page.
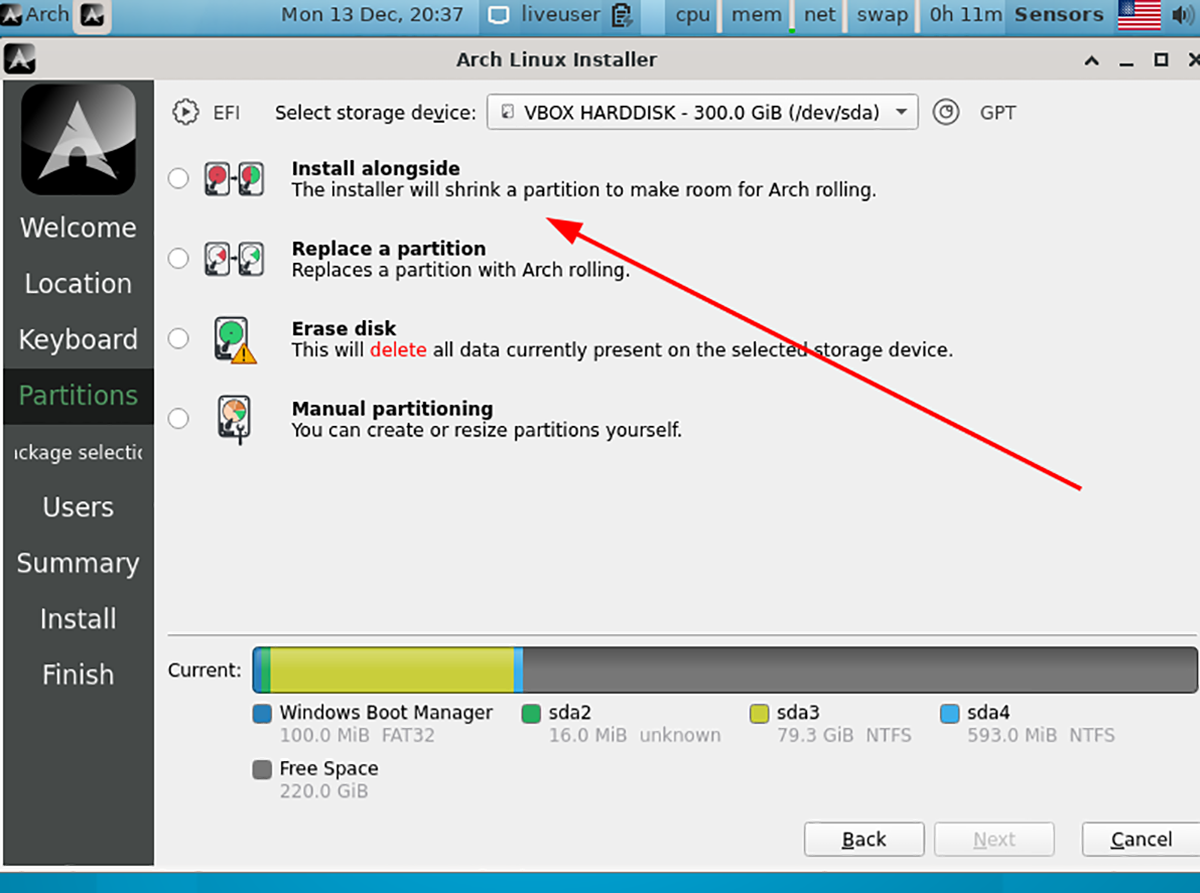
Step 4: Find the “Install alongside” option in the Arch Linux Installer and click on it with the mouse if you are installing Arch Linux with Windows 11 on the same hard drive.
Note: If you have one hard drive dedicated to Windows 11 and one hard drive dedicated to Arch Linux, do “Select storage device,” choose the Arch drive, and select “Erase disk” instead.
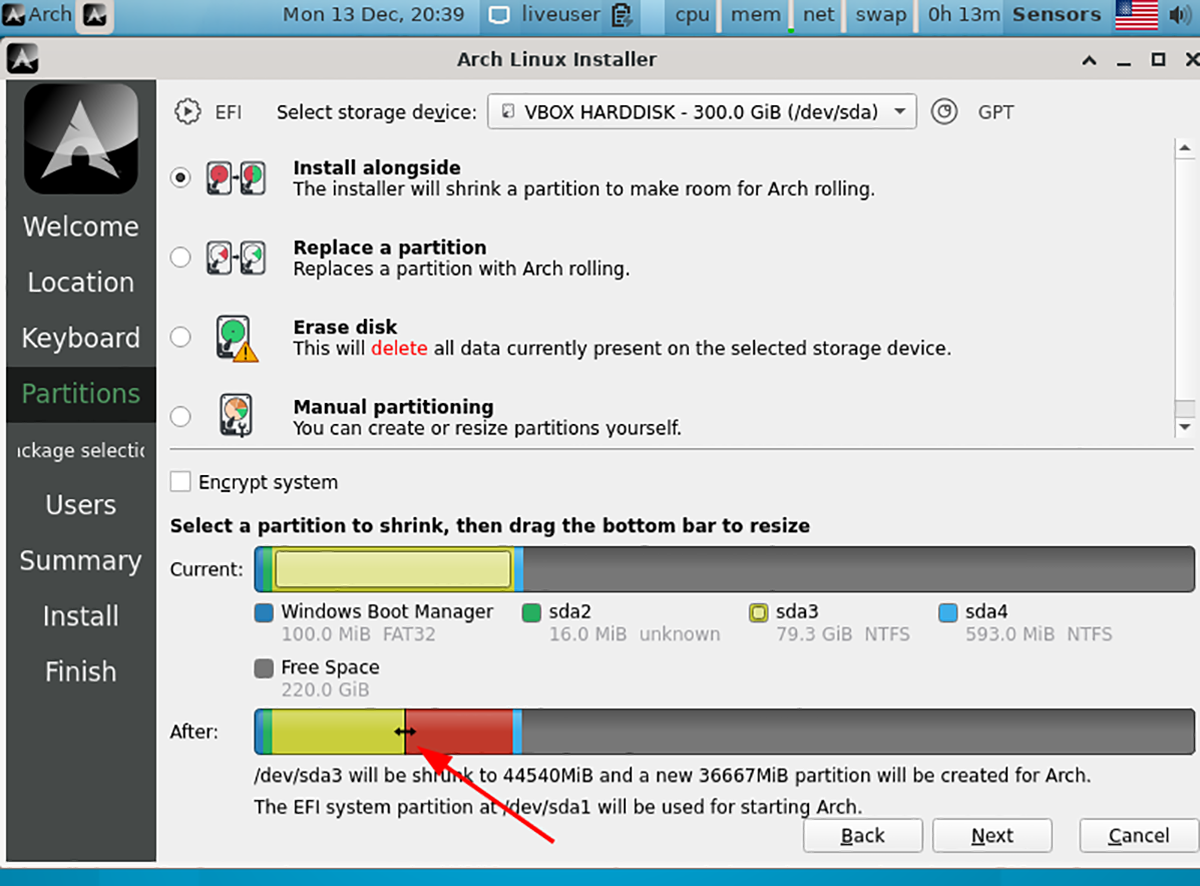
Step 5: After selecting “Install alongside,” use the UI in the “After” area to make your Arch Linux partition bigger or smaller. When done, click “Next.”
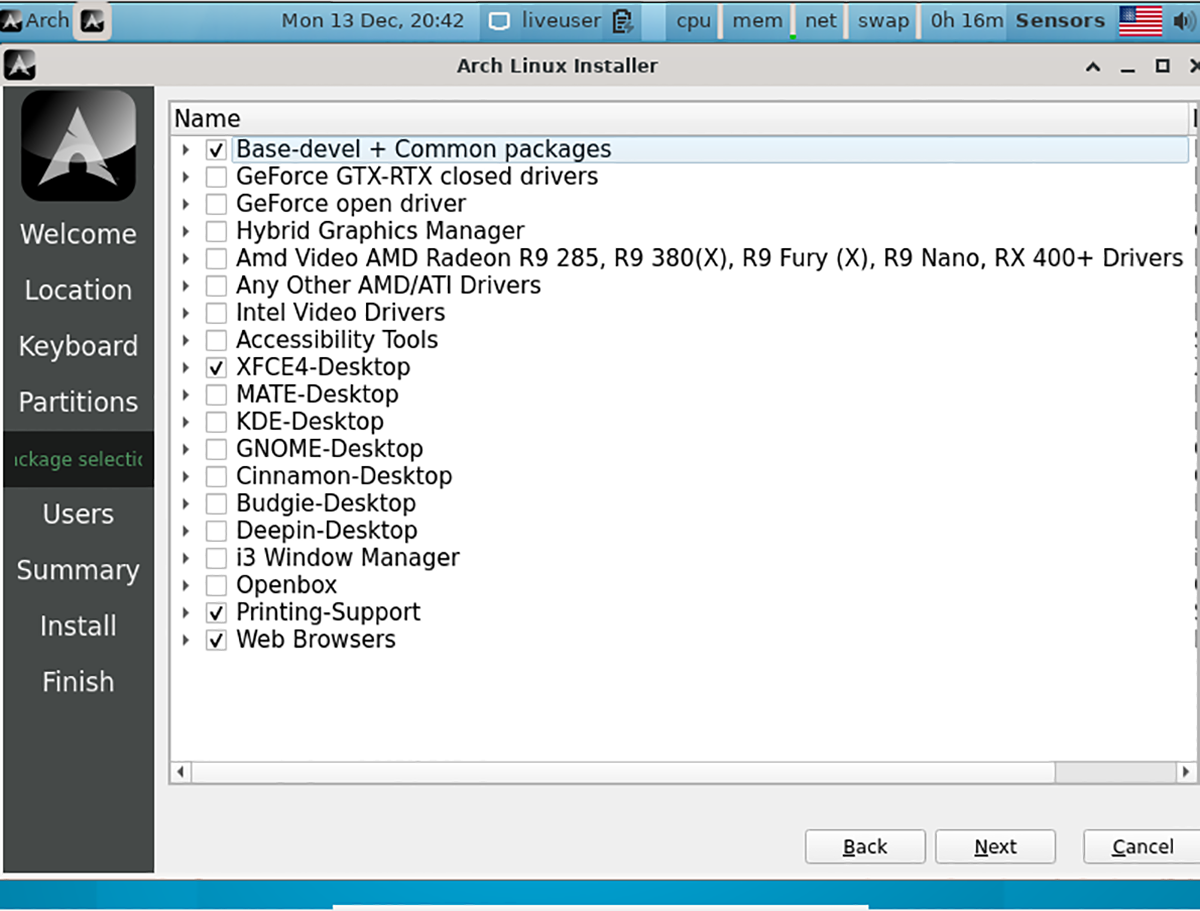
Step 6: On the page after “Install alongside,” you’ll be at the package selection screen. Select your desktop environment, drivers, printing support, preferred web browser, and anything else you need.
When you’ve made your package selections, click on the “Next” button to move to the next page in the installer.
Step 7: Using the installer UI, enter your full name, login username, computer name, password, etc. When you’ve finished entering all of the information, click on the “Next” button to continue.
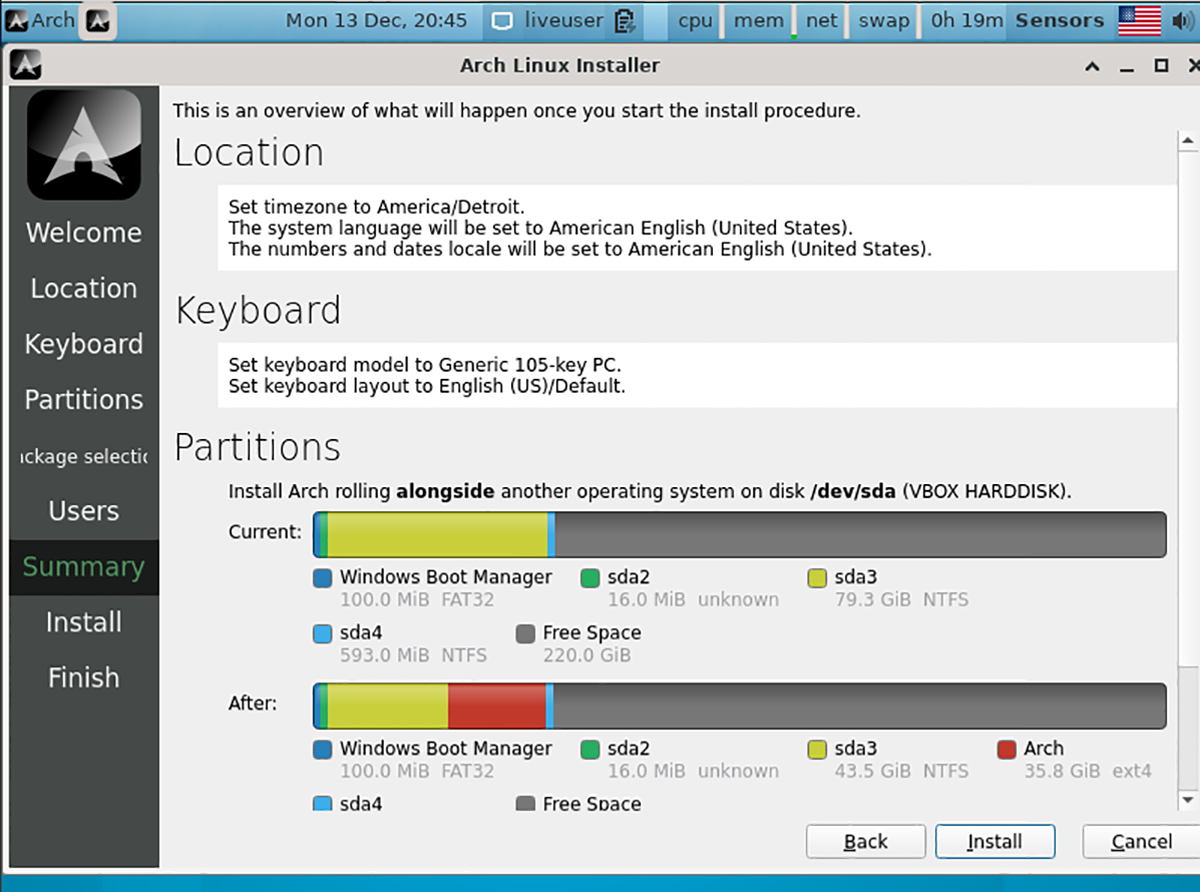
On the next page, you’ll see an overview of the installation. Next, find the “Install” button to start the installation process.
Step 8: When the installation is complete, reboot your Arch Linux system by selecting it in the GRUB boot menu. Launch a terminal window on the desktop once you’ve loaded up Arch Linux.
Inside of the terminal window, open up the /etc/default/grub text file in the Nano text editor.
Note: if you do not have Nano installed, install it with sudo pacman -S nano.
sudo nano -w /etc/default/grub
Step 9: Create a new, blank line in the /etc/default/grub file and add the following code.
GRUB_DISABLE_OS_PROBER=false
Step 10: Save the edits to the file in Nano by pressing the Ctrl + O buttons on the keyboard. Then, close the text editor by pressing Ctrl + X.
Step 11: Using the pacman command, install the OS Prober package. If you are using UEFI, you’ll also need to install EFI Boot Manager.
sudo pacman -S efibootmgr os-prober
Step 12: Using the command below, re-generate your Grub configuration. This will automatically add Windows 11 to your Grub boot menu so that you can select either Windows 11 or Arch Linux.
sudo grub-mkconfig -o /boot/grub/grub.cfg