MS Word has long had a really useful feature that allows users to manage large documents and their subsections that they’re collaborating on by separating sections into different files. The subsections or subdocuments as they are called make it easy to update and export parts of a large document. The feature isn’t just great for large documents but also for smaller ones that have many seemingly independent sections. You can make a Master Document in MS Word 2016 any time i.e. it’s not something that must be set when you first create a document. You will identify a document as the Master Document and then proceed to identifying the subdocuments in it. Subdocuments can be split or merged with other subdocuments and we will take a look at how to do that. You can also add a different document as a subdocument to an existing master document and we’ll be touching on that as well. Here’s a walk-through to making a Master Document and adding subdocuments to it in MS Word 2016.
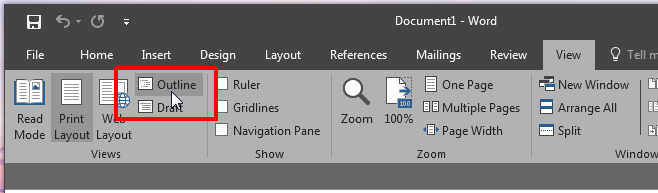
To create a Master Document, open a new or existing MS Word file. Go to the View tab and click Outline. If you’re working with an existing document, all text and heading styles you’ve applied to your document will appear in the Outline view. Headings identify sections of the document that can be turned into subdocuments. If you have a section that you want to turn into a subdocument, go to the Home tab, give it a name, and apply a heading style to it. You can add new headings any time you want.
In Outline view, you will have a toolbox called ‘Master Document’. Once you’re in the Outline view, go to the Master Document toolbox and click ‘Show Document’.

The toolbox will expand and reveal more buttons. Your document is now a Master Document and you can start adding subdocuments. All headings and text will be duly shown here. Select a heading by clicking the minus button (expanded heading) or plus button (collapsed heading) next to it. With the heading selected, click the ‘Create’ button.

The heading and everything under it will now be treated as a subdocument and an outline will appear around it to signify just that. You can alternatively use the ‘insert’ button to add a different Word file as a subdocument to your master document. Go ahead and create at least two sub-documents.
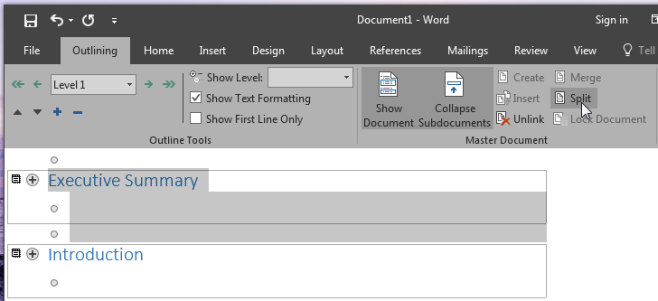
To split a subdocument, select it and, click the ‘Split’ button on the Master Document toolbox. Splitting a document will export that section of the document as a separate Word file and save it to the same folder/location as the master document itself. It will be named after the heading it was given in the master document.
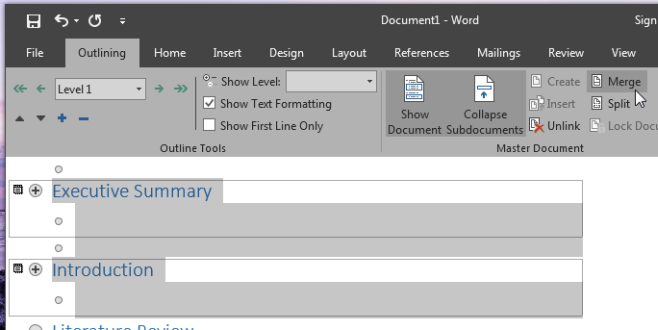
To merge two subdocuments, select them (hold down Shift key to select multiple documents) and click the Merge button.
That’s all it takes. You can return to the Print Layout view and resume writing. Return to the Outline view whenever you need to add another subdocument or export one. This feature is available in both MS Word 2007 and 2010.