We shared a tip a while back on how selecting a collapsed heading in MS Word selects everything; images, tables, sub-headings, under it, making it easy to cut, copy, and paste quickly. If you’re looking to copy a section from one document to another, this is possibly one of the easiest ways to do it. If however you have a large document that you need to reorder headings in you might want to do it in Outline view. MS Word’s Outline view has a tool that lets you select headings and move them up/down in the document.
Open the MS Word document you want to reorder headings in. Go to the View tab and select Outline. In Outline mode, select a heading by clicking the minus sign next to it. The minus sign indicates an expanded heading. With the heading selected, click the minus sign to collapse it. Collapse all headings.
When a heading is collapsed, the minus sign next to it changes to a plus sign as shown in the screenshot below. Select the collapsed heading and click the upward facing arrow on the Outline Tools set to move the heading up. Click the downward facing arrow to move the heading below the one that follows it.
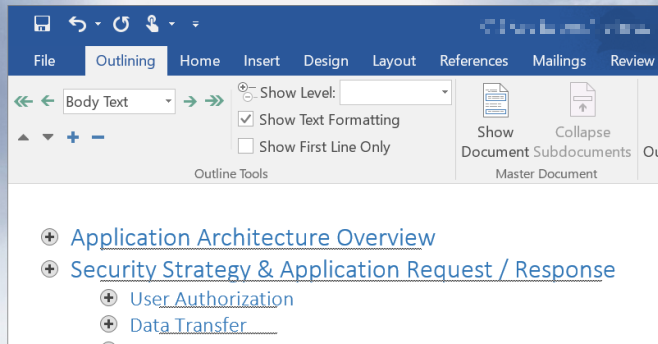
In the above screenshot, selecting the heading ‘Application Architecture Overview’ and clicking the downward facing arrow button will make it the second heading in the document and automatically promote the heading ‘Security Strategy & Application Request/Response’ to the first heading.
This doesn’t change the heading style applied to a heading i.e., a heading with the style Heading 1 applied to it will remain unchanged. It’s position in the document is the only thing that will be effected.