The iPhone X has been criticized for its poor design. The notch at the top is what’s earned this otherwise excellent phone such a poor reputation in terms of design. Users who find it especially annoying can hide the iPhone X notch with a clever wallpaper trick. Custom Notch is an iOS app that takes this same concept a little further. Instead of hiding the notch with a wallpaper trick, this app lets you customize the notch on iPhone X. It has 64 different notch styles and they look pretty good. The app costs $0.99 but is free for one day (today).
Download Custom Notch. The app doesn’t just work on iPhone X but on all iPhone models running iOS 11. You can use the app to fake a notch on your iPhone if you like it but you might not be able to use all the notch styles because the app icons and folders are aligned to the top on other iPhone models.
Note: the app was tested on an iPhone 6 and this post features screenshots that reflect the same.
Open the app and tap the plus button. Select the image you want to set as your wallpaper.
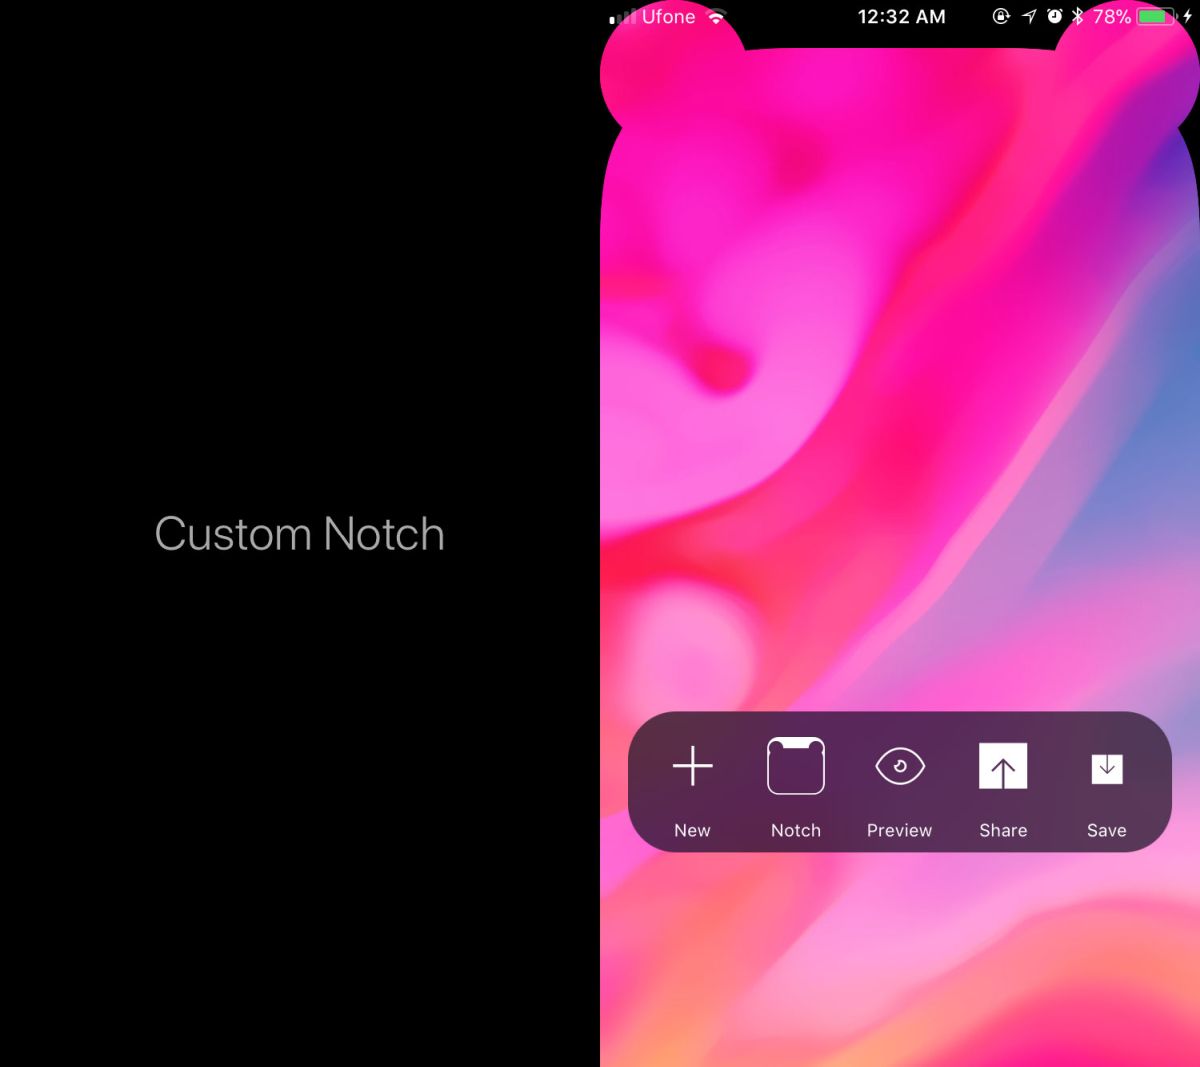
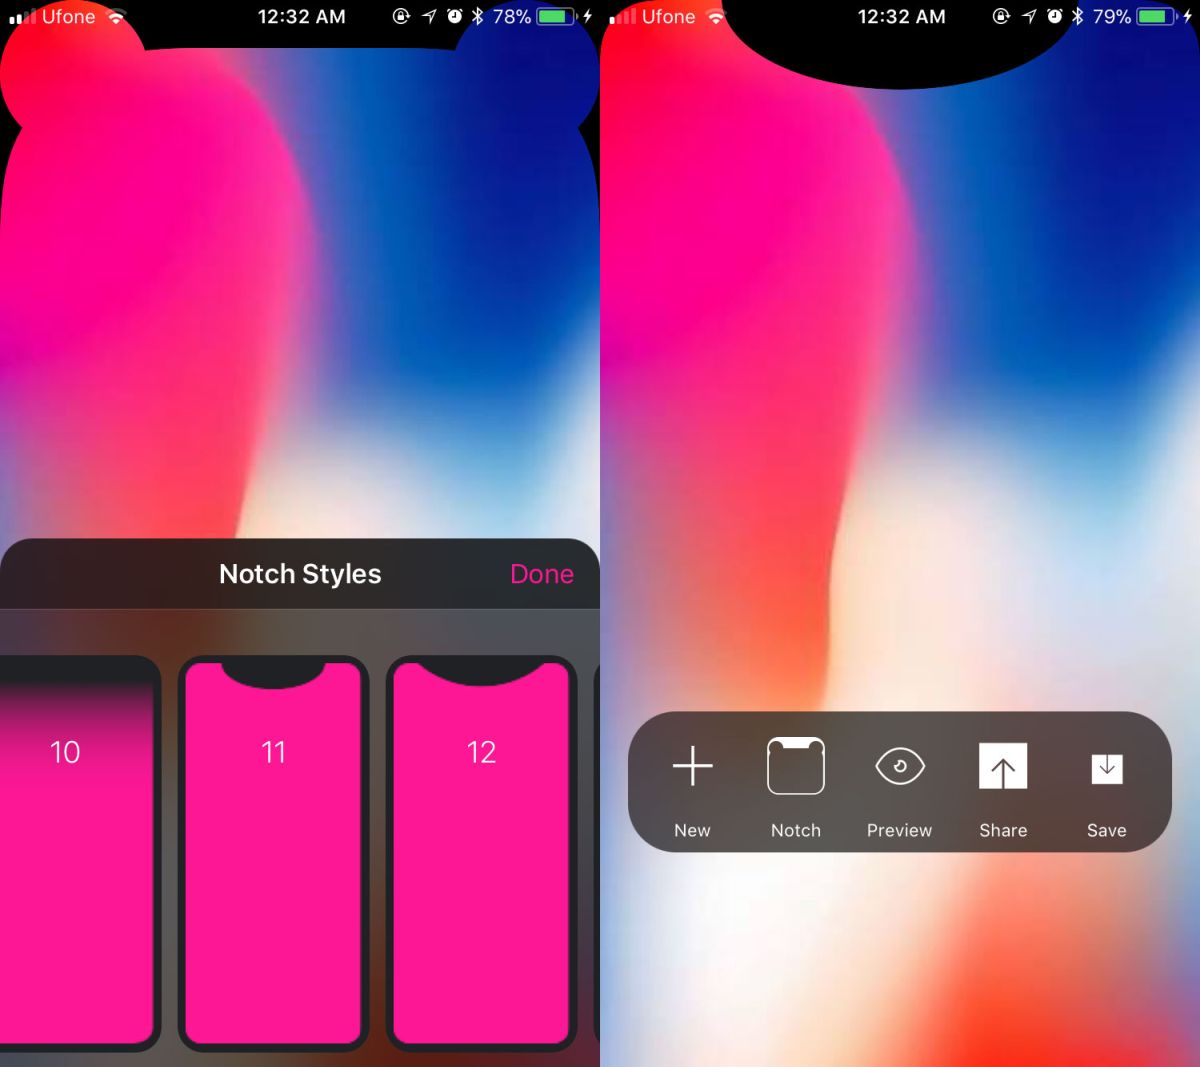
Once you’ve added the image you want to use as your wallpaper, tap the Notch button and browse the different notch styles that are available. Tap a style to see how it looks on your wallpaper. Tap the Preview button to see how it looks. If you like what you see, tap the Save button. This will save the new image to your camera roll.
The next step is to set it as your wallpaper. Open the Settings app and go to Wallpaper. Tap Choose a new wallpaper, and then tap Camera Roll. Select the image you just saved and set it as the wallpaper for your home screen, or lock screen, or both.
This app is possibly the best way to embrace the notch on iPhone X. It lets you customize an aspect of the UI that Apple never intended for you to customize and it makes the boring notch on iPhone X a little more interesting. The notch styles are really creative and deceptively simple.
As mentioned earlier, some styles can be used on other iPhone models however, most can’t. Remember that on other iPhone models, the time will always take up the space that the notch takes up on iPhone X and you cannot hide the time without a jailbreak tweak. Keep that in mind before you buy the app for an iPhone that isn’t the iPhone X.