If you’ve ever wanted to record your Linux desktop but don’t like how the existing screen recorder apps on Linux are ugly and confusing to use, you’ll like Kooha. It is an elegant screen recorder app that is designed around user-friendliness and ease of use. Here’s how to use it to record your desktop on Linux.
Installing Kooha on Linux
The Kooha screen recorder app is supported on Linux via Flatpak, Arch Linux (AUR), and the source code, which can be compiled. However, before we can go over how to use this program, we’ll need to demonstrate how to install it.
To install the Kooha application on your Linux computer, you’ll need to open up a terminal window. You can open up a terminal window by pressing Ctrl + Alt + T on the keyboard. Alternatively, search for “Terminal” in the app menu and launch it that way.
When the terminal window is open, the installation can begin. Follow along with the installation instructions down below that corresponds with the method of installation you prefer.
Flatpak
Kooha’s primary way of distribution is the Flathub app store as a Flatpak package. The reason for this is that the app is designed for the Gnome desktop, and the Gnome team works on Flatpak. However, any Linux desktop can use Flatpak.
To start the installation of Kooha via Flatpak, you’ll have to set up the Flatpak runtime. Setting up the runtime starts by installing the “flatpak” package onto your computer. You can install this package by searching for “flatpak” in your distribution’s package manager.
If you’re having issues setting up the Flatpak runtime on your computer, we’ve got you covered! Check out our in-depth guide on how to install and set up Flatpak on Linux. It’ll tell you everything you need to know to get it working!
Once the Flatpak runtime is configured and set up on your system, you’ll need to enable the Flathub app store. To enable the Flathub app store, use the flatpak remote-add command down below.
flatpak remote-add --if-not-exists flathub https://flathub.org/repo/flathub.flatpakrepo
With the Flathub app store installed onto your Linux computer, you’ll be able to install the Kooha application. Using the flatpak install command below, set up the app.
flatpak install flathub io.github.seadve.Kooha
Arch Linux
The Kooha application is available for installation on Arch Linux via the Arch Linux AUR. To start the installation, you must install the Trizen AUR helper. This program simplifies the setup of AUR apps.
sudo pacman -S git base-devel
git clone https://aur.archlinux.org/trizen.git
cd trizen/
makepkg -sri
WIth the Trizen application installed, you’ll be able to set up the Kooha application on your computer using the trizen -S command.
trizen -S kooha
Source code
While we do not recommend it, installing the Kooha application on your Linux PC from the available source code is possible. For more information on how you can get this application working on your Linux PC, please check out the official Kooha web page.
How to record your Linux desktop with Kooha
To record your Linux desktop with the Kooha application, start it up by searching for it in the application menu. Then, follow the step-by-step instructions below.
Step 1: Inside the Kooha application, you’ll need to decide on what you want to record. To record just a section of the screen, click on the “Capture a selection of screen” box. Select the “Capture a monitor or window” box if you’d prefer to record the entire desktop.
Step 2: After deciding what part of the screen to record in Kooha, you’ll need to decide on sound options. Find the speaker icon in the app, and click on it if you want Kooha to record all sound coming from your computer.
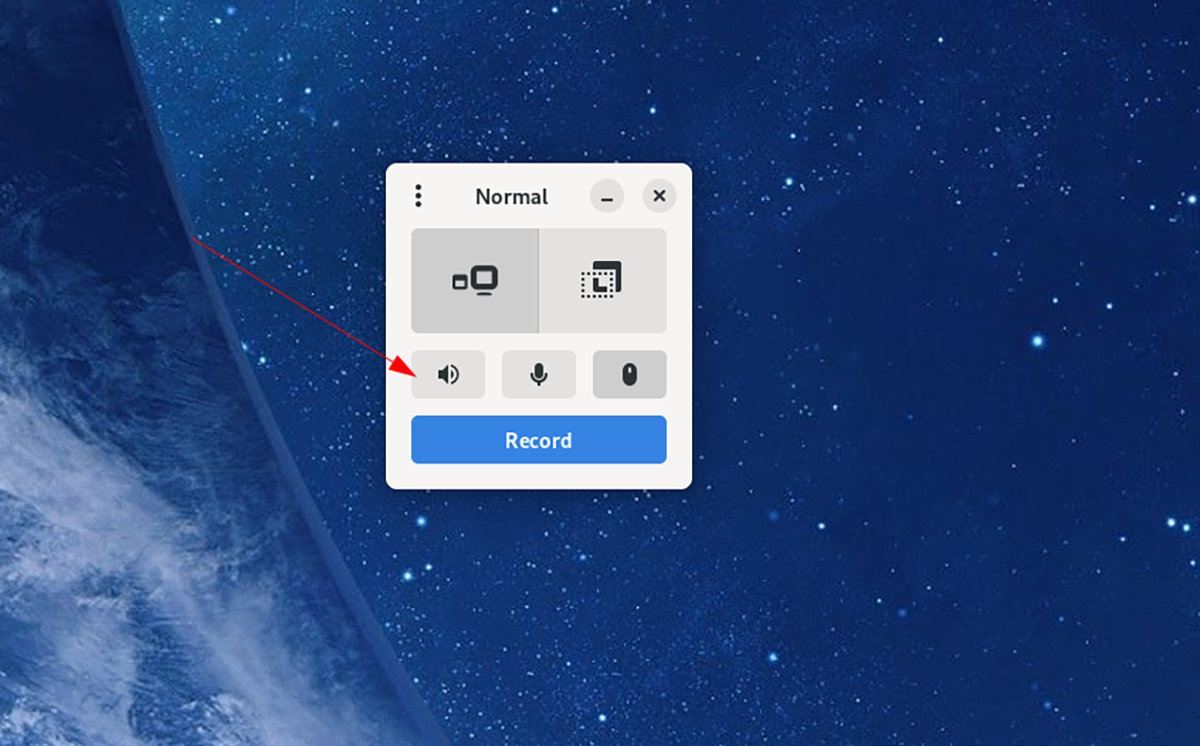
On the other hand, keep this box unchecked if you do not want Kooha to record the audio from your Linux desktop.
Step 3: Once you’ve chosen if you wish to record audio from your speakers, you must decide if you want Kooha to record the microphone connected to your computer. To record from it, select the microphone button.

If you do not want Kooha to record your microphone, do not select the button.
Step 4: With your microphone settings tweaked, it is time to decide if Kooha should display your mouse pointer. To have the app display your pointer during the recordings, click on the “Mouse Pointer” button.
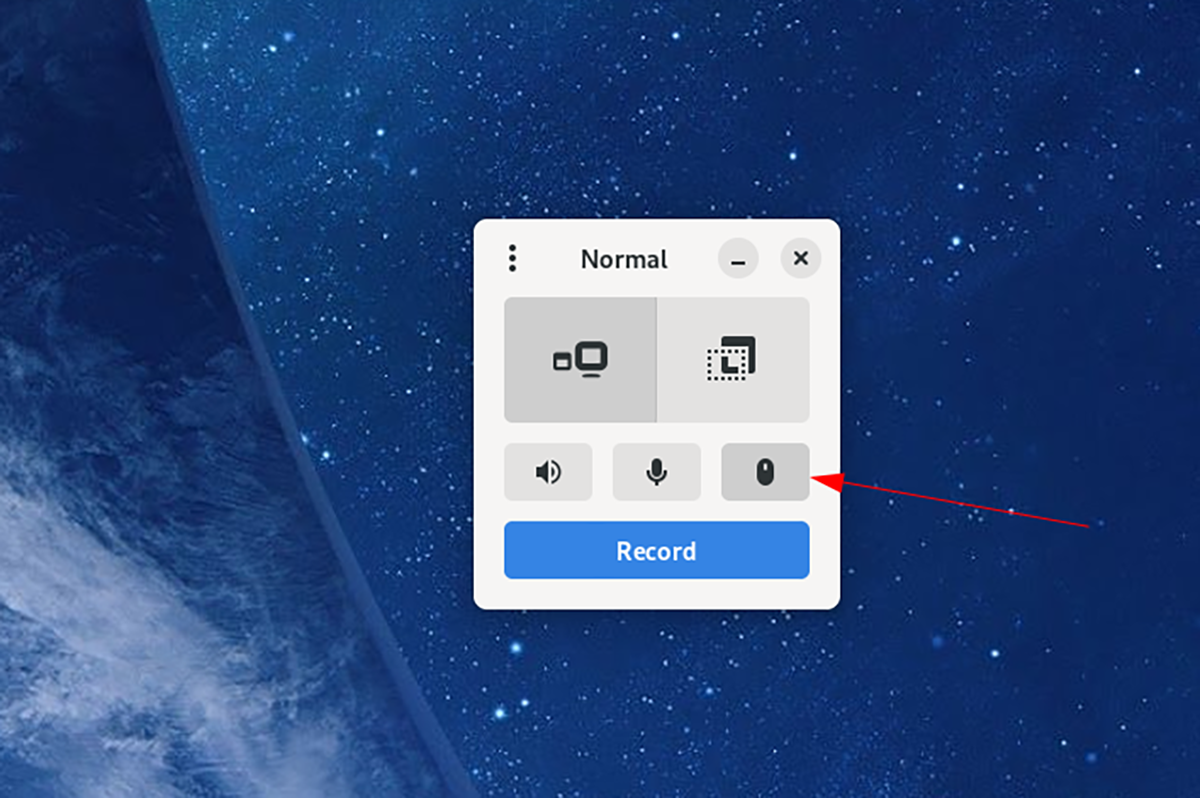
Don’t want to display your mouse pointer in your recordings? Don’t select the button.
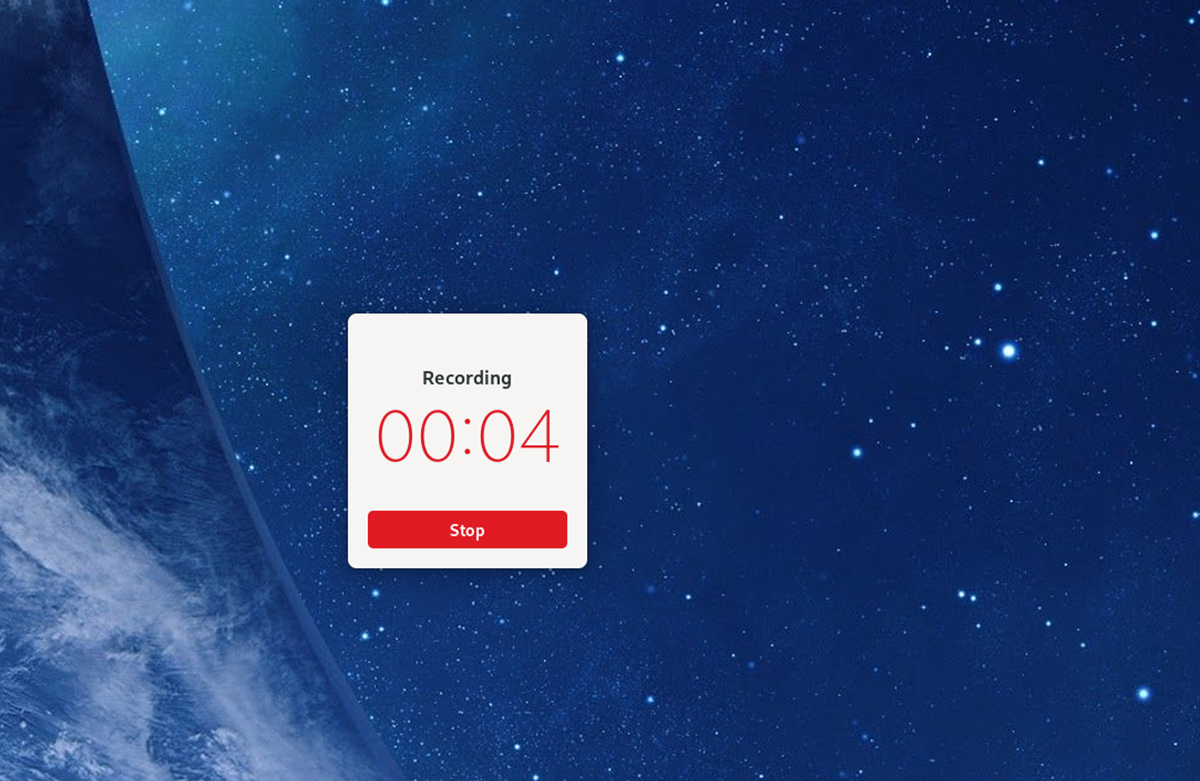
Step 5: With all settings in Kooha configured, recording can begin. Select the “record” button to start recording. When you click on the “record” button, the app will begin recording your screen.
When you’ve finished recording, click on the stop button. After selecting stop, Kooha will save your video to “Videos” in your home directory.