An email message can easily be forwarded from one account to another. In fact, you don’t have to own the account that you’re forwarding an email to. If you’ve bought something online for a family member, you can just as easily forward the receipt in your email to them, as you can to another one your email accounts.
Emails can be forwarded selectively and manually. They can also be forwarded automatically and set up so that a particular type of message is always forwarded to a particular account. Most, if not all, desktop email clients as well as web-based email portals will allow users to forward emails, and set up rules for forwarding them.
Looking to schedule emails in Outlook? Try this.
Forward emails in Outlook 365
Manually forward email in Outlook
To manually forward a single email in Outlook, follow the steps below.
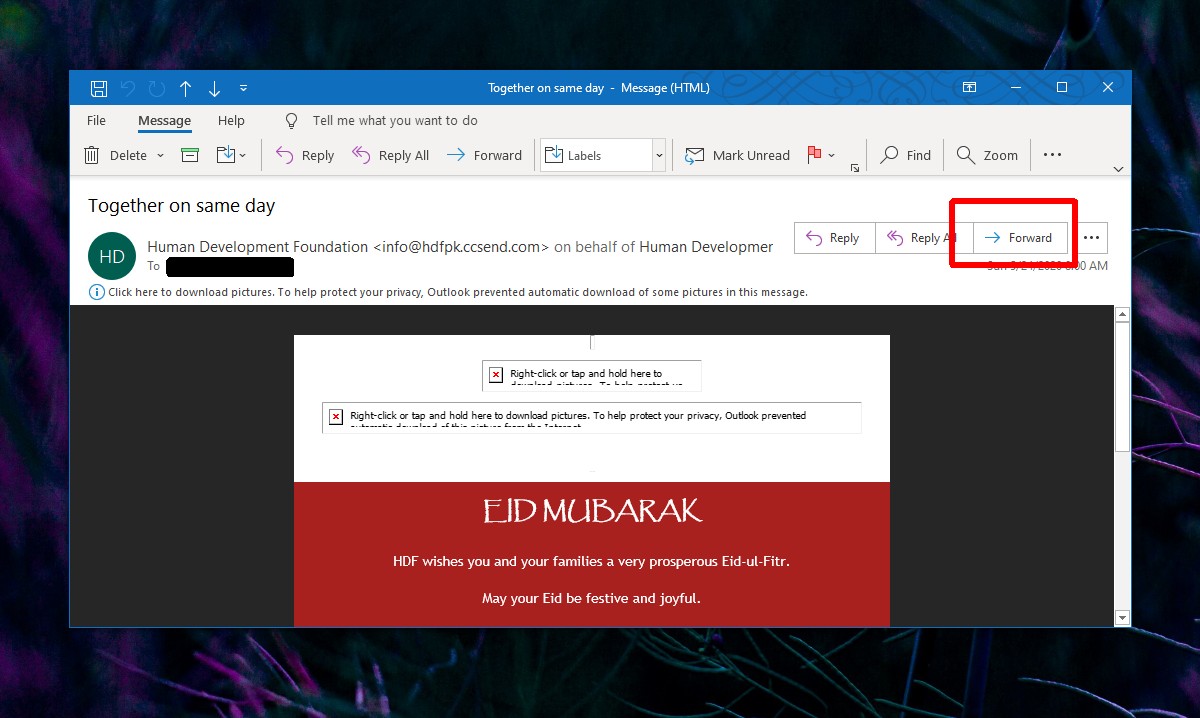
- Open the message. If you double-click it, it will open in its own window.
- At the top right, below the ribbon, click the Forward button.
- A new message window will open with the contents of the previous message in it.
- Enter the email that you want to forward the email to, and click send.
Note: You can edit the message in the new message window before sending it.
Automatically forward email in Outlook
To automatically forward an email from a particular sender to another email address, you have to set up rules in Outlook.
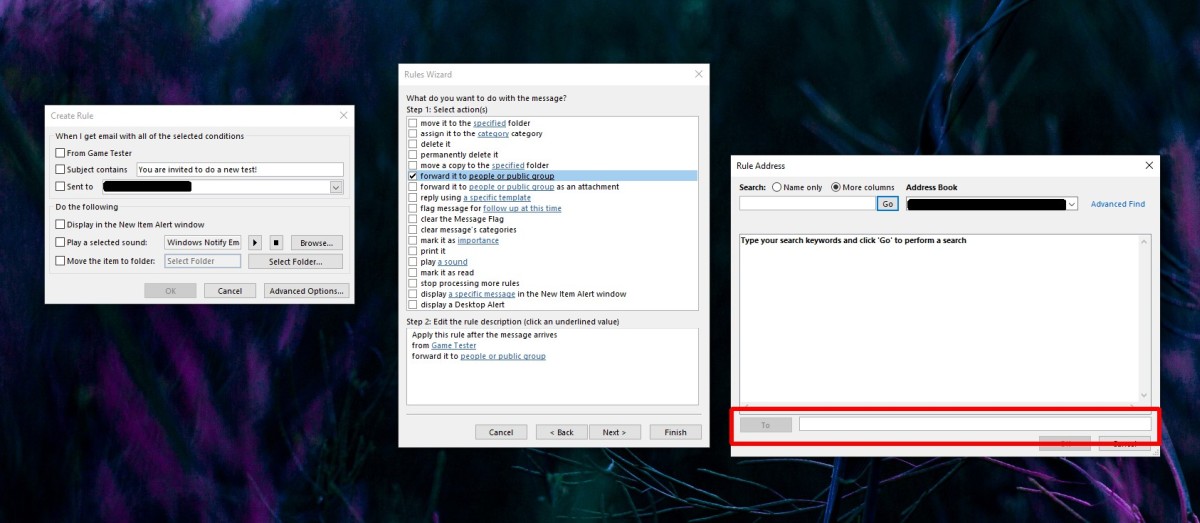
- Open the email that you want to set up a forwarding rule for. Click the more options (three dots) button at the top right and select Rules>Create Rules.
- If you do not have an email from the sender, select any email click the more options button (three dots) at the top right on the main Outlook window. Select Rules>Create Rules.
- Click Advanced Options on the new window that opens.
- In the list of conditions, enable the ‘From [email sender]’ option.
- Go to the box below it, and click the sender. Edit the sender i.e., enter a new or different email. Do this if you do not have an email from the sender you want to forward messages from. Click Next.
- On the next window, enable the ‘Forward it to people or public group’ option.
- In the box below the set of rules, click ‘People or public group’ and enter the email you want to forward the message to.
- Enter the email in the To field, and click OK. You don’t have to select an email address from your address book.
- Click Next, and check if you want to modify the forwarding rules i.e., enter exceptions. If not, click Finish and auto-forwarding will be set up.
Conclusion
Forwarded messages will have the email address they originally came from. If you’d like to remove the email address, you will have to edit the message first and for that, the rules won’t work. You will have to use manual forwarding.
If you’re forwarding emails from a work account, make sure you aren’t violating any workplace rules or sharing private data when you do so.