Meeting invites moved online long before meetings did. Given the popularity of digital planners, online calendars, and web-based events, it only stands to reason that invitations are managed accordingly.
Most online events provide a simple link that you can share with potential participants. The link adds the event to an online calendar. With Outlook, you can create something similar but it isn’t tied to an online event.
Meeting invite in Outlook
In Outlook, you can send a calendar invitation to an event. This event can be online or offline. It is entirely up to you and Outlook’s feature is less about the type of event and more about the kind of invitation you want to send.
An Outlook meeting invitation can be sent to multiple people, the recipients can accept or decline it, and you can see who is attending, and who isn’t.
When an invite is accepted by a recipient, the event/meeting is added to their calendar automatically.
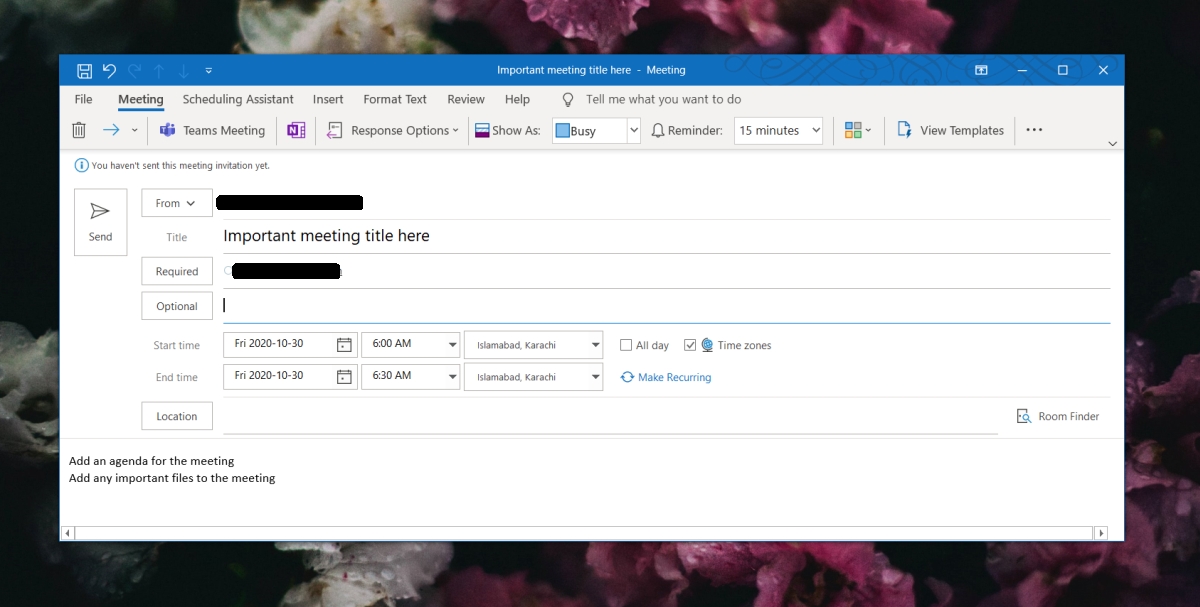
Create meeting invite
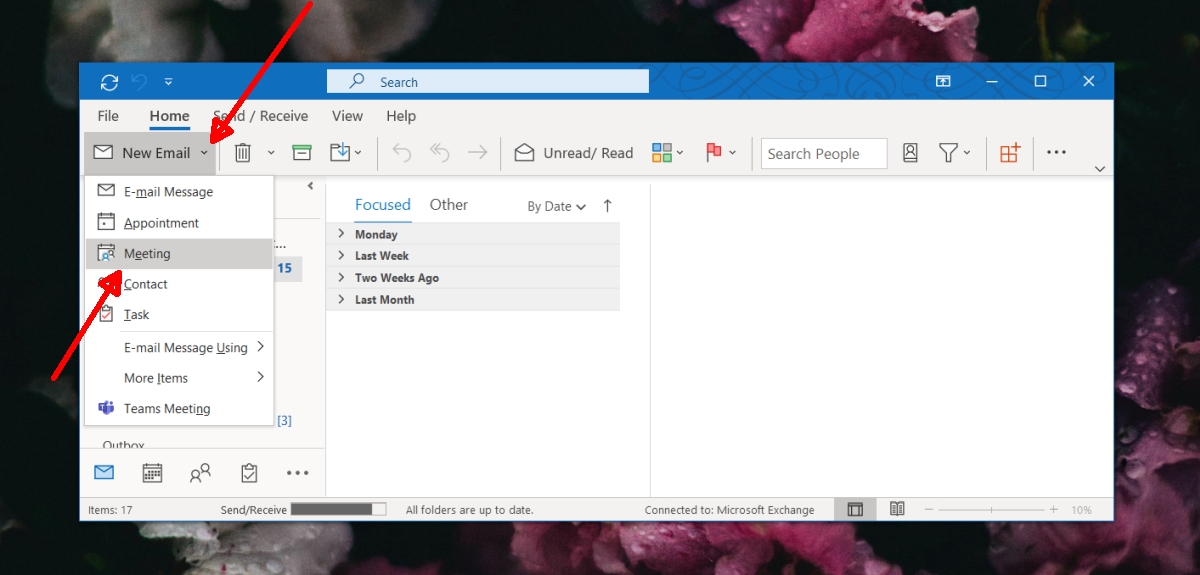
To create an invite in Outlook for Microsoft 365, follow these steps.
- Open Outlook.
- Click the dropdown arrow next to New Message.
- Select Meeting. A new window will open.
- Give the Meeting a name/title.
- For participants that must be present, enter their email in the Required field.
- For participants who can opt-out of the meeting, enter their email in the Optional field.
- Select a start and end time and date. If the meeting or event will last all day, select All Day.
- If the meeting is going to be held across multiple time zones, select Time zones and pick the time zone the invite is being created in.
- If the meeting is recurring, e.g., a weekly or daily staff meeting, select Make Recurring.
- Select the recurring period for the meeting.
- Add a message and attach files that are needed for the meeting, and send the invite.
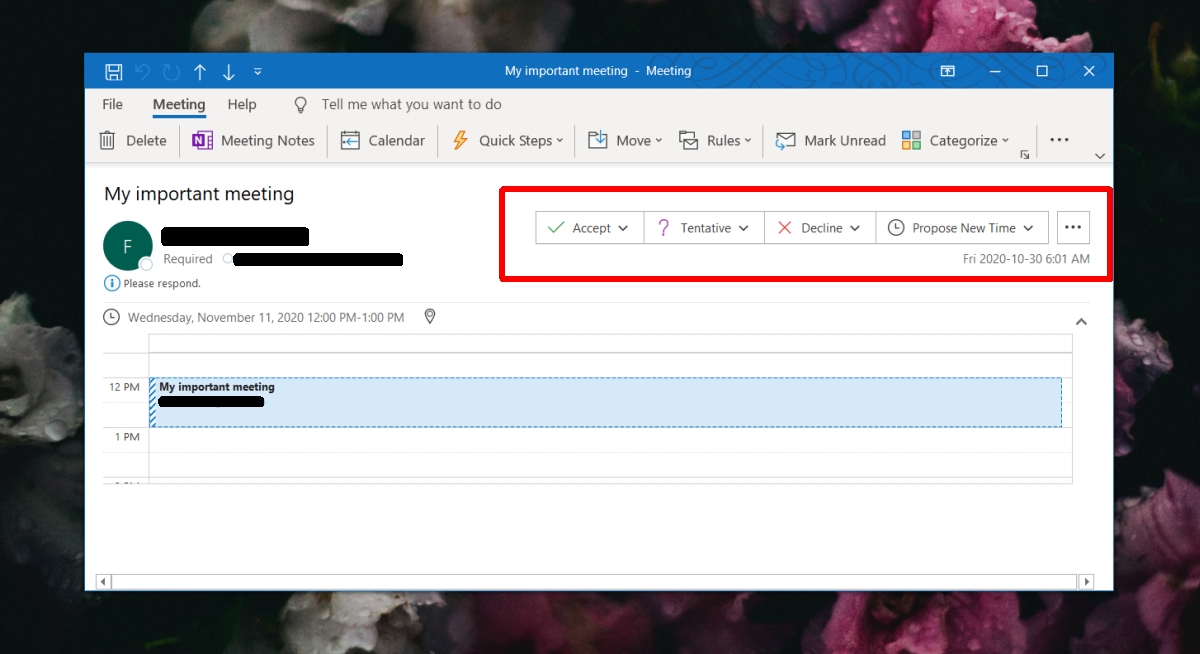
Accept meeting invite
Meeting invites can be accepted in most email clients and on the web interface of an email service. If you’re using Outlook, follow the steps below to accept (or decline) a meeting invite.
- Double-click the invite (It will appear as an email in your inbox).
- Click the Accept button, and select Send response now.
- To decline the meeting, click the Decline button.
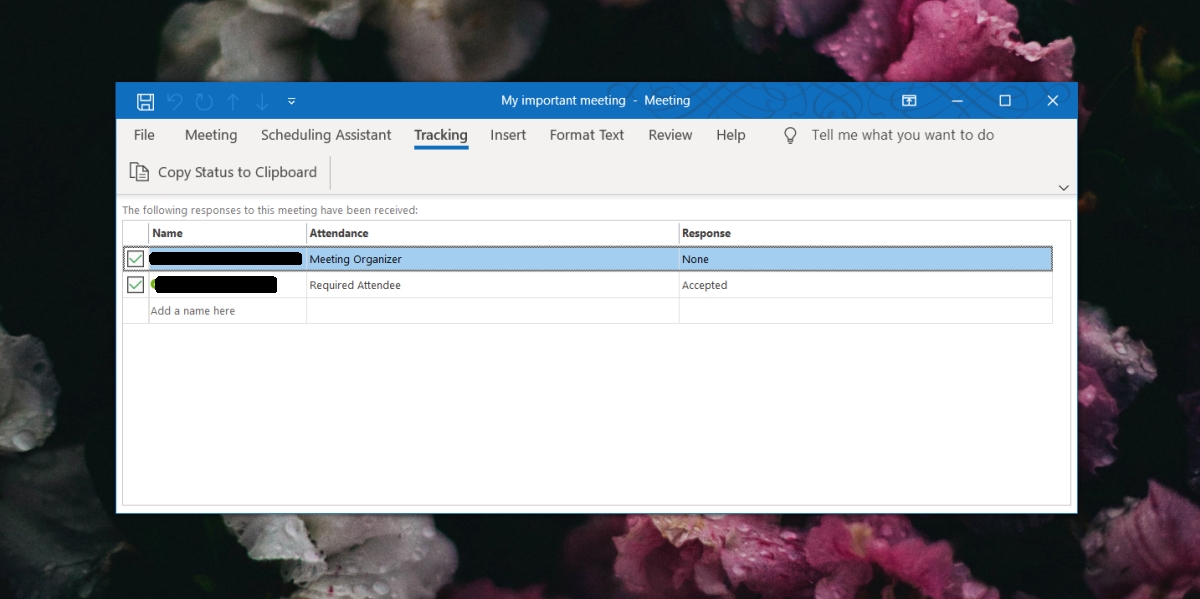
View meeting response
Viewing the response to a meeting is simple if you know where to look for it.
- Open Outlook.
- Click the Calender icon at the bottom of the column on the left.
- Find the meeting in your calendar.
- Double-click the meeting to open it.
- Go to the Tracking tab.
- You will see a list of attendees who have accepted, declined, or tentatively accepted the invite.
Conclusion
An Outlook meeting invite can be added to Gmail. Gmail is able to parse the message that is received when an invite is sent and convert it to a Google Calendar event. It will be able to retain most of the information in the invite.