Are you an Ubuntu user? Do you need to edit your bootloader to change something, delete something, or something else? Don’t know how to do it? If so, this guide is for you. Follow along as we show you how to edit the Ubuntu bootloader.
Installing Grub Customizer in Ubuntu
Before you can edit the Ubuntu bootloader, you will need to install the Grub Customizer tool. This program gives users an easy-to-use GUI that can load in Grub configurations for editing purposes.
There are a couple of ways you can install Grub Customizer in Ubuntu. You can set it up via the GUI in Ubuntu Software (or Software/KDE Discover if you’re on Xubuntu or Kubuntu, etc.) You can also get it working on Ubuntu through the terminal command line.
In this guide, we’ll go over both methods of installation. Keep in mind; this program also works on any Linux operating based on Ubuntu. If you’re using Elementary OS, Zorin OS, Peppermint, or anything else based on Ubuntu, you’ll be able to follow along with these instructions as well.
GUI installation
To install Grub Customizer on Ubuntu with the GUI, do the following. First, open up “Ubuntu Software.” If you cannot find “Ubuntu Software” in your app menu, look for “Software” or “Discover” and click on those instead.
Once the app is open, find the search box, and type in “Grub customizer.” When you type this in, only one search result should appear on the screen. Click on “Grub customizer” to access its software page.
After accessing Grub Customizer’s software page, look for the “Install” button, and click on it with the mouse. When you select the “Install” button, you will be prompted to enter your password. Do so.
Upon entering your password, Grub Customizer will be installed. When the installation is complete, click on the “Launch” button in Ubuntu software to get Grub Customizer open for the first time.
Terminal installation
If you’d prefer to use the terminal to install Grub Customizer on Ubuntu, here’s what to do. To start, press the Ctrl + Alt + T keyboard combination to launch a terminal window. Alternatively, search for “Terminal” in the app menu and open it that way.
With the terminal window open, use the apt install command to get the “grub-customizer” package installed.
sudo apt install grub-customizer
When you enter the command above, you’ll be prompted to enter your password. Enter it on the keyboard and press the Enter key. Do not worry if you cannot see your password while you enter it.
After entering your password, Ubuntu will collect all of the packages to install (this means the “grub-customizer” package and any dependencies it needs. When it is done collecting these packages, it will ask you if you wish to continue. Press Y to confirm.
Upon confirming, Grub Customizer will quickly be downloaded and installed. When the installation is complete, search for “Grub Customizer” in the app menu to open it up.
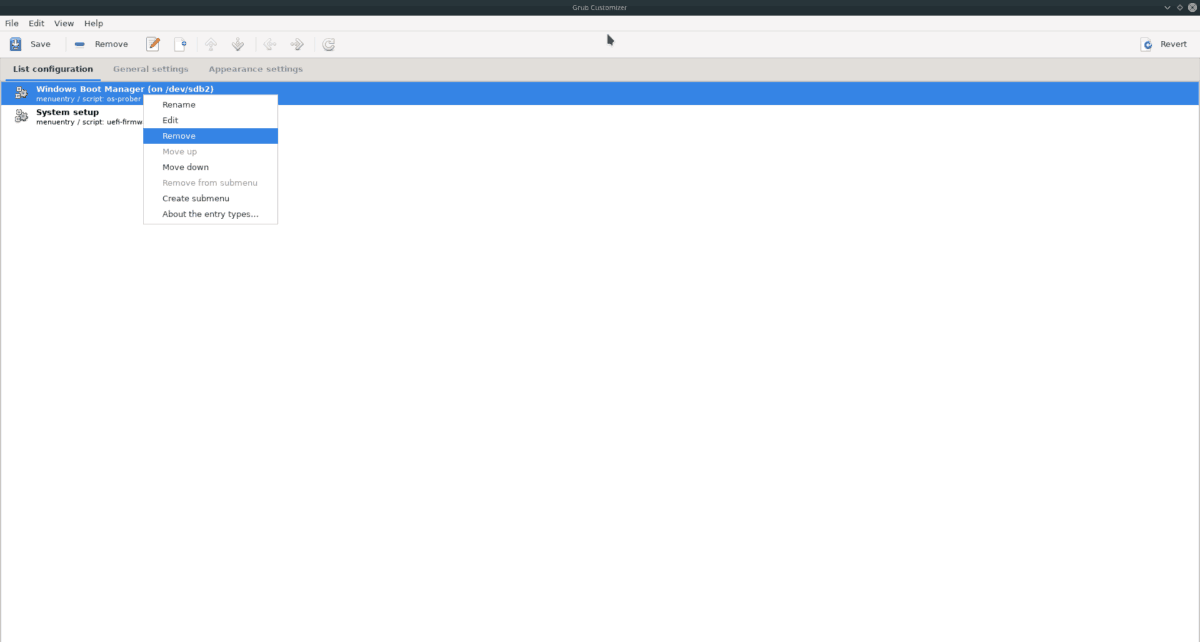
How to edit the Ubuntu bootloader
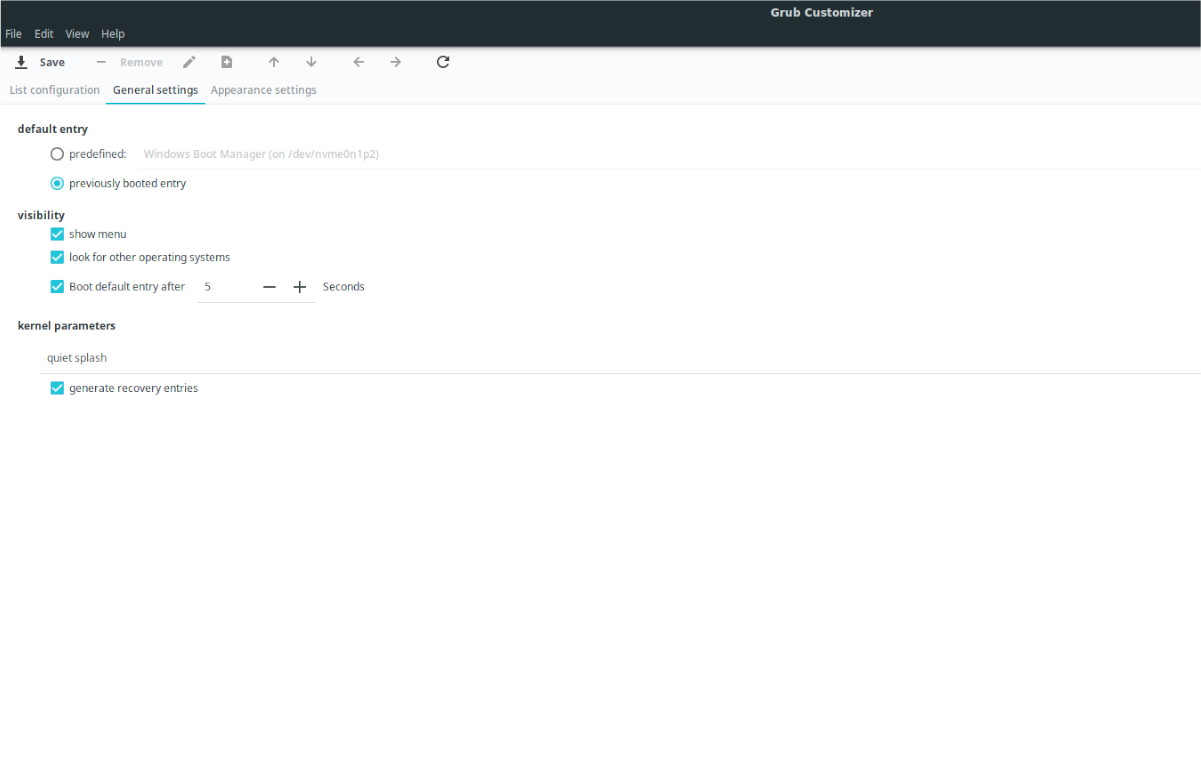
Editing the Ubuntu bootloader with Grub Customizer is easy. To start, find the “General settings” tab, and click on it with the mouse. You’ll find various Ubuntu bootloader settings in this area, like the default entry, visibility, and kernel parameters.
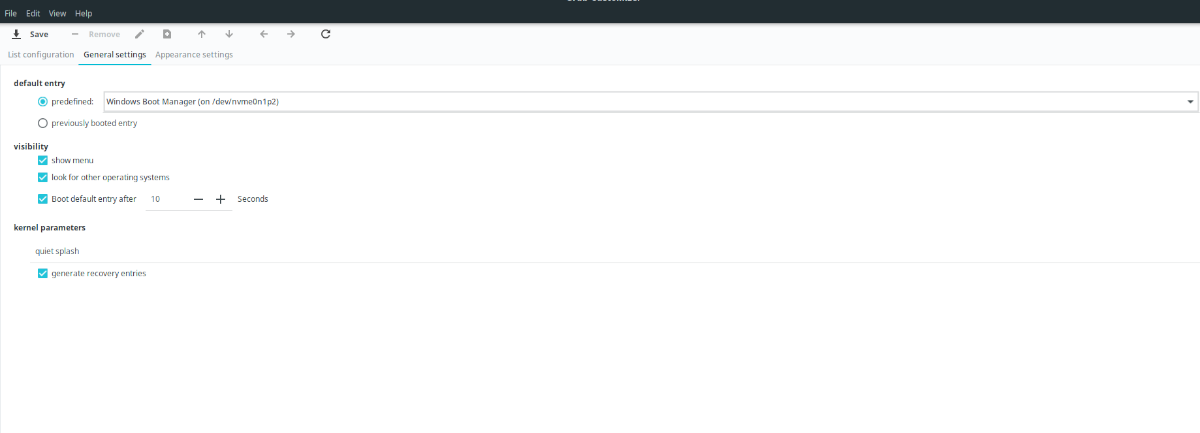
For example, if you’re not happy that it selects the first entry in the bootloader and loads it up, you can change it to whatever you want. Select the drop-down menu, and choose the option you’d like to auto-boot to.
Alternatively, if you’d prefer that Ubuntu always boot the last thing you booted, you can. For example, if you dual-boot Windows 10 and Ubuntu, and you previously selected Windows, you can tell the Ubuntu bootloader to choose it because you chose it last time.
Other settings you can edit
The main thing that Ubuntu users try to edit in the bootloader is the default entry option. However, that’s not all you can do. You can change how long it takes to boot the default entry from 10 seconds to as fast as you wish by changing the “10” to another number.
You can also disable the menu entirely by de-selecting the “show menu” button. Doing this will hide the bootloader completely unless you press the Shift button while booting up. Or, you can edit the Ubuntu kernel boot parameters by changing “quiet splash” to whichever kernel commands you like.
When you’re done editing Ubuntu’s bootloader, find the “Save” button at the top of the Grub Customizer app, and click it to save your edits. Then, close Grub Customizer and open up a terminal window.
Applying the changes
While Grub Customizer has an “Install to MBR” option, it doesn’t always work. Essentially, Grub Customizer is just editing text configuration files. As a result, you can apply the settings through the terminal. Here’s how to do it.
Using the update-grub command below, apply the new configuration changes to the Ubuntu bootloader.
sudo update-grub