Is your Virtualbox VM’s hard drive too small? Want to make it bigger but can’t figure out what to do to accomplish that? Don’t worry! We can help! Follow along with this guide as we show you how to make hard drives bigger in Virtualbox!
Please note that in order to enjoy all of the features of Virtualbox, you’ll need to have the latest version. Update your system before attempting this guide, or check the official website if you need to download a newer release of the Virtualbox software.
Making hard drives bigger in VirtualBox
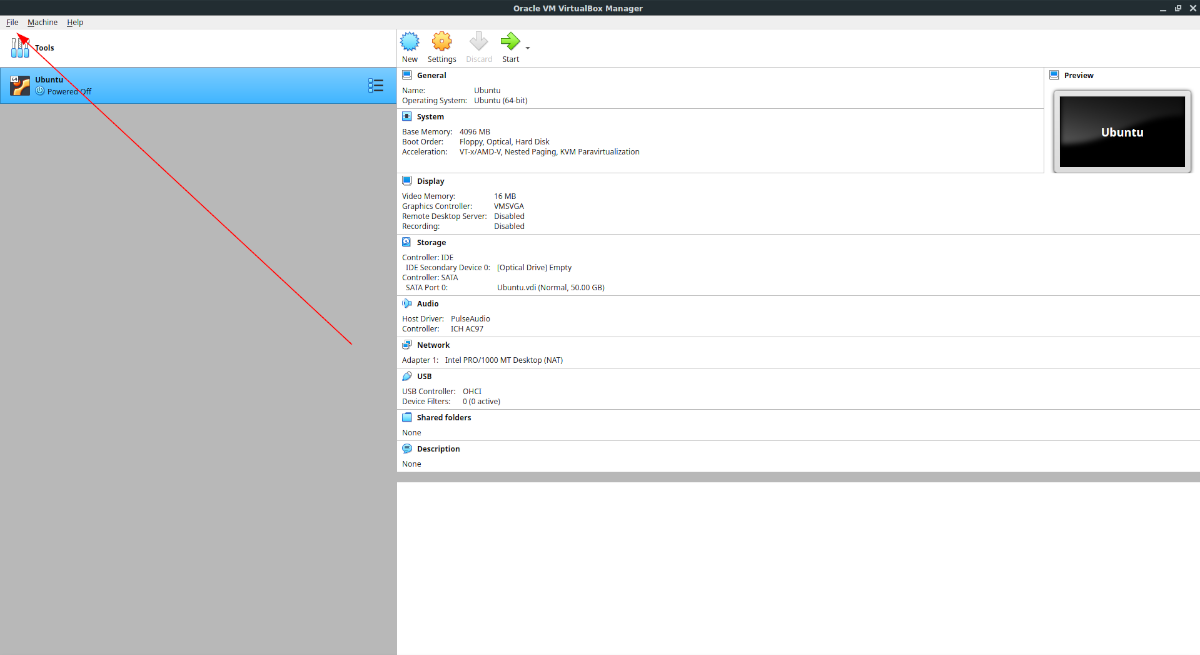
To make your virtual hard drive bigger in Virtualbox, you need to start by opening up the “File” menu. Once you click on this menu, you’ll see a ton of different options available. Locate the “Virtual Media Manager” button, and click on it to open up Virtualbox’s media management tool.
Inside of the Virtual Media Manager, you should see your virtual hard drives in the list. Select the drive you wish to make larger with the mouse. When you select it with the mouse, the Virtual Media Manager will show you two tabs: “Attributes,” and “Information.”
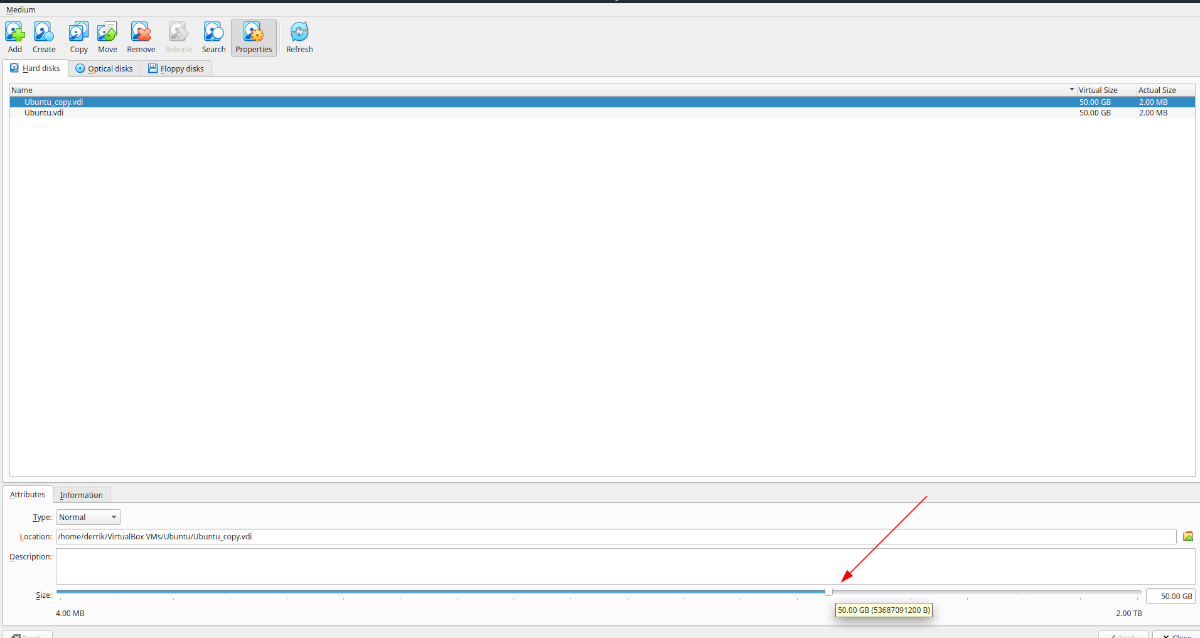
Select the “Attributes” tab. In this area, you’ll see a lot of different options. These options are “Type,” “Location,” “Description,” and “Size.” Find the “Size” area. Directly next to the “Size,” label, you’ll see a slider bar followed by the size of your virtual hard drive.
From here, take the slider and move it up to make it bigger. Keep in mind, however, there is a limit to how big you can make a virtual drive. Currently, Virtualbox only supports virtual drives in size of up to 2 TB. If you require more space, you will need to configure a hard drive RAID set up in your virtual machine.
When you’ve settled on your new, larger hard drive size for your virtual disk, find the “Apply” button, and click on it to increase your hard drive size. However, understand that you cannot undo this change.
Why can’t you undo a resize change? For whatever reason, Virtualbox doesn’t implement drive shrinking, and it will fail if you do try to do this.
Making cloned hard drives bigger in VirtualBox
While it is easy to go to the “Virtual Media Manager” and quickly increase the size of your virtual hard drive, you should understand that resizing it without cloning it is undoable. Meaning, once your Ubuntu VM in Virtualbox goes from 500 GB to 1 TB, it cannot be undone.
That said, there is a neat way to work around Virtualbox’s lack of resizing: cloning your hard drive. You can make a copy of your drive and resize the copy. That way, if you decide you’d rather have a smaller drive, you can delete the bigger copy, rather than being unable to go back.
To start the process, select the “File” menu with the mouse and click on it to reveal its options. Once you are inside of the “File” menu, locate the “Virtual Media Manager” button, and click on it to open up the Virtual Media Manager.
Once inside of the “Virtual Media Manager,” you’ll see your hard drives listed before you. Look through the list of drives and select the hard drive you want to work with. Then, find the “Copy” button at the top of the “Virtual Media Manager” and select it with the mouse.
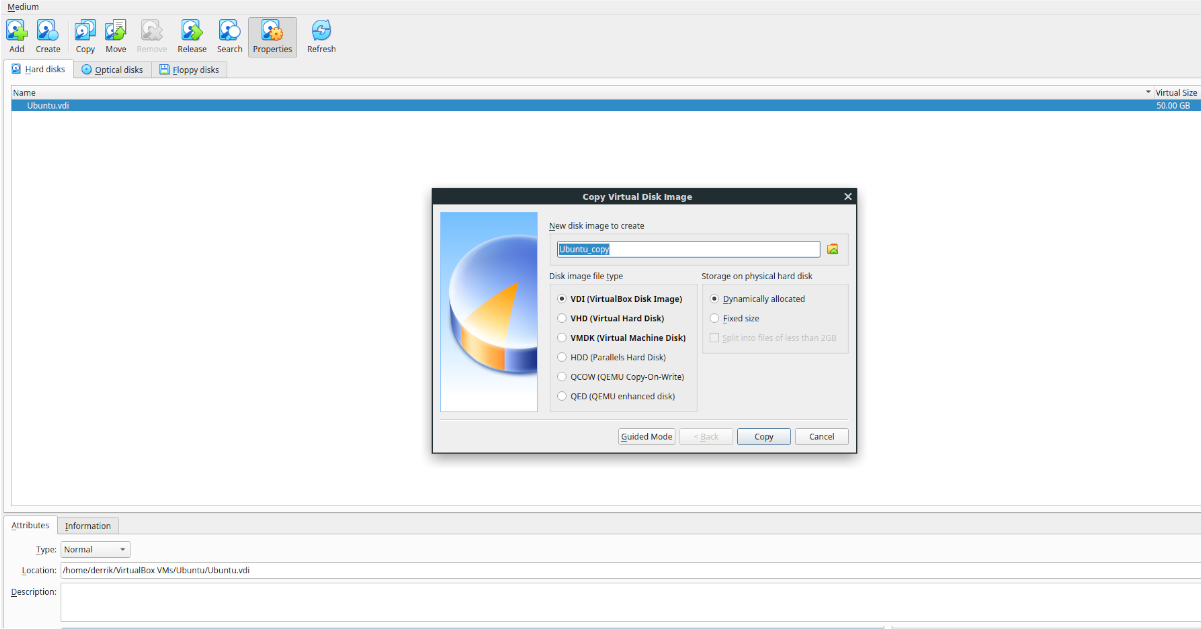
When you select the “Copy” button, a “Copy Virtual Disk Image” will appear. In this window. Click on the “Expert Mode” button. When you do, you’ll see “New disk image to create,” followed by a text box with its name, the disk image file type selection, and the storage type options.
To start, go to the text box and change the name of the disk image to whatever you wish to call it. When you’ve settled on a name, move on to the “Disk image file type” area.
Inside of the “Disk image file type” area, choose what file type your copied virtual disk should be. By default, the “VDI” option is chosen, and this is a good format. However, if you prefer a different format, you can also choose VHD, VMDK, HDD, QCOW, or QED.
After selecting your drive file format, click “Copy”. Then, select the copied hard drive in the “Hard Disks” area, find the “Size” slider, and drag it to make it larger. When you’ve settled on your new drive size, click “Apply”.
Delete the copy
If you want to delete the copied drive, select it in the “Hard Disks” with the mouse. Then, find the “Remove” button, and click on it with the mouse. When you select this button, Virtualbox will ask if you wish to remove it. Click the “remove” button in the pop-up to confirm. Then, select “Delete” to delete it.