Ajenti is a web-based monitoring tool for servers and VPSes. Once installed, Ajenti is able to provide real-time monitoring, a web-based shell for terminal commands, and many other things. In this guide, we’ll show you how to set up Ajenti on Ubuntu Server.
Note: Although this guide focuses on Ubuntu Server, Ajenti supports various Linux operating systems, including Redhat Enterprise Linux, CentOS, Debian, etc. So feel free to follow along with this installation guide even if you do not use Ubuntu Server.

Automatic installation
The best way to get Ajenti working on your Ubuntu server is with the automatic installation script provided in the Ajenti documentation. The script is written in Bash, will auto-detect your operating system, and It takes care of everything on the OS so that the user doesn’t have to.
To start the installation, you’ll need to install Curl on Ubuntu Server. Curl is used to download and run the script on Ubuntu Server. Launch a terminal window, connect to the Ubuntu Server over SSH. Or sit at the server physically and use the TTY console.
Once you’ve gotten the terminal window open and ready to use, run the apt install command to get the “curl” package installed on your Ubuntu Server setup.
sudo apt install curl
Upon entering the command above, Ubuntu Server will ask for your password. Enter it using the keyboard. Then, press the Enter key to confirm and Y to install the package.
With the Curl app installed, it is time to run the automatic installation script. You will need to run this script as root as it needs access to system files.
curl https://raw.githubusercontent.com/ajenti/ajenti/master/scripts/install.sh | sudo bash -s -
The Ajenti installation script is automatic and should only take a couple of minutes. Watch the terminal as it downloads and configures Ajenti on Ubuntu Server.
When the installation is complete, Ajenti is ready to configure. Open up a new web browser tab, and enter the URL to access the Web UI interface for Ajenti.
HTTP://YOUR_UBUNTU_SERVER_IP_ADDRESS_OR_HOSTNAME:8000
Manual installation
If you’d prefer to have more granular control over the installation of Ajenti on Ubuntu Server, or if the installation script doesn’t work, the manual installation is the best way to go about it.
To set up Ajenti via Manual installation, start by launching a terminal window, logging into the Ubuntu Server via SSH (or TTY console). Then, use the terminal to enable the “Universe” software repository.
sudo add-apt-repository universe
Next, run the apt update command to refresh Ubuntu Server’s software sources.
sudo apt update
Following the update command, it is time to install the Ajenti dependencies for Ubuntu Server. These packages must be installed, or the app will not function correctly.
sudo apt-get install build-essential python3-pip python3-dev python3-lxml libssl-dev python3-dbus python3-augeas python3-apt ntpdate
Following the dependencies, install all Python plugins for Ajenti.
sudo pip3 install ajenti-panel ajenti.plugin.ace ajenti.plugin.augeas ajenti.plugin.auth-users ajenti.plugin.core ajenti.plugin.dashboard ajenti.plugin.datetime ajenti.plugin.filemanager ajenti.plugin.filesystem ajenti.plugin.network ajenti.plugin.notepad ajenti.plugin.packages ajenti.plugin.passwd ajenti.plugin.plugins ajenti.plugin.power ajenti.plugin.services ajenti.plugin.settings ajenti.plugin.terminal.
When all Python plugins are configured, Ajenti is ready to go on Ubuntu Server. From here, open up a new web browser tab, and access the URL below.
HTTP://YOUR_UBUNTU_SERVER_IP_ADDRESS_OR_HOSTNAME:8000
Configuring Ajenti on Ubuntu Server
Using Ajenti on Ubuntu Server requires knowing the root password. Sadly, Ubuntu disables the root password by default for security purposes. To re-enable the root password on your Ubuntu System, do the following.
First, open up a terminal window and log into your machine over SSH. Or physically sit at your server and use the TTY console. Then, once you’ve got access to the terminal shell, use the sudo -s command to log into root.
sudo -s
Once you’ve logged into your account using sudo -s, use the passwd command to tell Ubuntu you’d like to change the password. Then, enter your new root password. Be sure that this password is memorable and secure.

passwd
With the root password set, do the following to log in. First, access the URL below in your favorite web browser. Then, type in “root” in the username box and the root password into the password box. Finally, select “Login” to log into your account.
HTTP://YOUR_UBUNTU_SERVER_IP_ADDRESS_OR_HOSTNAME:8000
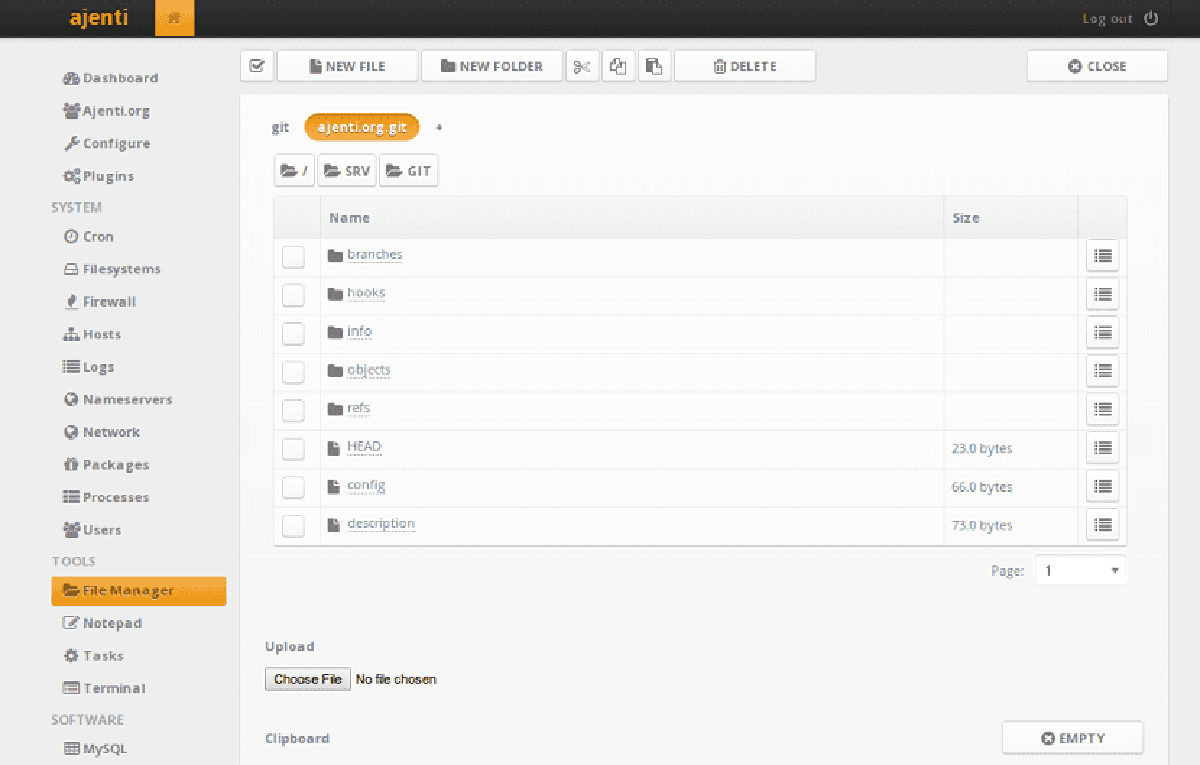
Once logged in, Ajenti will display the dashboard. In the Ajenti dashboard, you’ll see valuable information for Ubuntu Server. Information like how many cores are active, CPU usage, uptime, disk usage, and RAM usage. In addition, if you select the menu in the top-right corner, you’ll gain access to the terminal shell, notepad, package manager, and more.