Android offers its users the absolute freedom to customize and optimize one’s device freely. You can modify everything from how it looks, its core apps, its dependence on Google and everything in between. To that end, Tasker is an Android app that lets you automate your phone’s functions. Here’s how you can set-up and use Tasker on Android to automate your phone.
Getting Tasker
Tasker is a paid for app that costs a measly $3.99 on the Play Store. However, you can download a trial build from the Tasker Website that expires in 15 days. While in trial mode, accessing Tasker – even if by switching between open apps – asks if you want to continue trial or register.
Beginner Mode

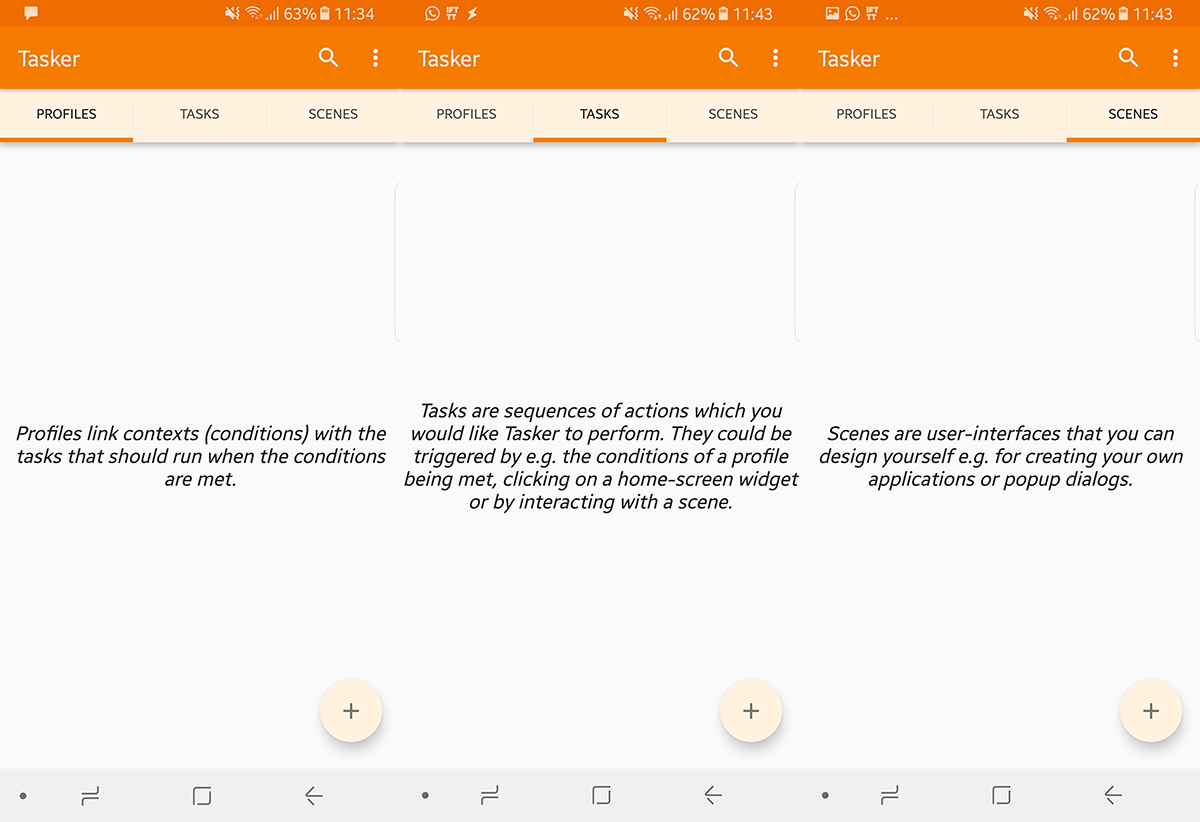
Tasker is quite versatile, in order to prevent users from getting overwhelmed we start off in beginner mode. You are given Profiles, Tasks and Scenes (accessing each tabs tells you what it does). Tapping on each can give you the option to import a profile/Task/Scene.
Tapping the add (+) button at the bottom right will create a new entry. Pressing the Back arrow button on the top left of a view will save and exit. Pressing the cross button on the top right will cancel the operation.
It is important to note that the app isn’t as simple as IFTTT where you can just select some pre-built customizations. Tasker lets you go much deeper than that and as such requires you to build your own profiles and define how your Android device ought to behave.
To turn off beginner mode; Go to Menu (top right) > Preferences > Uncheck Beginner Mode
We don’t recommend doing this until you have understood Tasker a little better. Turning off Beginner Mode will introduce a new tab called Vars.
Step 1 – Creating a Task
Even though a Profile is the first tab, we begin with Tasks as they are the backbone of this app. We will create tasks for a list of things we want to see happen when we wake up.
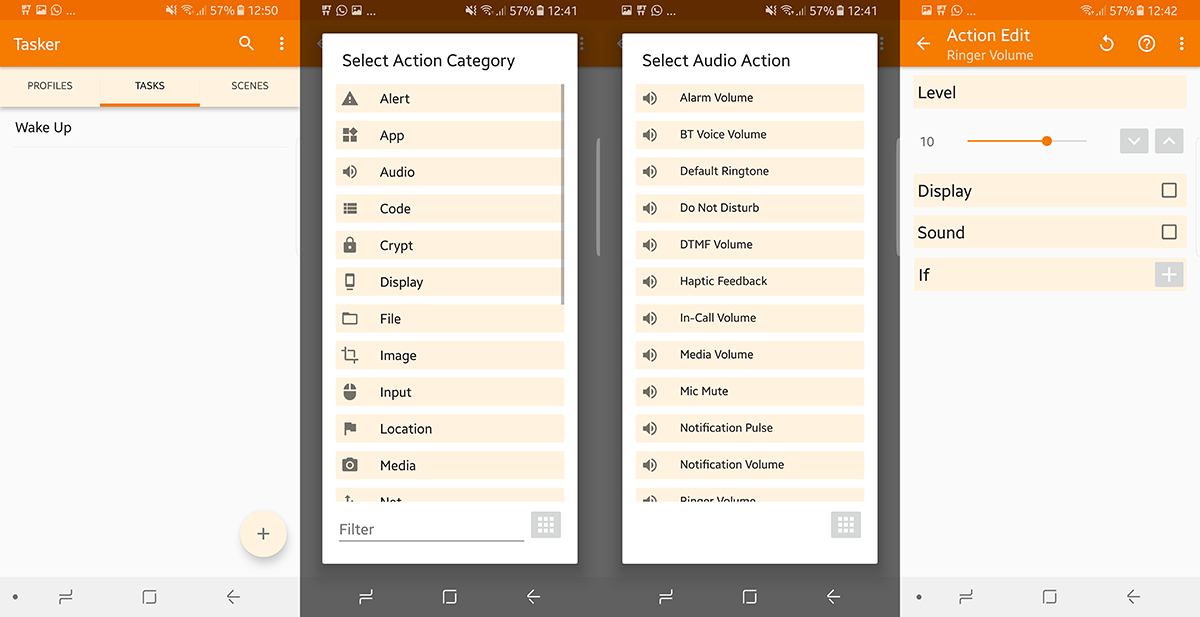
So tap on the + button in the lower right corner and give it a name, then press the Tick button. Now, tap on the + icon to add actions that will be performed under this task.
Assuming we want our phone to switch off silent mode and turn on Wi-Fi when we wake up, we do the following:
+ > Audio > Ringer Volume
+ > Net > Wifi > On
Now we have two actions for this task.
Keep in mind that at this time, we haven’t told Tasker when we want this app to run, we have only taught it what to do. We can press the Play button at the bottom left to execute it manually, or even add a widget on the homescreen (it will ask you which profile you want to load). Tapping on that widget will launch said task.
However, that is not as exciting as the promise of complete automation. So we must now link it to a trigger (or context, as Tasker calls it). Something that sets off these events automatically. To set a Context, we must build a profile.
Step 2 – Building A Profile
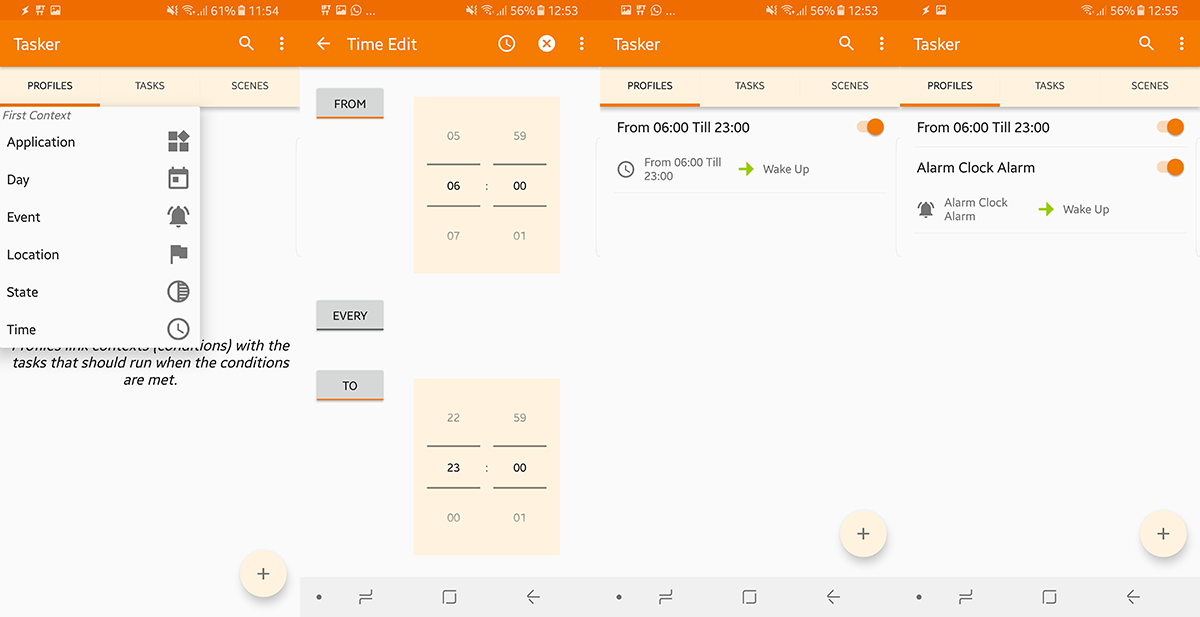
Tasker can have numerous profiles depending on what you intend to do. Go to the Profile tab and select the app/service you want an operation to be performed on. Tap on the + icon in the bottom right corner and select your context.
In extension of our above example, we our created actions to trigger when we wake up. We can assign a specific time for the tasks to trigger. Tap the plus button + > Time > From – To Range (tap on every if you want it to recur on a schedule).
Alternatively, if you have variable wake up times then you want these actions to trigger whenever you wake up, so we can make our context the alarm going off. Tap + > Event > Date/Time > Alarm Done
When asked, select the task created in step 1.
This means anytime you are done with an alarm, these events will trigger. So you can set your wake up time every time and get the same tasks run each time.
Step 3 – Creating Scenes
Scenes in Tasker is if you want to create your own user interface or popup dialogues. You can learn to create these even if you have never created interfaces before. So let us create one and you will be able to launch as many as you want from that point forth.
Press the + button to create a new scene. We will create a scene that shows us who sent us an email with what subject line.
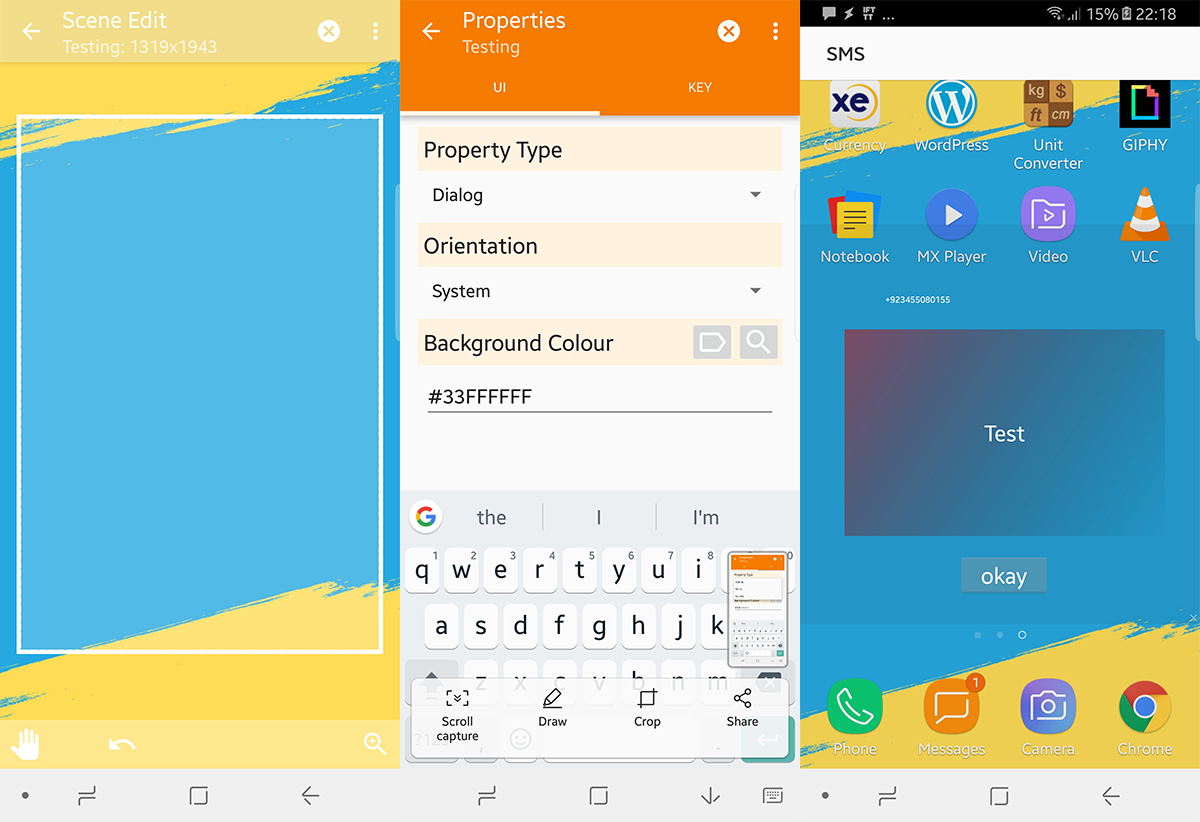
When a new scene is created you adjust the size of your overall screen. Once adjusted you can change its color from the menu button on the top right, tap on the + below to add elements. We want two text boxes (one for who sent that mail and another for the body). Lastly, we want to add a button that says “Done” so we can close the scene.
So press + > Text
Under name, name it anything that is easy for you to remember later.
Now under text, you can either write actual text, or call from a list of built-in variables. In our case we will be calling the “Text Sender” variable and another text box for the “Text Body” variable. Once these are done, create a “done” button that will “destroy” on tapping.
Now, this is just the scene, with neither a trigger, nor a task. So create a Task that “Shows Scene” and a Profile that triggers this task (as mentioned in steps 1 and 2) and the app will be ready.
Trying It Out For Yourself
The best part about Tasker is that you cannot damage your phone no matter what you do. So feel free to play around with different settings and configurations to see which one best optimizes your device for you. The best thing is, once you get used to it, you can even create apps through Tasker that your friends can use on their own custom Tasker services that you cook up for them.