If you find yourself using an Ubuntu live disk a lot for portable computing, you might notice that the files you save to it don’t save and aren’t persistent. That’s because, by default, the Ubuntu live disk doesn’t have persistent storage.
In this guide, we’ll show you how to create an Ubuntu live USB with persistent storage so that no matter what PC you’re on, and no matter how many times your USB stick is rebooted, you’ll always have your files.
Installing the Mkusb app on Ubuntu
It is possible to make a persistent Ubuntu USB stick but to do it, and you’ll need to install a unique tool. This tool is known as Mkusb. It’s a unique program that can help you create bootable disks, including ones that allow you to have persistent storage.
Getting this app installed on Ubuntu requires some tinkering, as it doesn’t come in any of the default Ubuntu software repositories. To get started, open up a terminal window on the Ubuntu desktop. To do that, press Ctrl + Alt + T on the keyboard or search for “terminal” in the app menu.
Once the terminal window is open, use the add-apt-repository command below to add the Mkusb PPA to your Ubuntu system. This PPA is currently the only way to get the app working on Ubuntu.
Note: nearly every version of Ubuntu is supported within the Mkusb PPA. However, some releases are more supported than others. For more info on support, click here.
sudo add-apt-repository ppa:mkusb/ppa
After typing out the add-apt-repository command above, you’ll see a brief prompt, followed by the terminal asking you to press the Enter key. Do so, and Ubuntu should automatically refresh your software sources and set up the new Mkusb ppa.
If your Ubuntu system doesn’t automatically update, or you prefer to do it by hand, you can execute the following apt update command below in a terminal window.
sudo apt update
Finally, you can install the Mkusb application on your Ubuntu computer by executing the following Apt command below.
sudo apt install mkusb
Downloading Ubuntu
The Mkusb application can set up persistent USB so that files in the Ubuntu live home folder will always be there, but to do that, it needs an Ubuntu ISO file. Sadly, the program doesn’t have the ability to download the latest release of Ubuntu automatically.
To download the latest Ubuntu ISO, start by heading over to Ubuntu.com. Once you’re there, find the “Download” section, and click on it with the mouse. From there, a pop-up window will appear.
In this pop-up window, select 20.04 LTS and go to the next page to start the download. Or, if you prefer to stick with the 6-month release, as opposed to the LTS, select the other option available next to 20.04 LTS.
If you prefer to download the latest Ubuntu ISO file via the terminal, open up a terminal window on the Ubuntu desktop with Ctrl + Alt + T on the keyboard and enter the following wget command below.
wget https://mirror.us.leaseweb.net/ubuntu-releases/20.04.2.0/ubuntu-20.04.2.0-desktop-amd64.iso - O ~/Downloads/ubuntu-20.04.2.0-desktop-amd64.iso
Creating a persistent USB with Mkusb
To create an Ubuntu USB with persistent USB storage, follow the step-by-step instructions below.
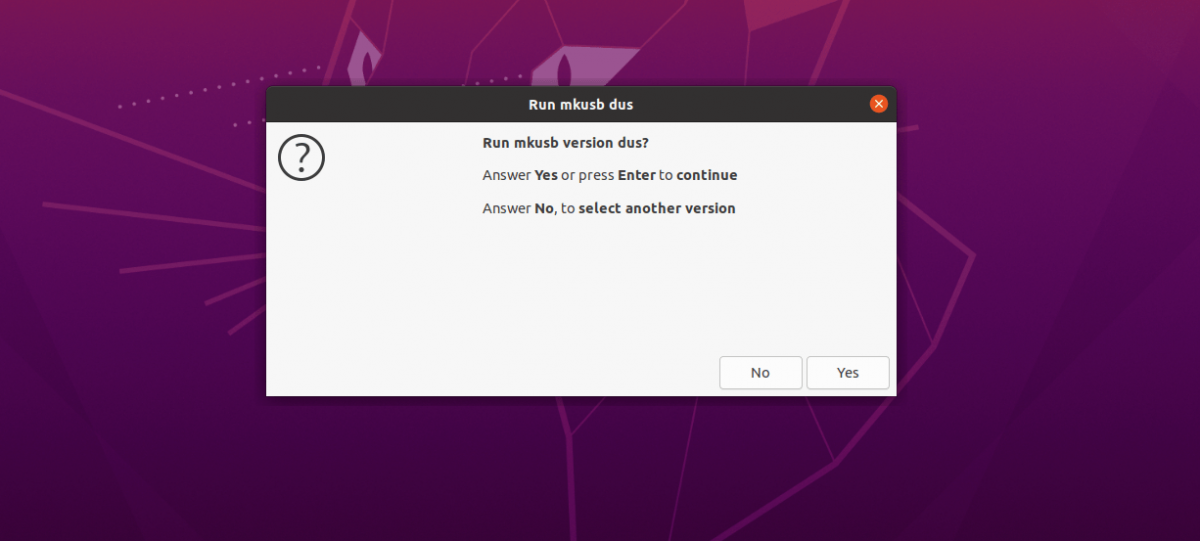
Step 1: Open up the Ubuntu app menu and search for “mkusb,” and launch it. Once the app is open, you’ll see a message that says, “Run mkusb version dus?” Select the “Yes” button to continue.
After clicking on “Yes,” you’ll be prompted to enter your password. Do so, and Mkusb will load up.
Step 2: Once your password is entered, Mkusb will show a list of operations. Look for the “Install (make a boot device) option, and select it with the mouse. Then, click “OK” to continue.

Step 3: Select the “Persistent live” option with the mouse in Mkusb. Then, click “OK” to continue to the next page.

Step 4: Browse for the Ubuntu ISO file you downloaded previously. Then, select the “OK” button to confirm your choice.
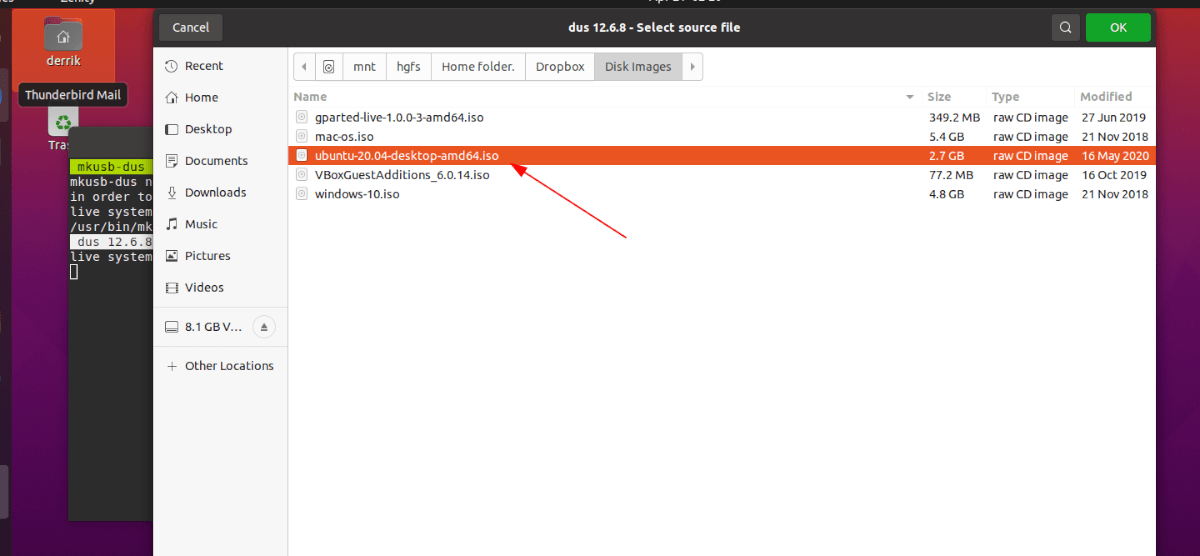
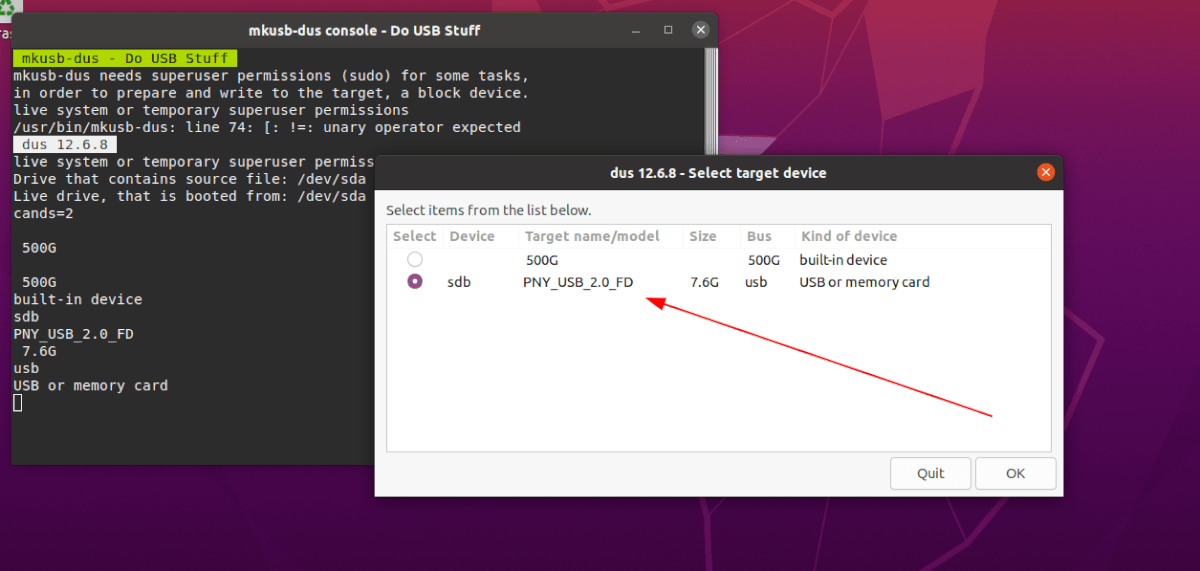
Upon selecting the Ubuntu ISO file, a pop-up window will appear with “Select target device”. Using the pop-up window, select a USB flash drive (of at least 8 GB in size or more). Press the “OK” button to continue.
Step 5: Following selecting your USB, you must choose a type of installation. Look for “msdos” and click on it to continue. Then, press the “OK” button to continue.

Step 6: You must now choose how much storage space will be used via persistent storage. Using the slider, decide how much space to use. Click “OK” when done to continue.
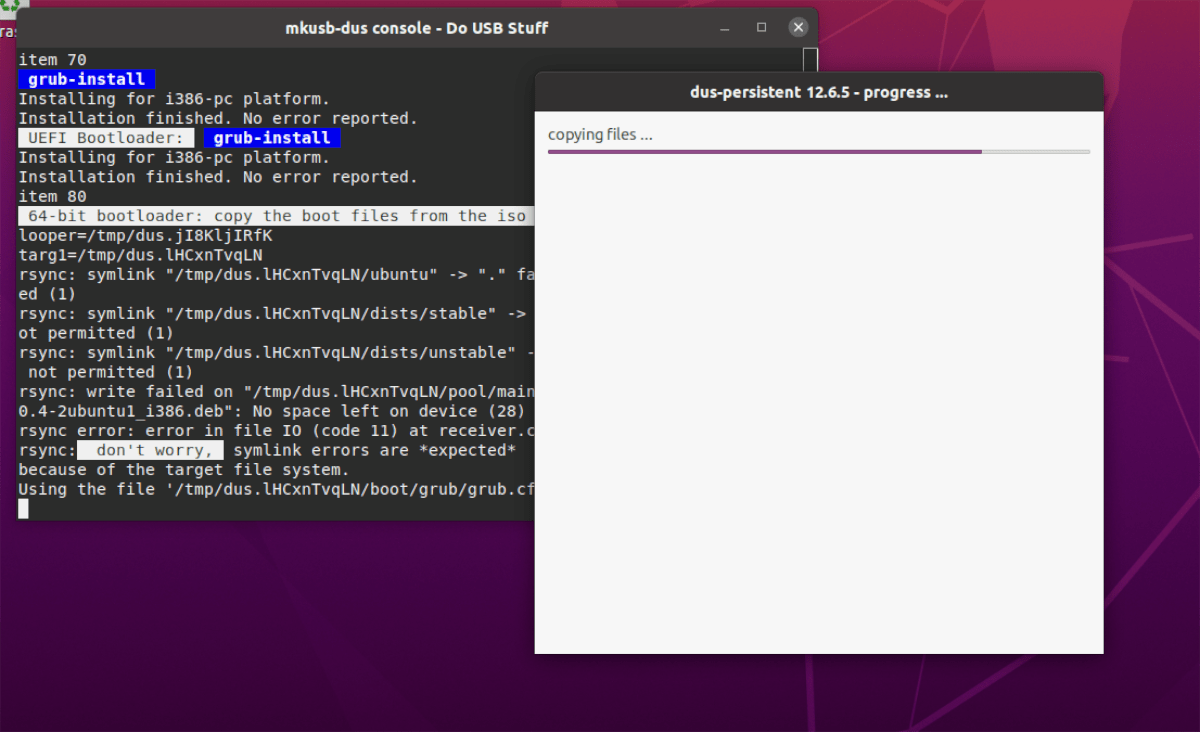
When you’ve chosen your persistent USB storage size, Mkusb will begin flashing your device. Sit back and be patient. When it is complete, close the app.