The Raspberry Pi 4 is seriously impressive, with some considerable hardware improvements over the Pi 3. As a result, many are picking it up to use as a Linux computer. One of the best operating systems to run on the Pi 4 is Rasberry Pi OS. Here’s how to get it set up.
Downloading Raspberry Pi OS with desktop
Before you can get going with Raspberry Pi Desktop, it needs to be downloaded. Currently, the place to get this operating system for your Raspberry Pi 4 is through the Raspberry Pi Foundation website, on the “Operating Systems” page.
Once on the Operating Systems page, scroll down the page till you locate “Raspberry Pi Desktop”. Next, you’ll see a Raspberry Pi 4 model, followed by several different download links.
Select the second download link that says “Raspberry Pi OS with desktop,” and click on the blue download button to start the download process. Or, if you have a torrent client and prefer to torrent the OS, click on the “Download torrent” button, and it will launch inside a torrent app and download.
The download should only take a few minutes to complete, as it is only 1,180 MBs in size. When the process is complete, head over to the next section of the guide to create the Raspberry Pi OS installation image.
Creating the Raspberry Pi OS installation SD Card
Raspberry Pi OS is a Raspberry Pi operating system, and it needs to be installed on an SD card from a computer. The installation process is called “flashing.” Essentially, taking the OS from the download website, flashing it to your SD Card using a flash tool.
There are many ways to flash the Raspberry Pi OS installation image to an SD card to use on the Raspberry Pi 4. In this guide, we’ll focus on the Etcher application. Why? Etcher is cross-platform, meaning it works the same on Linux, Mac OS, and Windows, so you’ll get the exact instructions no matter what computer you use to make the installation SD card.

To get started, download the latest release of the Etcher app to your computer by visiting the official Etcher website. Then, start up the app and plug in your Raspberry Pi 4 SD card into the computer using the card reader.
Once Etcher is open, and the SD card reader is connected, find the “Flash from file” button, and select the Raspberry Pi OS ZIP archive you downloaded. Then, find the “Select target” button.
When you choose the “Select target” button, you will need to select your SD card in the UI. After choosing your SD card, find the “Flash!” button, and select it with the mouse to start the flashing process.
The flashing process will not take long. When the process is complete, move on to the next section of the guide to continue the installation process.
Setting everything up
Insert your SD card into the Raspberry Pi 4, connect your keyboard, mouse, power cord, etc., and power it on. Once it powers on, be patient! The first boot may take a bit of time.
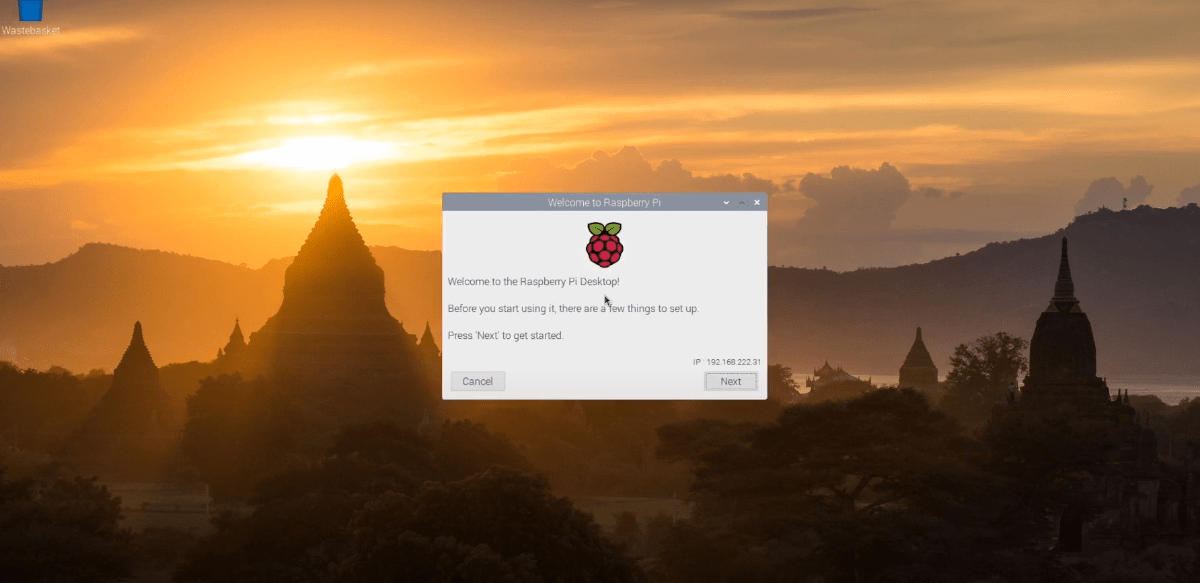
When Raspberry Pi OS finishes booting for the first time, you’ll see a message that says, “Welcome to the Raspberry Pi Desktop!”. Click on the “Next” button at the bottom of this window to continue.
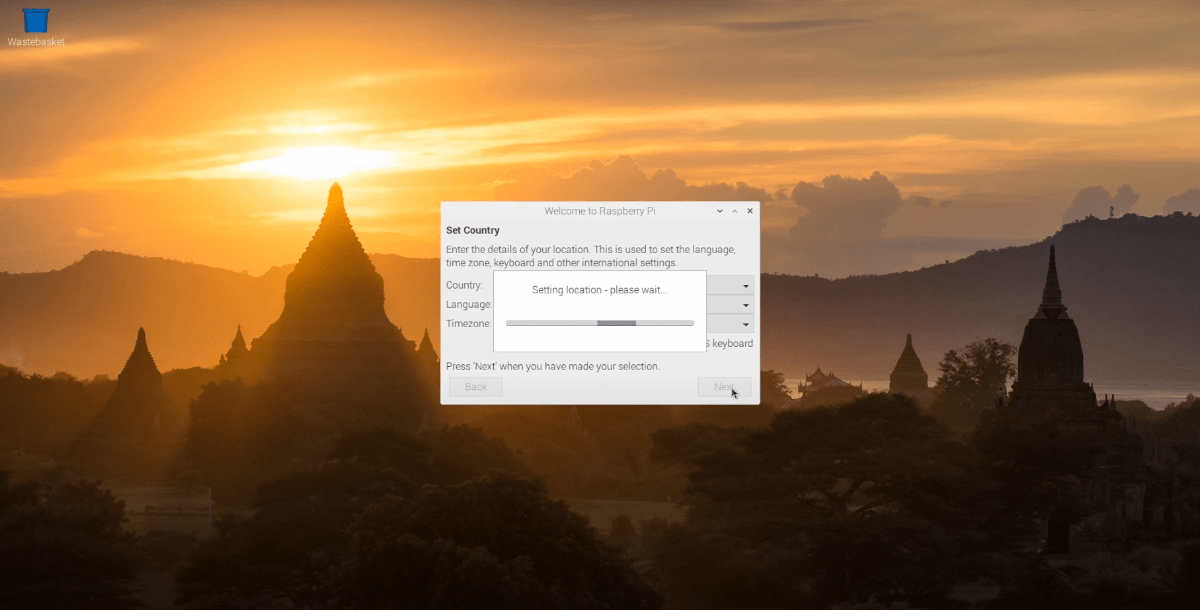
On the next page, you will need to select your country, language, and timezone. For example, if you are American, check the “Use US Keyboard” box. When you’ve set everything up, click the “Next” button to continue.
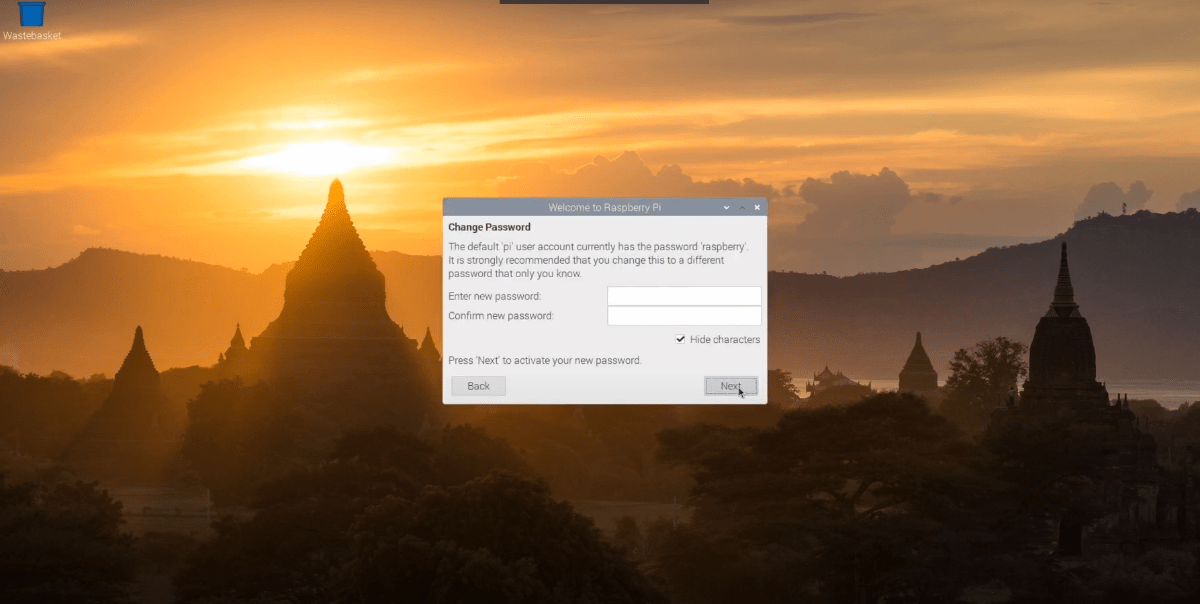
You’ll need to change the default Raspberry Pi OS desktop password to something you prefer to use on the third setup page. Using the mouse, click on the “Enter new password” text box, and enter your password. Then, click on “Confirm new password” to enter it a second time. When done, click “Next.”
You’ll now need to configure how Raspberry Pi OS Desktop handles your screen layout. If you see black bars on either side of the screen, check the box “This screen shows a black border around the desktop.” If not, leave it blank, and click on the “Next” button to continue.

With the screen configured, the next step is to configure the WiFi. Use the UI, connect your Raspberry Pi 4 to the network over WiFi, and press the “Next” button to continue.
Note: If you’ve connected your Raspberry Pi 4 via Ethernet, this step doesn’t apply to you. Click the “Skip” button to skip it.
Once WiFi is connected, you’ll need to update the operating system. In the “Update Software” window, click on the “Next” button to start checking for updates and installing them.
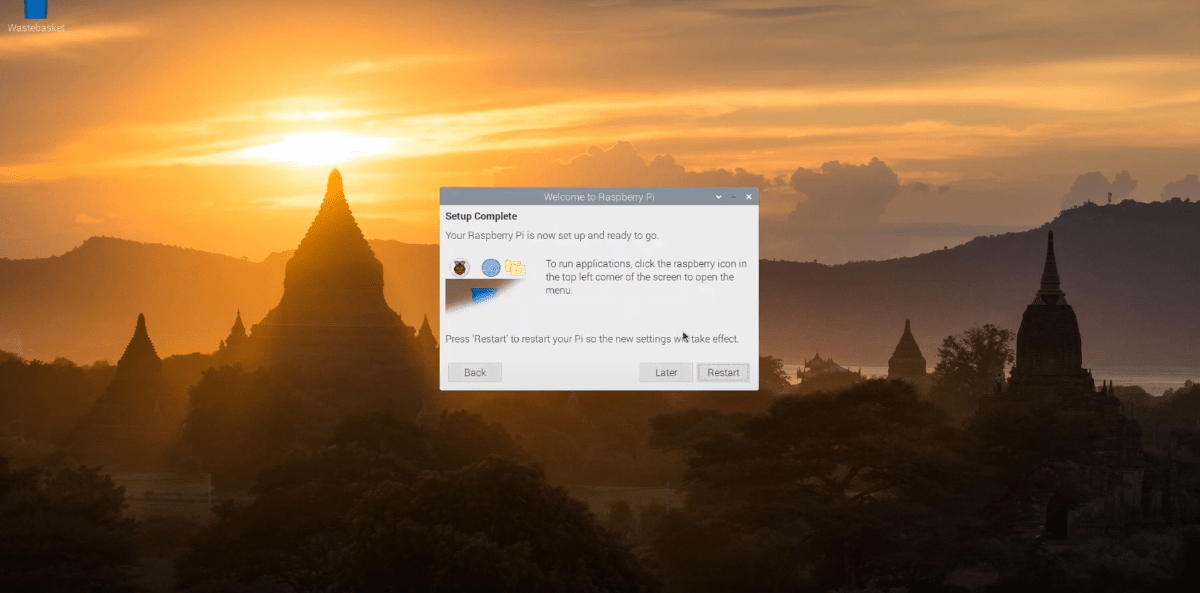
When all of the updates are installed, the initial setup process for Raspberry Pi OS Desktop is complete. From here, click on the “Restart” button to reboot your machine.