PostgreSQL is a lightweight, advanced databasing tool for Linux and other platforms. It is well supported on Ubuntu, but setting one up and managing it through the terminal can be pretty annoying.
There’s a better way you can set up a PostgreSQL database server on Ubuntu. How? With Webmin, the modern admin interface for Unix systems. Here’s how to use Webmin to create a PostgreSQL database on your Ubuntu system.

Getting Webmin installed on Ubuntu Server
If you’re interested in using the PostgreSQL module on Webmin, you will need to set up Webmin on your Ubuntu Server. To get the app working, you’ll need to install a DEB package from the Webmin website.
To start the installation of Webmin, open up a terminal window and access the server over SSH. Or use the TTY console on the server by physically sitting at it. Once you’ve gained command-line access, use the commands below to get the latest release of Webmin working on your Ubuntu Server machine.
http://prdownloads.sourceforge.net/webadmin/webmin_1.981_all.deb
sudo apt install ./webmin_1.981_all.deb
This section should be more than enough to help you get Webmin up and running on your Ubuntu Server setup. That being said, if you need more guidance in how to set up the tool, please follow our guide on how to set up Webmin on Ubuntu Server.
Setting your root password
The Webmin web UI uses the user’s root account and root password to log in. However, you won’t be able to log in out of the box on Ubuntu Server, as the Ubuntu system locks the root account by default.
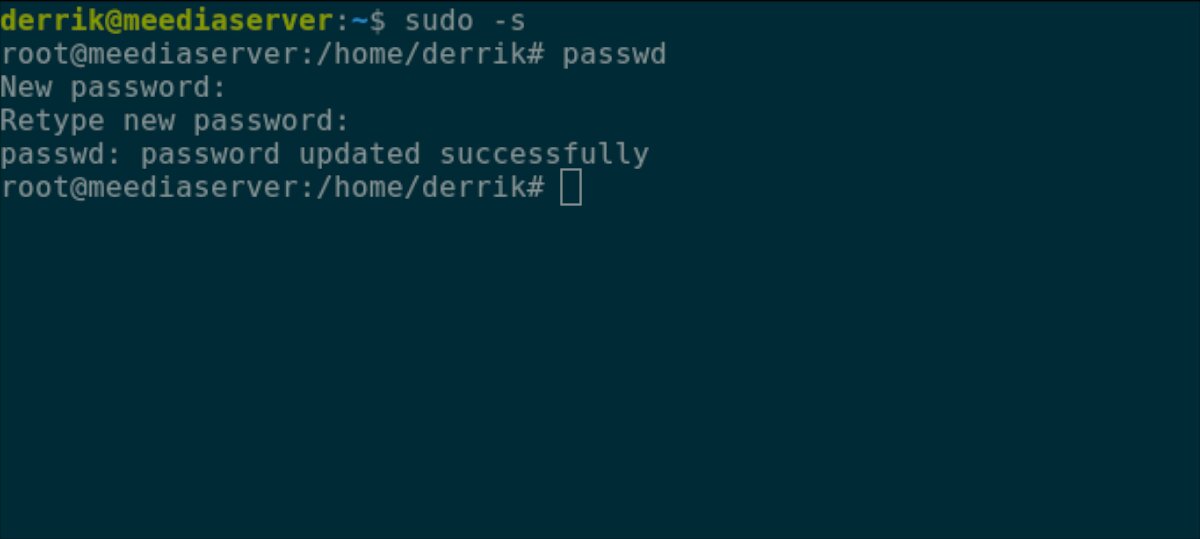
if you wish to set up the root password on your Ubuntu Server system, start by gaining a root shell using sudo -s.

sudo -s
Now that you have a root shell, you’ll be able to set the root password for Ubuntu Server. Using the passwd command, tell Ubuntu you are giving the root account a new password. Make sure that the root password is memorable and secure.
Note: if you need help generating a password, try out the StrongPasswordGenerator.
passwd
With the root password correctly configured on Ubuntu, you can now access the Webmin web UI. Open up your favorite web browser, enter “root” into the username box, and the root password in the “password” box.
http://YOUR_UBUNTU_SERVER_IP_ADDRESS_OR_HOSTNAME:10000
Installing the PostgreSQL packages through Webmin
PostgreSQL packages must be installed on Ubuntu Server before the PostgreSQL Webmin module is accessible. To install the package on your Ubuntu Server, follow the step-by-step instructions below.
Step 1: Access the Webmin web UI interface. Then, click on the menu button in the left-hand sidebar.
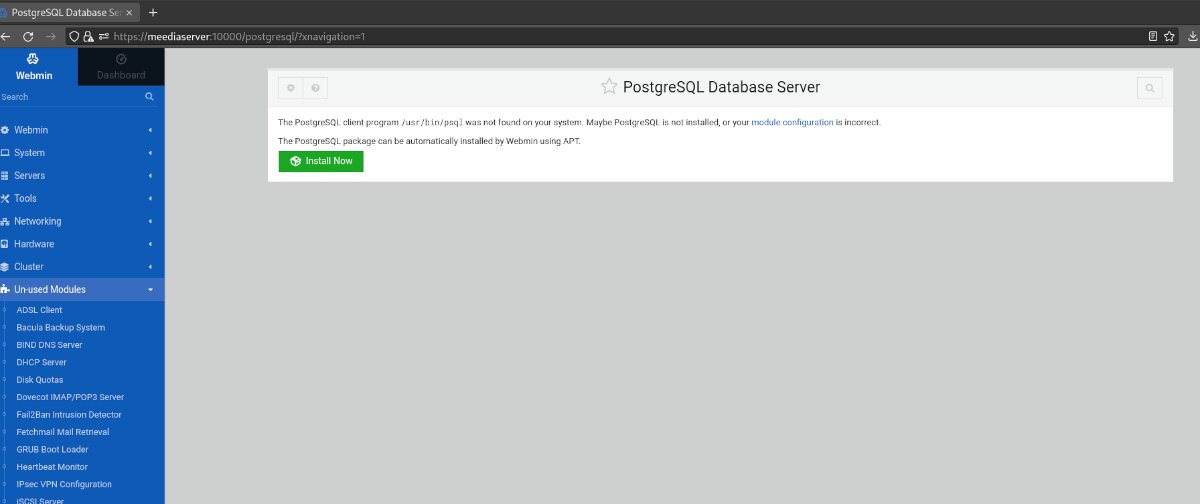
Step 2: Once inside of the sidebar, find the “Un-used Modules” section, and click on the down arrow icon to reveal its menu items.
Step 3: Find “PostgreSQL Database Server” in the “Un-used Modules” section and click on it with the mouse. Selecting this will show you the PostgreSQL module section in Webmin.
Step 4: Find the green “Install Now” button inside of Webmin, and click on it with the mouse to tell Webmin you wish to install the PostgreSQL packages to Ubuntu.

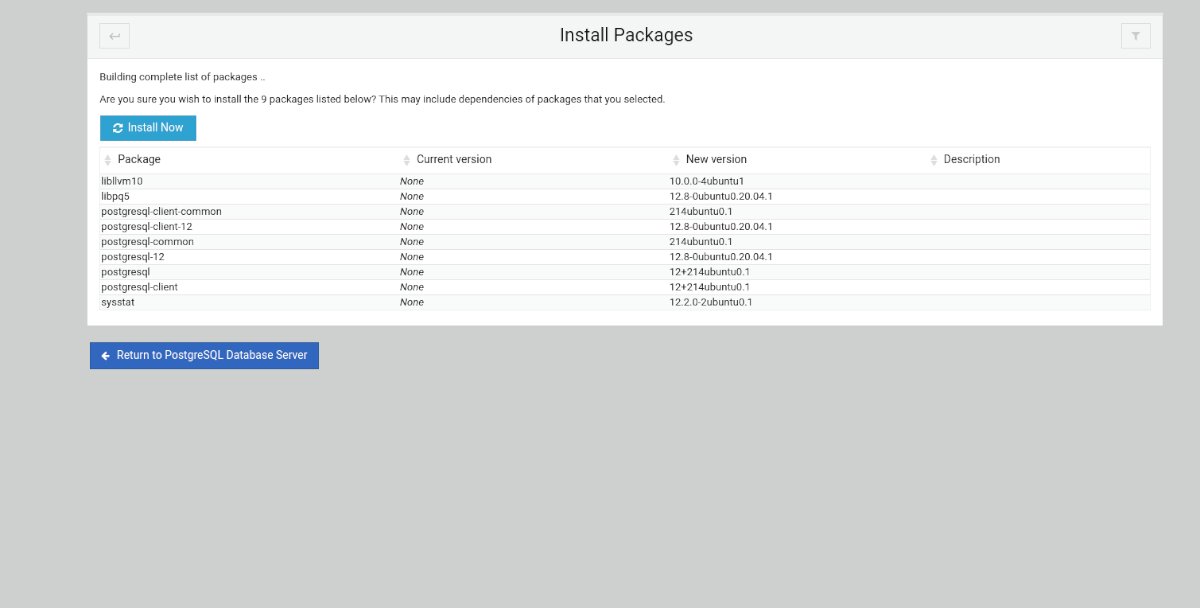
Step 5: After selecting the green “Install Now” button, a blue “Install Button” will appear. Select it to confirm you wish to install the PostgreSQL packages to your Ubuntu system with Webmin.

Step 6: Find the “Refresh Modules” button at the bottom of the Webmin sidebar and click on it to refresh modules.
Configuring your PostgreSQL Database in Webmin
The default settings for PostgreSQL in Webmin should suffice for most beginners. That being said, if you’re not new to PostgreSQL and want to configure your database settings, here’s how you can.
Step 1: Find the Webmin sidebar on the left and click on it with the mouse. You’ll then load up the PostgreSQL Database Server configuration area.
Step 2: Find the gear icon at the top-left corner of the page, and click on it to access the PostgreSQL module settings.
Step 3: After configuring the module settings, make your way to “User, Groups, and Permissions” to change settings related to the PostgreSQL Database Server.
Creating a new database in Webmin
Do the following if you wish to create a new PostgreSQL database in Webmin on your Ubuntu Server.
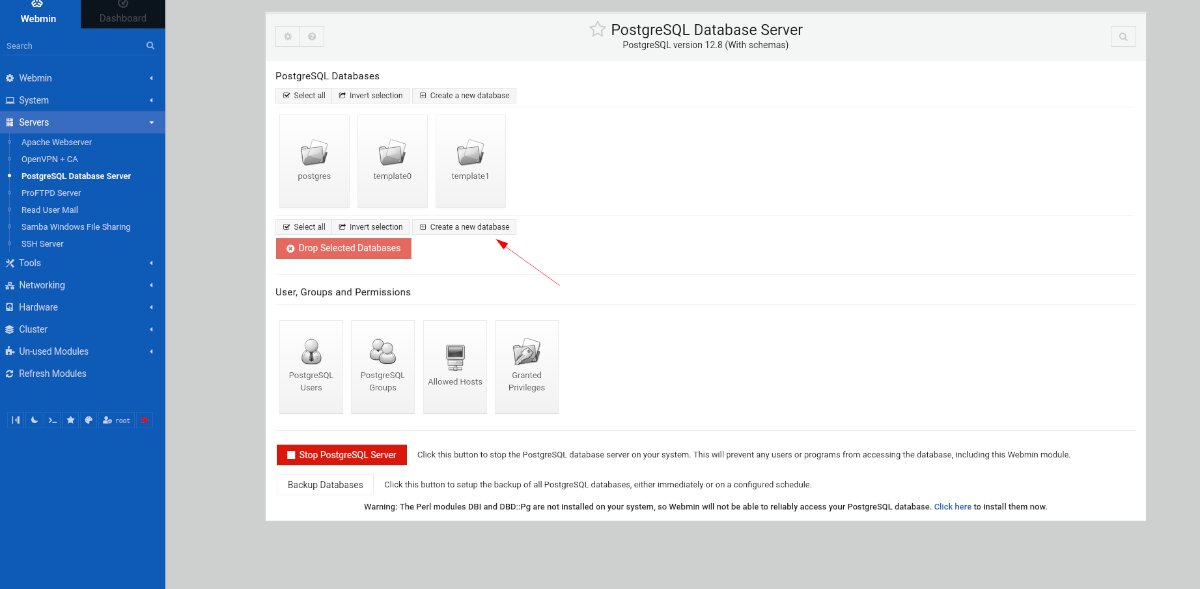
Step 1: Access the PostgreSQL Database area in Webmin by selecting it under “Server” in the Webmin sidebar.
Step 2: Find the “Create a new database” button in the PostgreSQL Webmin area, and click on it with the mouse.

Step 3: In the “Database name” box, enter your PostgreSQL database name. Then, set your custom settings, and click on the green “Create” button to create the new database.


