Endeavour OS is a rolling Linux operating system based upon Arch Linux. The project is a successor to Antergos, and it aims to provide an easy way to set up Arch Linux with a slick graphical UI. Here’s how you can get Endeavour OS working on your computer.
Note: to install Endeavour OS, you must have a computer with at least 1 GB of RAM and a USB flash drive with at least 1 GB of storage space.
Downloading Endeavour OS
Endeavour OS is available on the official website, and users can download it in ISO format. To download your copy of Endeavour OS, start by heading over to the official website.
Once you’ve made it to the Endeavour OS official website, locate the “Download & Help” button and click on it with the mouse. After selecting this button, you’ll be taken to the “Download & Help” page. From here, click on the “Latest release” button with the mouse to get your hands on the latest release.
The latest release of Endeavour OS is relatively small and comes in under a gigabyte. So sit back and wait for the ISO file to finish downloading. When the process is complete, move on to the next section of the guide.
Creating Endeavour OS install USB
Like all Linux operating systems, Endeavour OS comes in ISO format. The ISO format needs to be flashed to a USB drive to be installed on your computer. So, we must demonstrate how to set up Endeavour OS on a USB.
To start, you’ll need to download the Etcher application. Etcher is a program that works on all operating systems and is easy to use. Head over to Etcher.io and download it to your computer. Then, install it, launch it and follow the step-by-step instructions below.
Step 1: Find the “Flash from file” button, and select it with the mouse. After selecting this button, a pop-up window will appear on the screen. Using the mouse, browse for the Endeavour OS ISO file and click on it.
Step 2: Insert your USB flash drive into the USB port. After that, click on the “Select target” button with the mouse. Then, using the Etcher menu, select your USB flash drive. Selecting your USB drive as the target tells Etcher to flash Endeavour OS to it.
Step 3: Find the “Flash!” button inside of the Etcher tool and click on it with the mouse. The Etcher tool will begin flashing the Endeavour OS ISO file to your USB upon selecting this button. This process will take some time. When it is complete, close Etcher.
After closing the Etcher application, reboot your PC into the BIOS. Then, inside of your computer’s BIOS, configure it to boot from USB. If you cannot figure out how to configure booting from USB, consult with your computer’s official manual.
Installing Endeavour OS
To install Endeavour OS on your computer, start up the USB installer. Then, follow the step-by-step instructions down below.
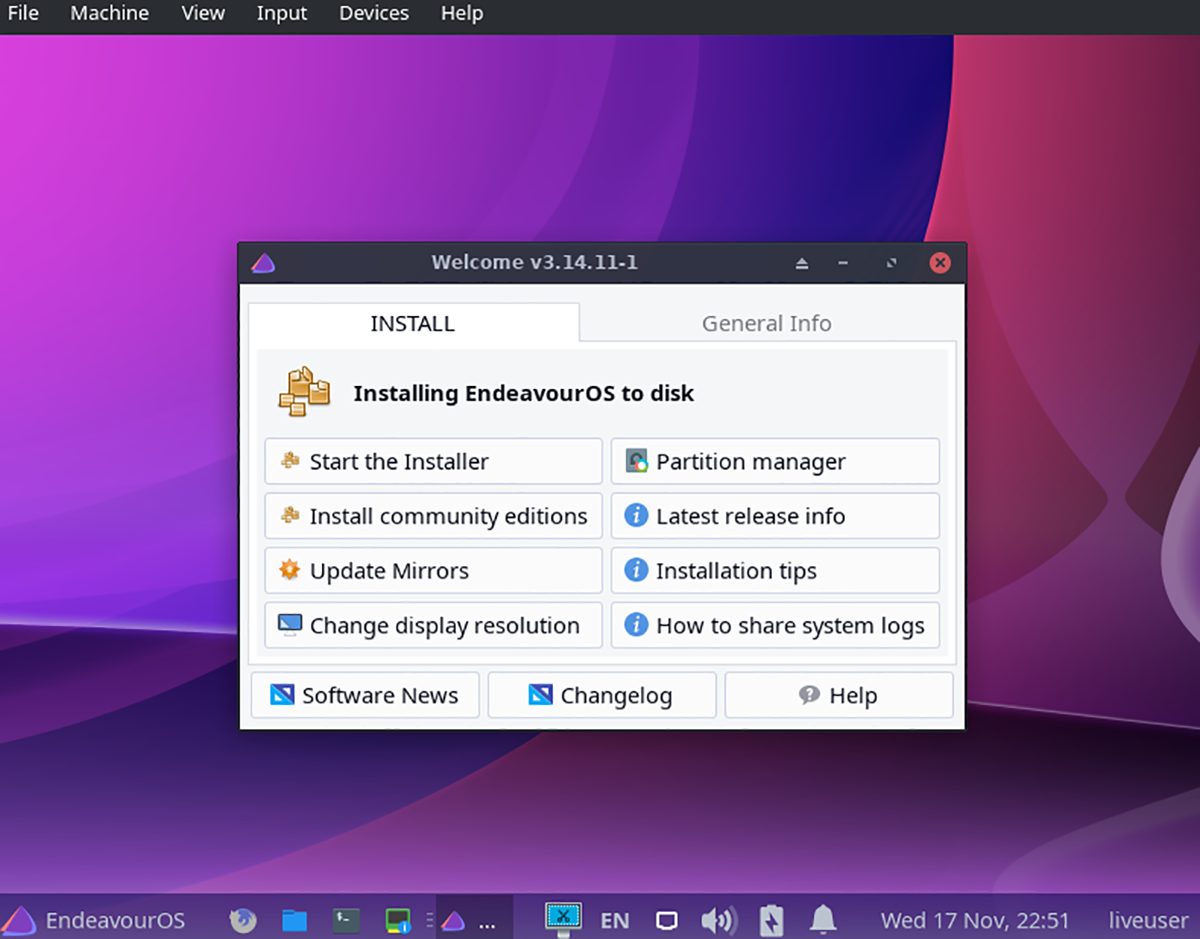
Step 1: In the Endeavour OS installer, you will see a “Welcome” screen with an “INSTALL” page. Find the “Start the Installer” button to open up the Endeavour OS installation tool.
Step 2: Upon clicking on the “Start the Installer” button, you’ll see a message asking to choose from either “Online” or “Offline” installation. Choose Online, unless you do not have an internet connection.

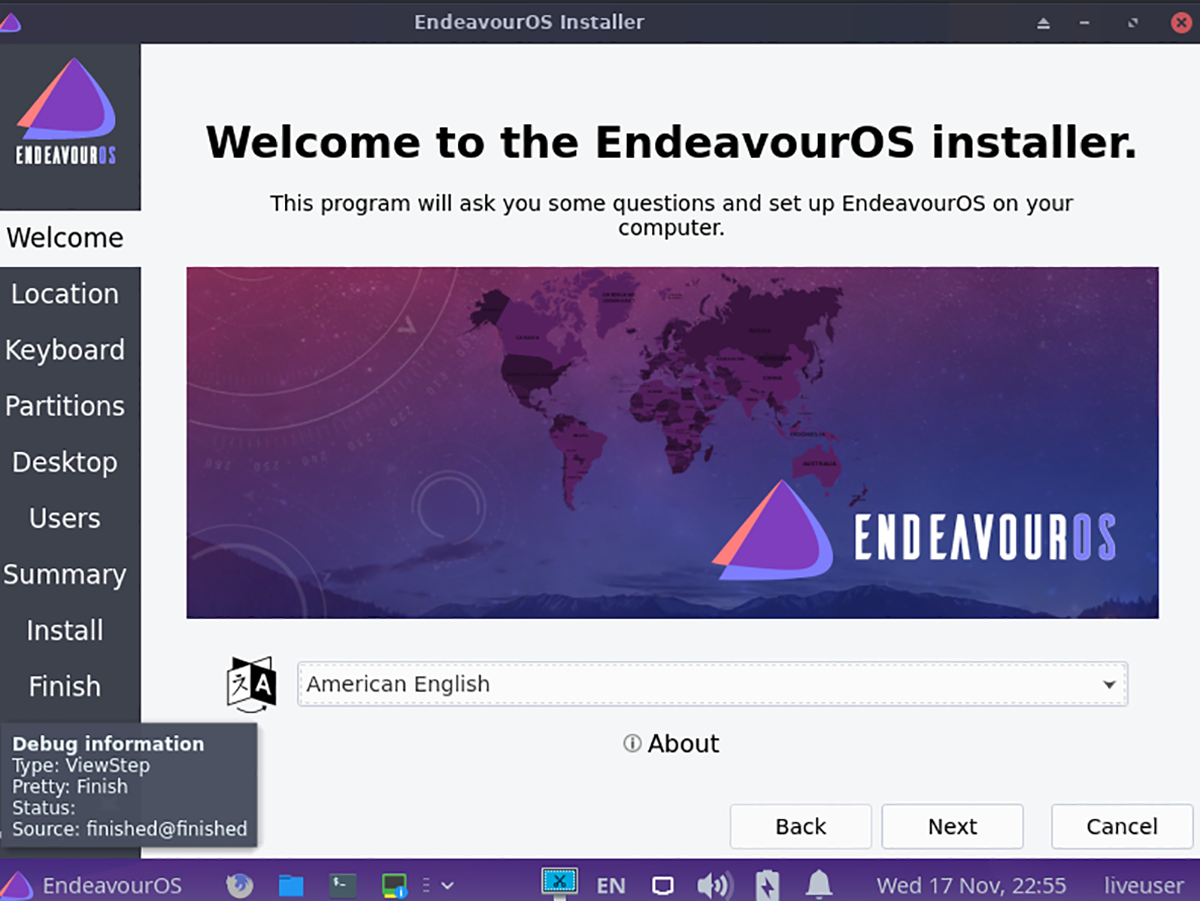
Step 3: Upon selecting your “Online” or “Offline” choice, you’ll see the “Welcome to the EndeavourOS installer.” Select your language. Then, choose the “Next” button to move on to the next page in the installer.
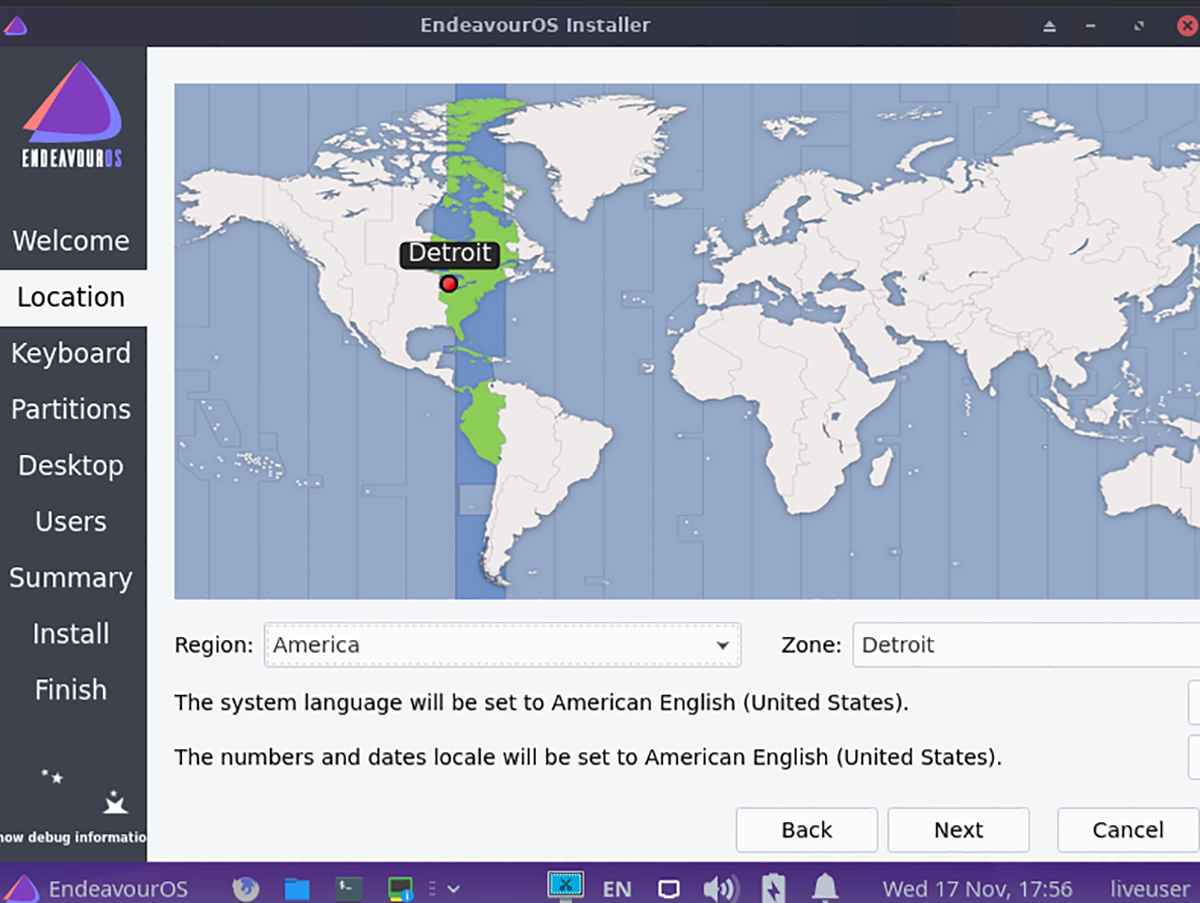
Step 4: Look at the map presented to you in the installer. Then, choose where you live by clicking on the area with the mouse. When you select where you live, Endeavour OS will set the correct timezone.
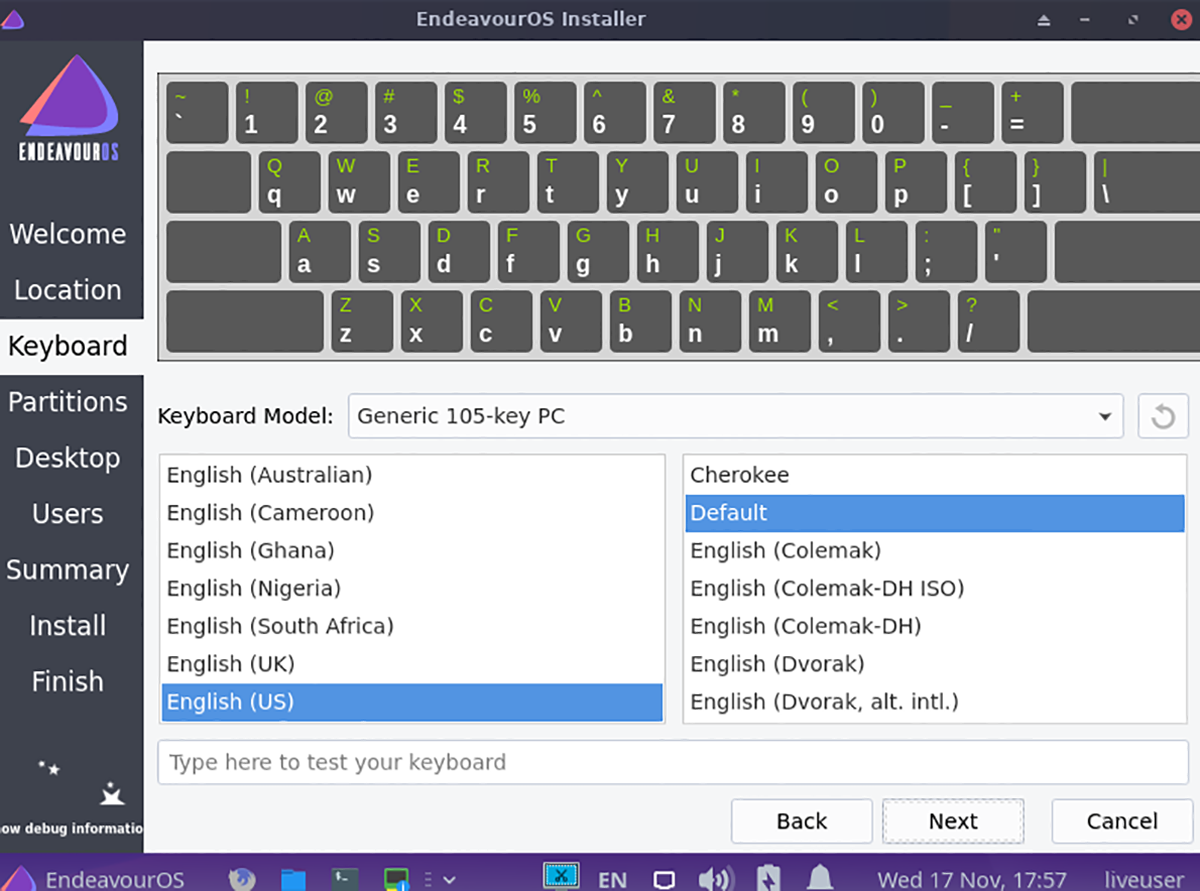
Step 5: After choosing your timezone, you’ll have to select your preferred keyboard layout. Look through the list of keyboard layout choices and click on the one you prefer. When you’ve settled on a keyboard layout, click on the “Next” button to move on to the next page.
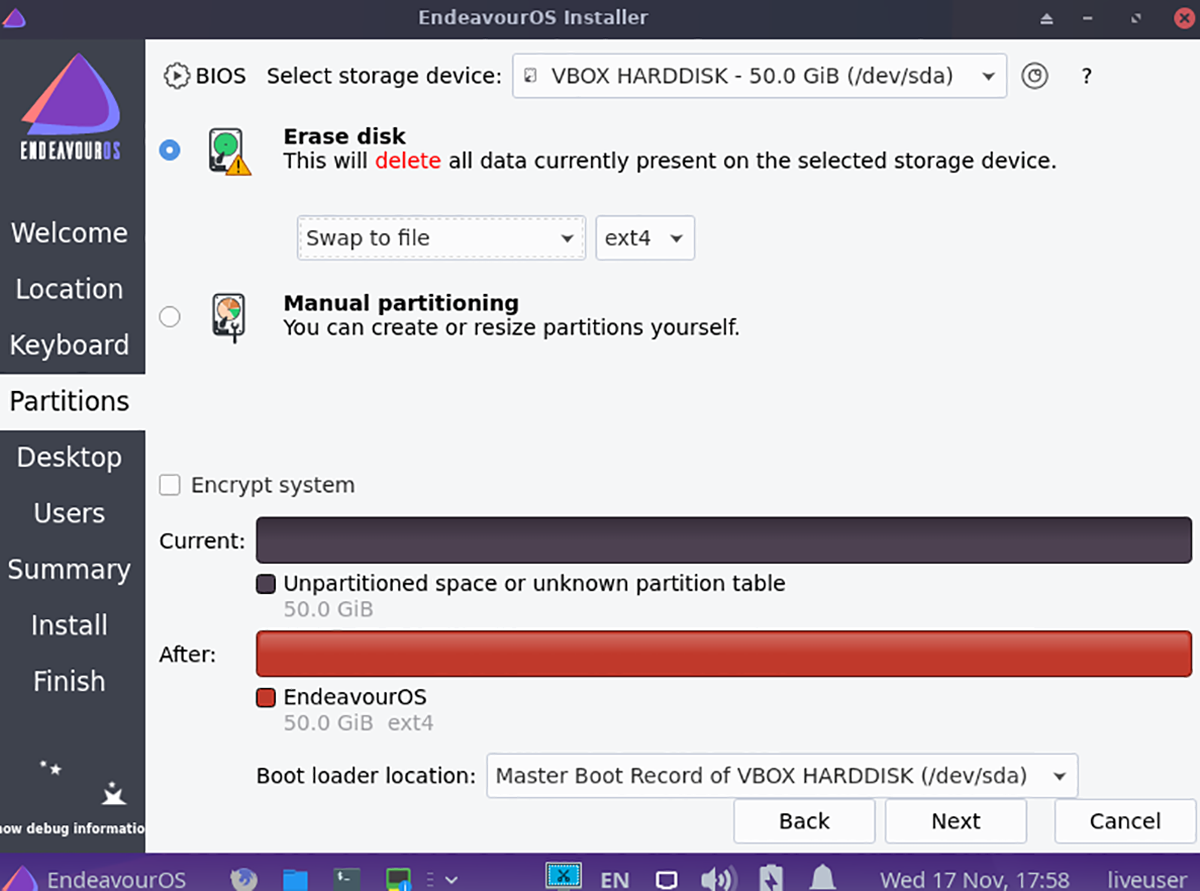
Step 6: You must choose an installation method. Select the hard drive you wish to install Endeavour OS on. Then, select your partitioning method. For best results, we recommend clicking on the “Erase disk” option.
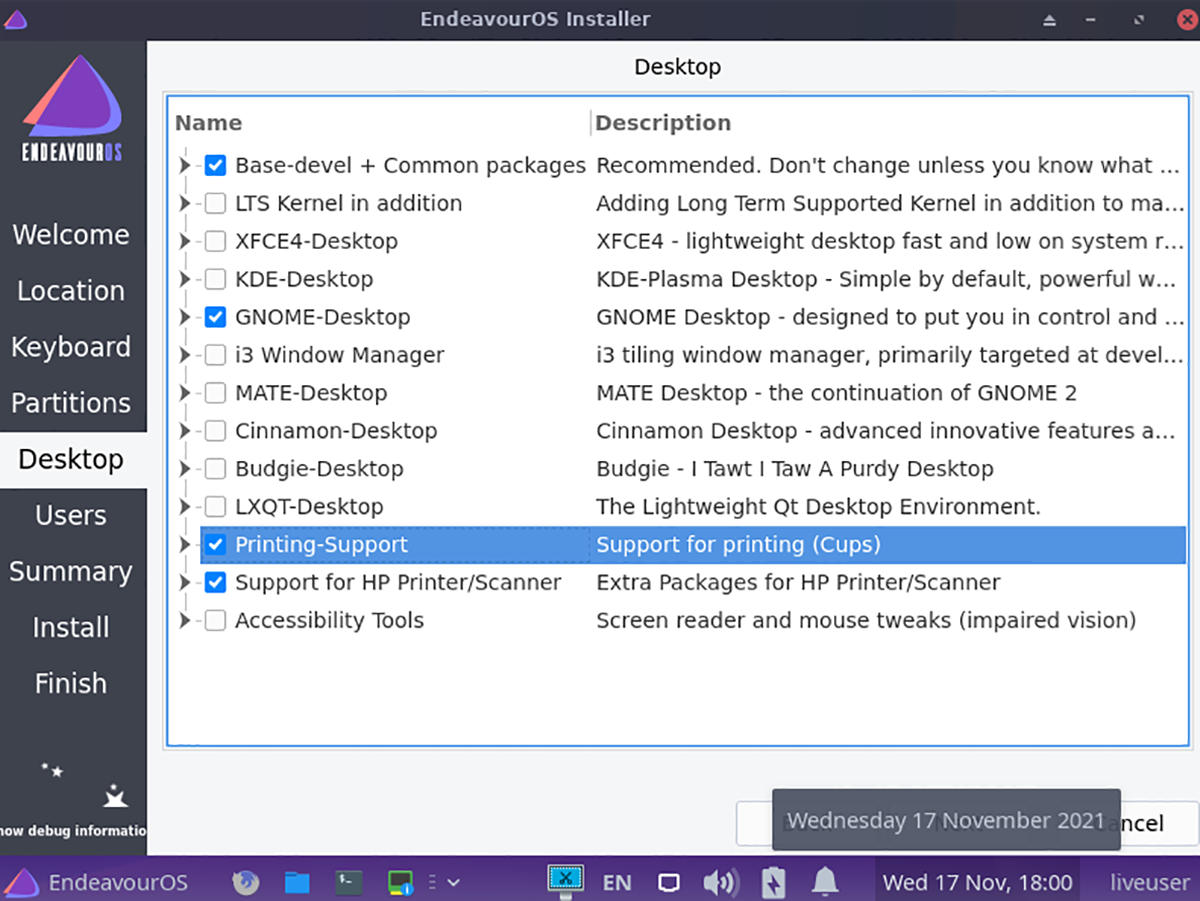
Step 7: After choosing your hard drive and partitioning layout, you must select your desktop environment. There is XFCE 4, KDE Plasma, Gnome Shell, Mate, i3, Cinnamon, Budgie, and LXQT.
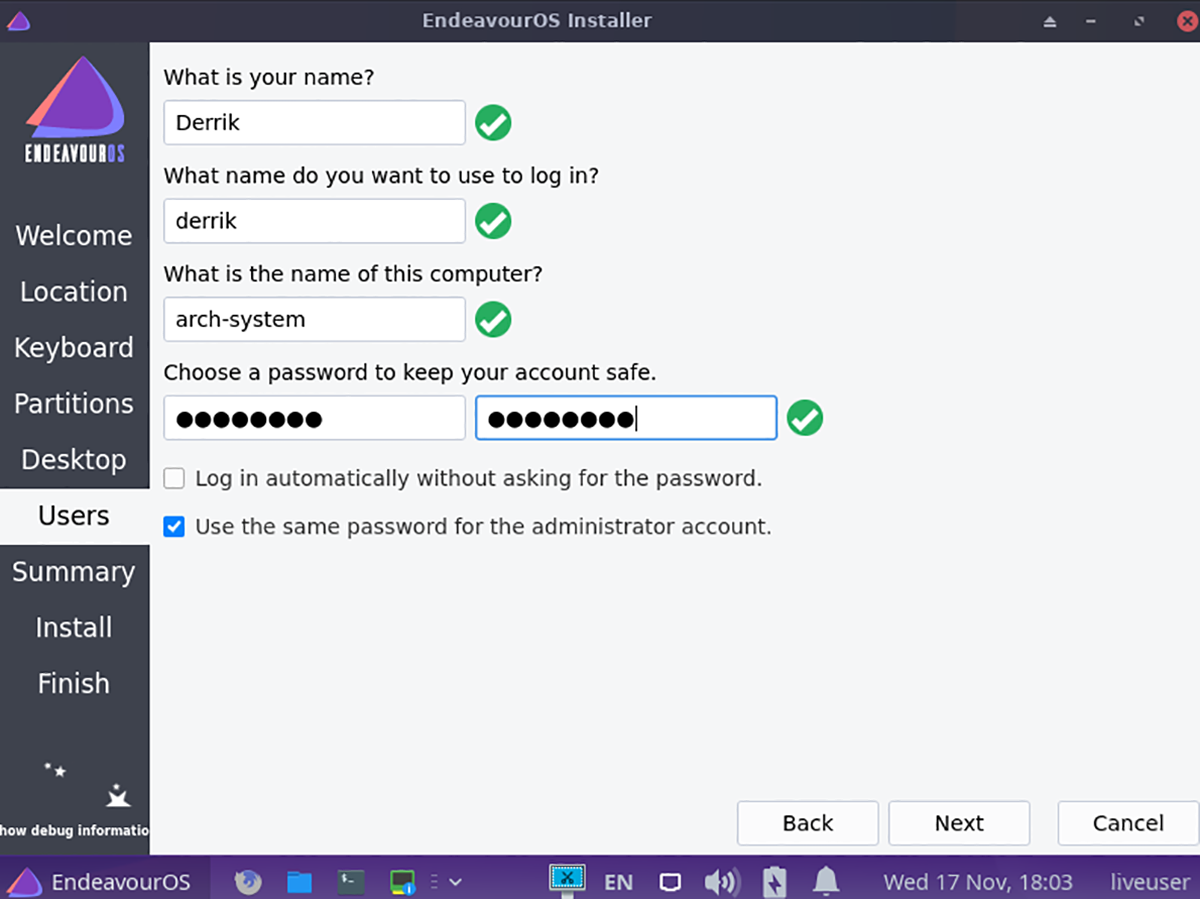
Step 8: Upon choosing your preferred desktop, you’ll have to set up your username, computer name, and password. Using the text boxes provided in the installer, set everything up. Click “Next” when done.
After selecting “Next,” Endeavour OS will show an overview. Find the “Install” button and click on it to start the installation. When the installation is done, reboot and log into your new Endeavour OS system!