If you’re a diehard open source advocate, you’ve probably got a huge list of why you dislike Android. And you’ve probably tried for years to find a good, open alternative. Sadly, projects like Ubuntu touch, Firefox OS and Sailfish have failed, or stalled. If you’re still hoping for an opensource, Linux based Android OS, KDE Plasma mobile is a good option. It’s a forked version of Ubuntu touch that brings a KDE mobile OS to the Nexus 5 and 5X! It promises to bring a full, Linux experience to mobile. Here’s how you can install KDE Plasma Mobile Linux On Nexus 5 and 5X.
Installing Android Tools
To interact with any Android device you need Android development tools. Some Linux distributions package these tools directly, for easy access, and some don’t. Installing Plasma Mobile to the Nexus 5 and 5X only requires Fastboot and ADB, and not the entire Android development environment. You can also download ADB and Fastboot tools directly from Google.
Here’s how to get these tools on your version of Linux.
Ubuntu
sudo apt install android-tools-adb git android-tools-fastboot
Arch Linux
sudo pacman -S android-tools git
Debian
sudo apt-get install android-tools-adb android-tools-fastboot git
Fedora, Open SUSE and Other Linuxes
Fedora OpenSUSE, and many other Linux distributions out there do not carry installable binaries for the Android Debug Bridge, or the Fastboot tool. This is a shame, but predictable, as Google’s operating system comes with many strings attached, and because of that, some choose not to distribute development tools out of the box.
Not to worry! There are standalone binaries to download that work just fine!
First, download both ADB and Fastboot from these download links.

Along with downloading these binaries, be sure to install the Git package with your Linux OS’s package manager
Then, open a terminal and do the following commands to place the Android device tools in your Linux PC’s path.
sudo cd ~/Downloads
Note: your Download directory may be different.
Inside of the downloads directory, list all the files with the ls command.
ls
Look for “fastboot” and “adb”. Then, use the Chmod command to change the permissions of these files. This is crucial, as it makes both ADB and Fastboot executable.
sudo chmod +x fastboot sudo chmod +x adb
Then, using the mv command, place both binaries in the /usr/bin/ directory. This makes it so that both Fastboot and ADB can be called like any other tool in the terminal.
sudo mv ~/Downloads/adb /usr/bin sudo mv ~/Downloads/fastboot /usr/bin
Unlocking The Bootloader
Your device’s bootloader needs to be unlocked before you can flash custom firmware. Here’s how to do it. Instructions for both the Nexus 5 and 5X are pretty much identical.
Step 1: Plug in your Android device to the PC via the USB cable. Be sure to use the original cable it came with for best results.
Step 2: Navigate to settings, and look for “about phone”. Can’t find it? In Android 6 and later, users can use the search button. Type “about phone”. In the about phone area, look for “Build Number”. Tap the build number rapidly till you get a notification saying “you are now a developer!”
Step 3: Go back to the main settings area. In the search box, type “USB debugging”. Click the slider to enable it. If on an earlier version of Android that doesn’t have search, you can find this option in developer settings.
Step 4: Go back to developer options. The Nexus 5X has bootloader setting that must be enabled for the boot to be fully unlocked. Search for “allow OEM unlocking” and check the box.
Step 5: Open a terminal and type:
sudo -s adb start-server
Then, unlock your 5/5X and accept the USB debugging prompt on your device. Check the checkbox to “always allow from this computer” if you don’t want to manually accept USB debugging.
Run the devices check to see if the adb server is working, with:
adb devices
Then, reboot into the bootloader.
adb reboot bootloader
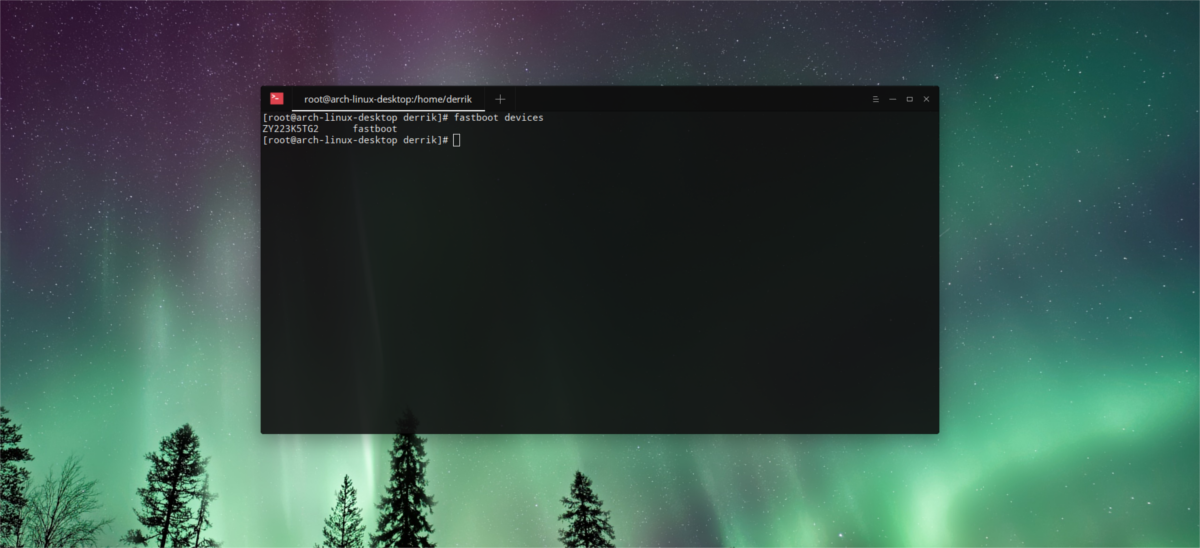
Step 6: The device is in download mode. Time to start the install process. First, run the fastboot command to check and see if the device is still connected correctly.

fastboot devices
If everything is working correctly, you’ll see the phone’s serial number in the Terminal.
Unlock the bootloader with:
fastboot oem unlock
As you run this command, you’ll need to open your phone and accept the agreement. Use the volume up/down keys to navigate, and the power button to accept.
Installing Plasma Mobile
The device is unlocked and everything is ready. Time to get the latest version of KDE Plasma Mobile on your Nexus 5/5x. Using the same root terminal, do:
fastboot format cache
This will clear the device’s cache partition. This is crucial, otherwise the OS will fail. Then, clear the user data partition.
fastboot format userdat
With the required partitions formatted, it’s time to install the OS. Clone the latest source code to your PC.

git clone https://github.com/plasma-phone-packaging/pm-flashtool.git
Enter the source directory with the cd command:
cd pm-flashtool
Lastly, start the flashing process.
./pm-flash -p neon
This process (including the first boot) may take a little bit of time. Be patient. Do not turn off your device. No, it’s not broken, just keep in mind that installing a new firmware to an Android device — especially one based on Linux takes time.
Conclusion
Linux users pretty much have one choice in smartphones: Android. For most die hard open source fans, this is disappointing, as every day Google closes the platform further. For a while, it had seemed that all viable alternatives to Android in the open source community had died off. That is, till Plasma mobile appeared. If you’re looking for a viable alternative operating system to Android, this may be your last chance. Eager to switch over? Go pick up a Nexus 5 or 5X today and take it for a spin.


