MS Word has a neat feature called ‘Quick Parts’. Quick parts let you insert items like the author’s name or other document attributes inside the document itself. On the surface of it, the feature seems like something you use to enter just that; document attributes. That’s not true. You can use Quick Parts to insert just about anything in a document. You can create custom quick parts in MS Word and use them in any document you want. For example, if you repeatedly have to create a 2×2 table, you can add it to Quick Parts and enter it easily.
Create Custom Quick Part
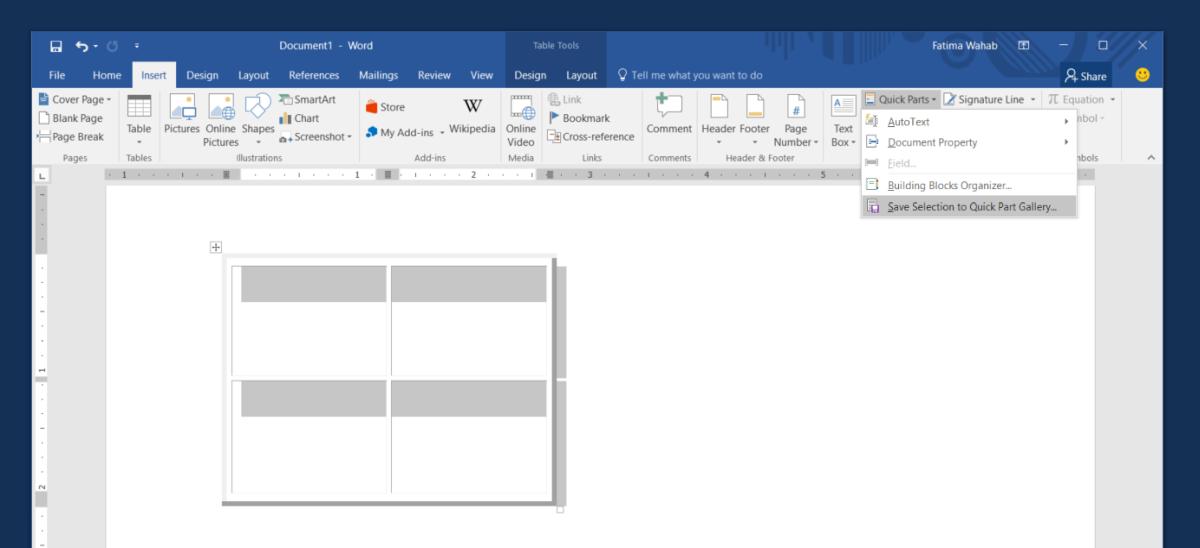
To create custom quick parts in MS Word, you need to first insert the item in your document. For example, if you want to turn a table into a quick part, insert it. Customize it any way you want. The quick part will copy it down to the T. Apply a theme and/or style to it. When you’re done, go to the Insert tab on the ribbon.
Click the Quick Parts button and select ‘Save Selection to Quick Part Gallery…’.
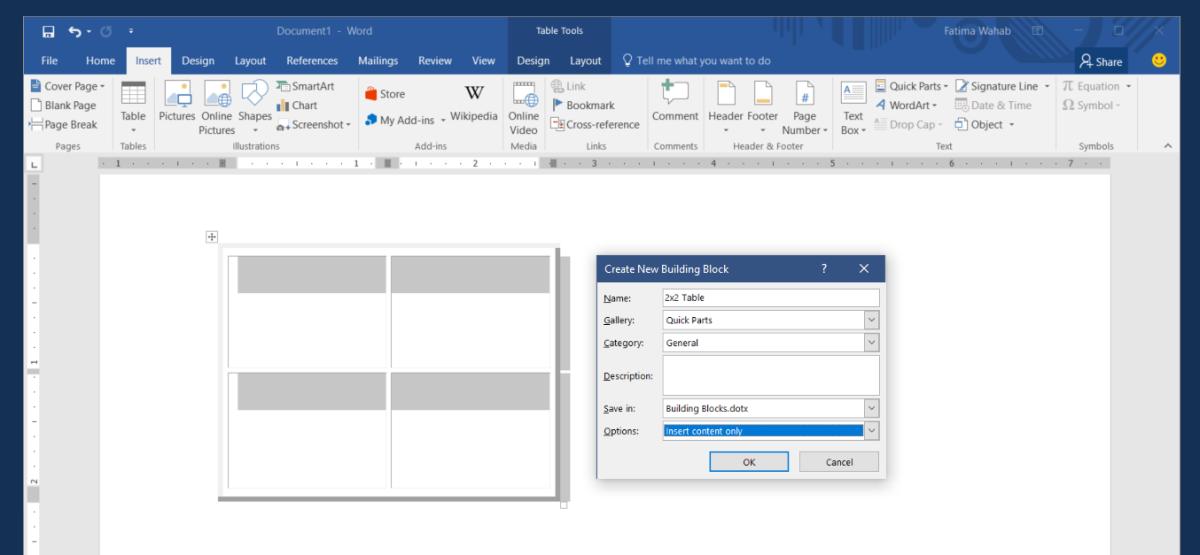
Next, enter a name for your custom quick part. If you plan on creating a lot of custom quick parts in MS Word, you can even categorize them. You can create and name categories and then sort the quick parts to them accordingly.
It’s worth mentioning that you can include any content in your quick part as well. For example, you can create a quick part of a 2×2 table, or you can name cells in the table and save the table with the content in it as a quick part. The process is the same. You just have to enter the content before you go to save it as a quick part.
Insert Custom Quick Parts
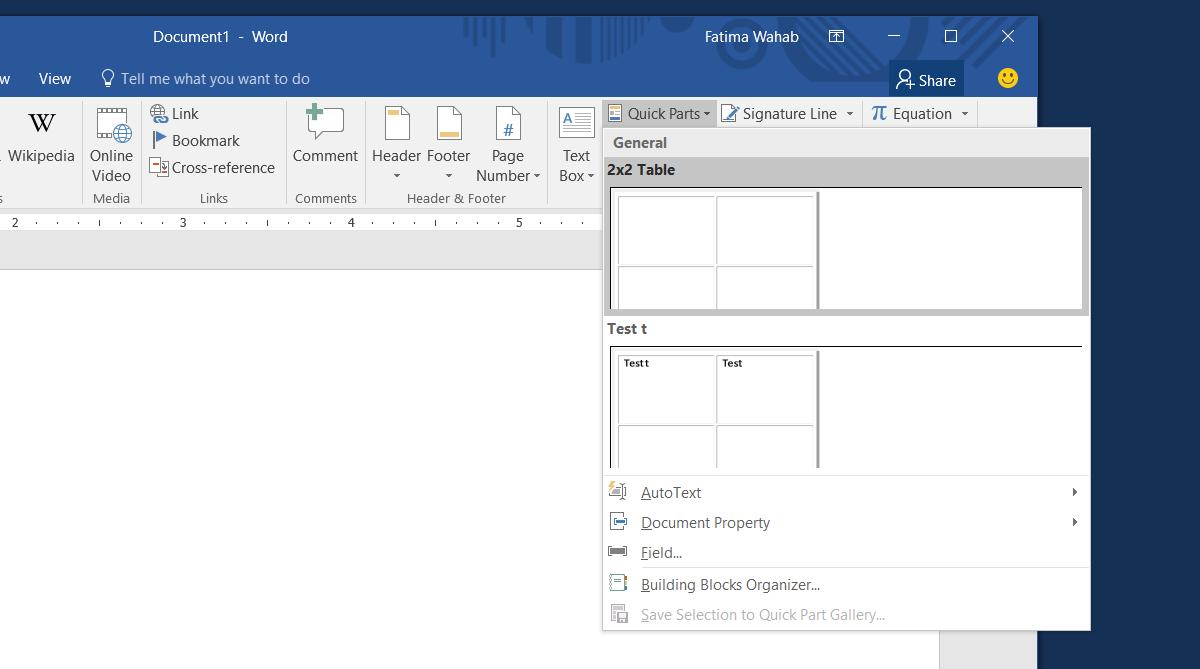
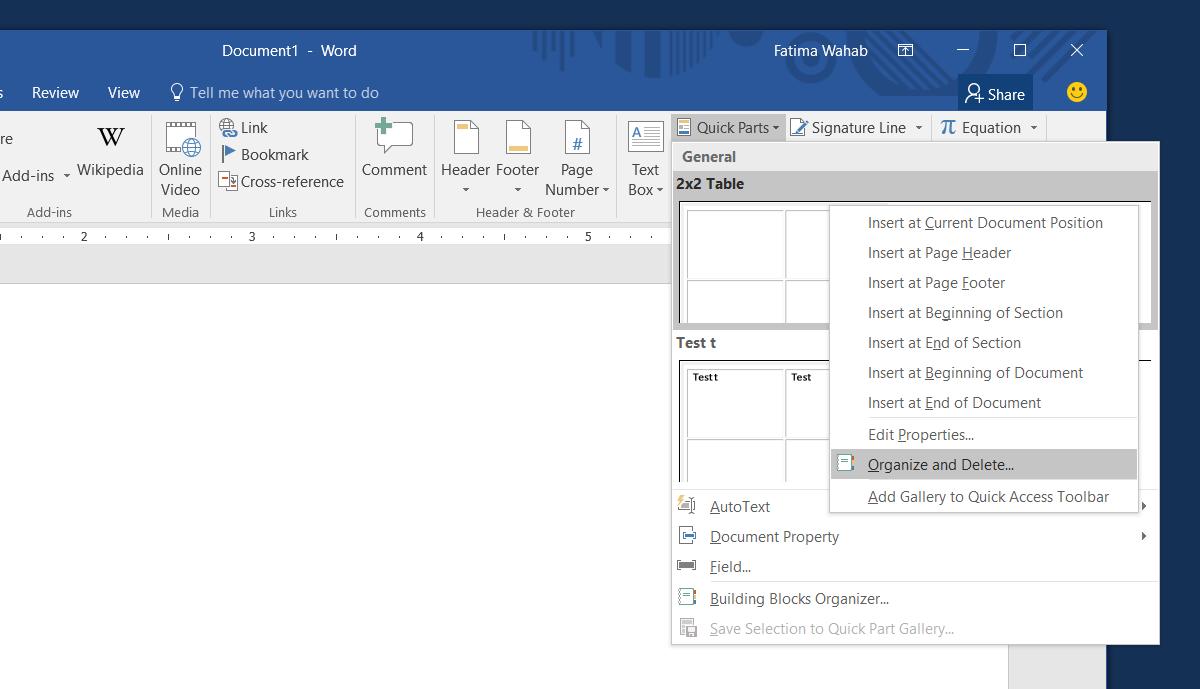
When you create custom quick parts in MS Word, they’re added to the gallery. These items appear inside the dropdown window when you click the Quick Parts button on the Insert tab. They’re named whatever name you gave them and there’s a preview of the item as well. Just click the item you want to insert.
Delete Custom Quick Part
Open the Quick Parts dropdown and right-click the item you want to delete. Select ‘Organize and Delete’ from the context menu. Your custom quick part will be selected in the new window that opens. Click the delete button to remove the item permanently.
That’s all you need to do. You can make things easier by creating a custom keyboard shortcut to access Quick Parts.

