The good folks over at XDA have covered a neat tool that lets you control your Android phone from Windows 10. It’s fairly easy to set up but there are quite a few things that can go wrong even if you follow the instructions exactly. Scrcpy lets you control your Android phone from Windows 10 and it is fairly easy to use but your Android device itself may need a few settings turned on. We have a step-by-step guide that lets you use Scrcpy and offers a few solutions to troubleshoot it if it doesn’t work right off the bat.
This will work on older versions of Windows but adding an environment variable might be a little different than the method for Windows 10. This tool is available for both macOS and Linux but the instructions in this tutorial are only for Windows 10. You can visit the tool’s Github page for instructions for other operating systems.
Requirements
In order to control your Android phone from Windows 10 you need;
- Scrcpy: It’s open source and you can get it from its Github page
- A Windows 10 machine that you have administrative rights on
- An Android phone, no root required
- A USB data cable that lets you connect your phone to your PC
- Developer options enabled on your phone
Set Up Environment Variables
Download the Scrcpy tool and extract it somewhere it’s easy to access. It’s a good idea to extract it to the root of a drive. You don’t necessarily need to extract it to your C drive but that’s what we went with.
Open File Explorer and paste the following in the address bar;
Control Panel\System and Security\System
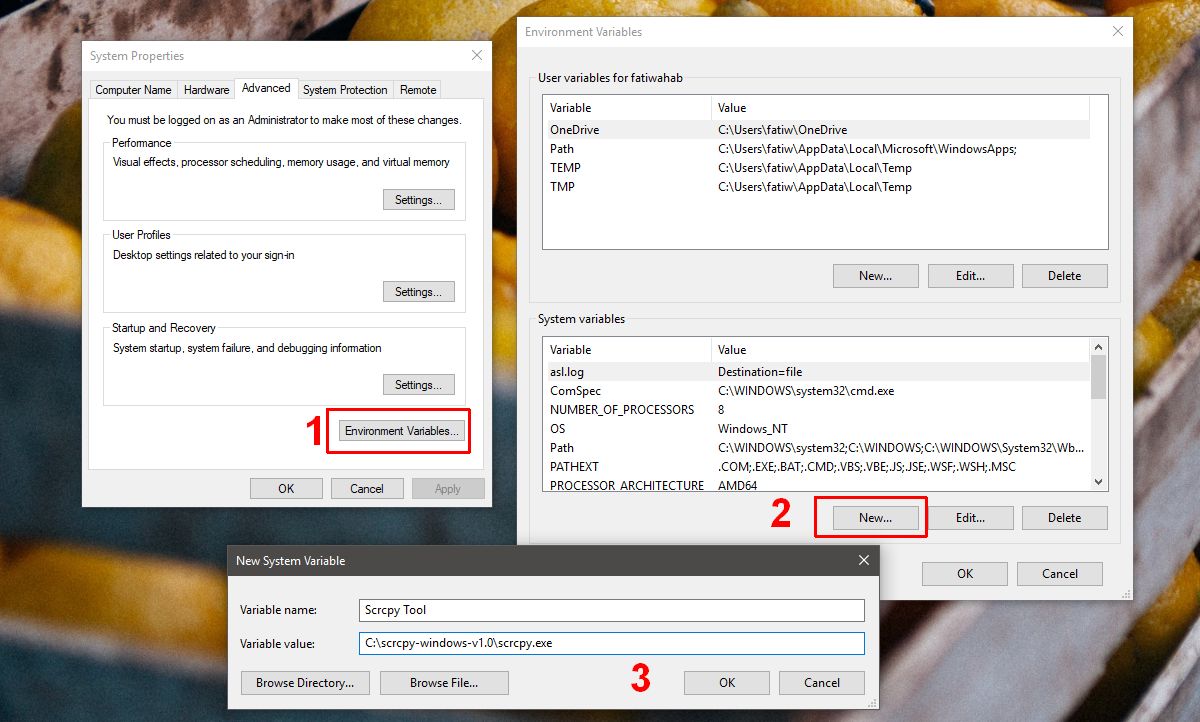
In the window that opens, click Advanced system settings on the left.
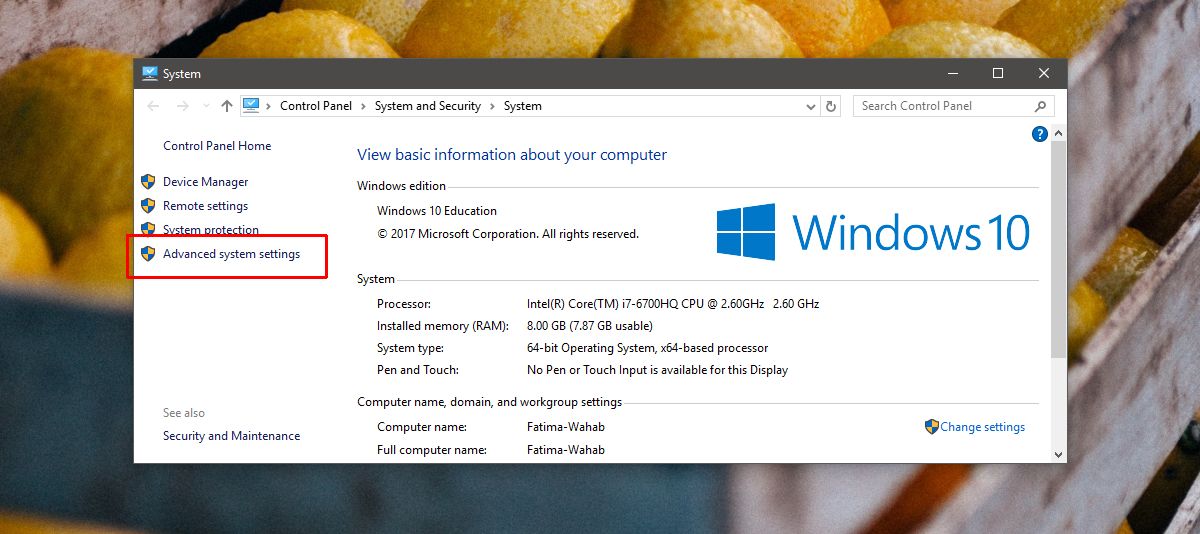
In the window that opens, go to the Advanced tab. Click Environment Variables at the very bottom. On the Environment Variables window, click the New button in the System variables section. In the New System variable window, paste the path to the folder you extracted and append scrcpy.exe to the end. This is the Scrcpy tool and the folder has the EXE file to it inside.
Example:
C:\scrcpy-windows-v1.0\scrcpy.exe
Prep Your Phone
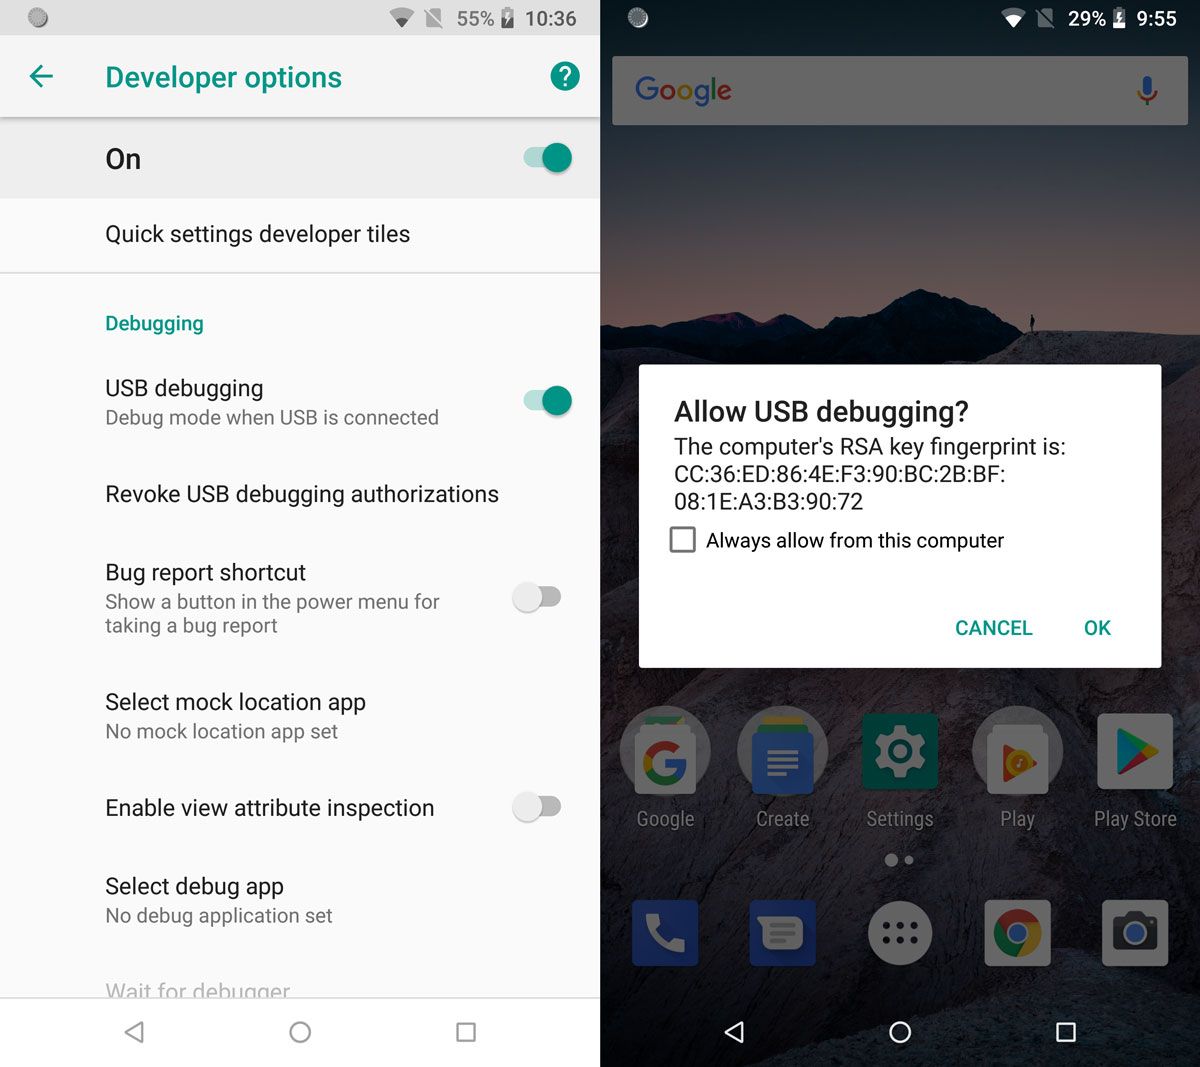
On your Android Phone, open the Settings app and go to Developer settings. Here, look for and enable USB debugging. Connect your phone to your PC. You ought to see a prompt on your phone asking if you want to enable USB debugging. Enable it.
Running Scrcpy
Open Command Prompt with administrative rights. Go to the folder you extracted in earlier steps using the cd command;
Syntax
cd folder path
Example
cd C:\scrcpy-windows-v1.0\
Note: If the folder path contains folders that have a space in them, enclose the entire path within inverted commas.
Run the following command;
adb.exe
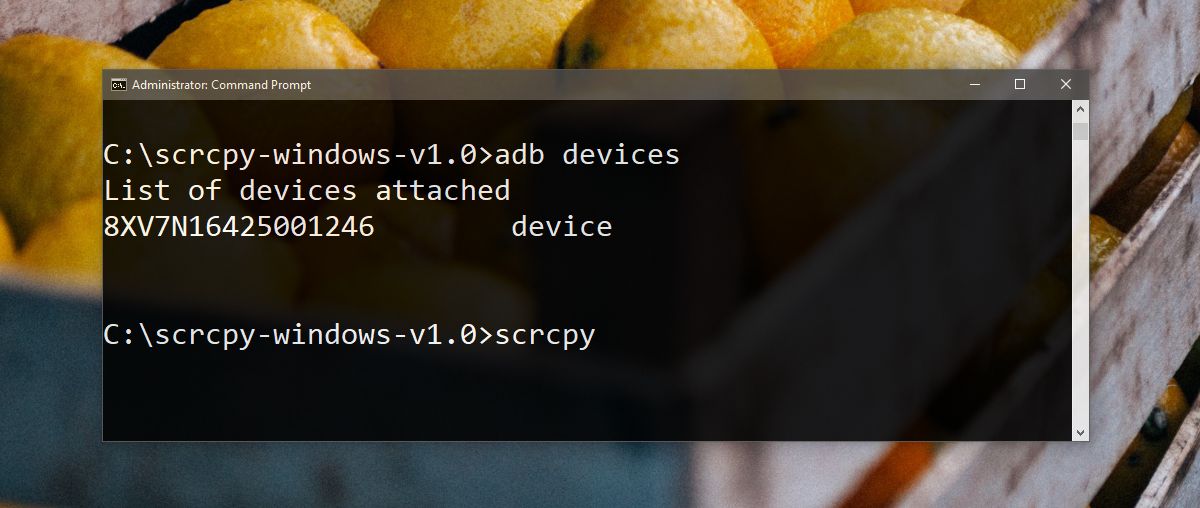
This will run the ADB tool. Next, check if your device is connected with the following command;
adb devices
Your device should appear in the output. You will only see its serial number and whether or not it is authorized. If it isn’t authorized, skip ahead to our troubleshooting section to try a few fixes, and then return to the rest of the turorial.
Assuming your device showed up without any issues, run the following command;
scrcpy
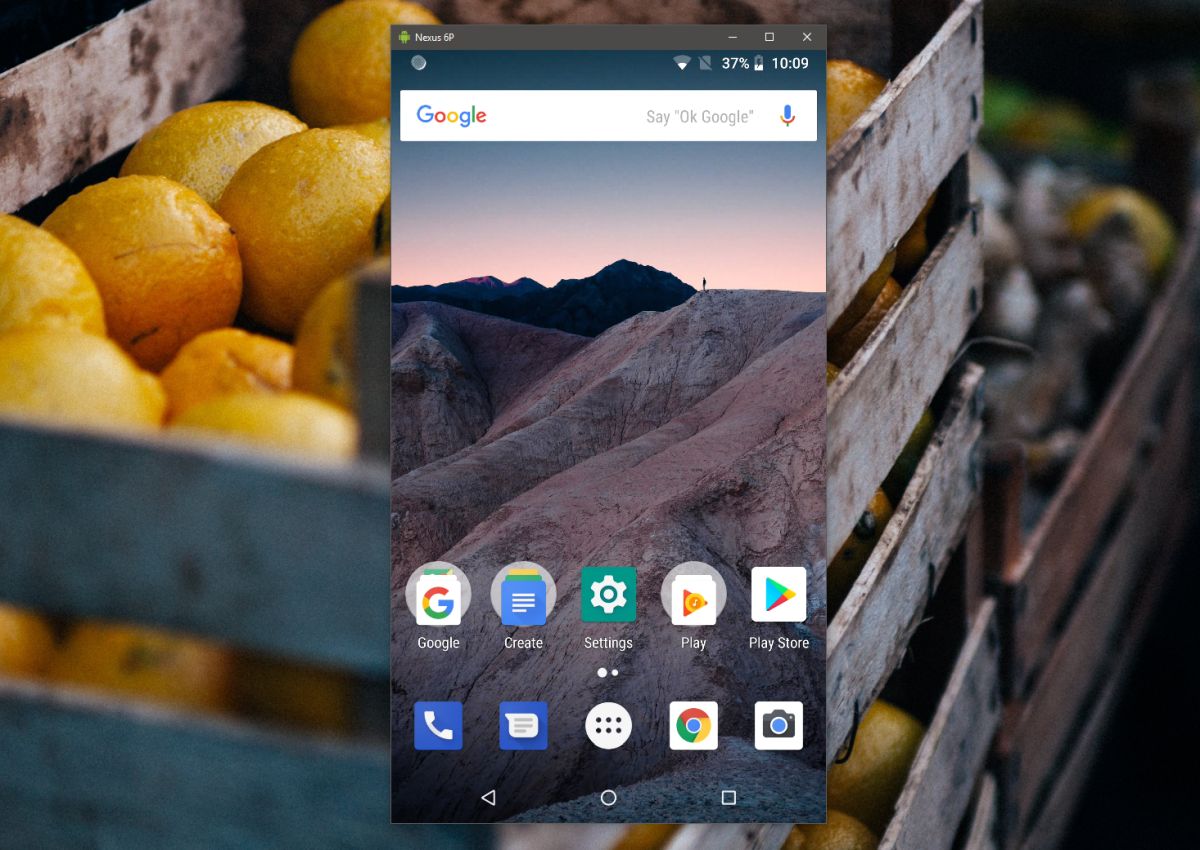
This will open a new window emulating your Android phone. Use your mouse and keyboard to control it.
Troubleshooting ADB Devices
If the above instructions don’t work for you or your Android phone appears as an unauthorized device try the following;
Re-Enable USB Debugging
Disconnect the phone from your PC. Open the Settings app on your Android phone and go to Developer settings. Here, look for an option to revoke all USB debugging authorizations. Toggle USB on/off on your phone. On your desktop, run the following commands in Command Prompt;
adb kill-server
Followed by;
adb start-server
Once done, connect your phone to your PC again, and allow USB debugging when prompted.
USB Transfer Protocol
Pull down the notification shade and tap the Android System USB Connection notification. You may need to select File Transfer mode, or Transfer Photos mode. Try both and see which one works.


