If you use VMware Workstation 16 on Linux and want to know how to export and import VMs, you’ll need to take advantage of the OVF file format. In this guide, we’ll show you how to use VMware to export and import VMs in the OVF format on Linux.
Before we begin
In this guide, we focus on both the export and import feature in VMware Workstation 16. For this reason, you’ll need to have the latest VMware Workstation to follow along with this guide.
If you’re using a later release of VMware on your PC, it’s a good idea to uninstall it and download the latest release. If you’re using Ubuntu Linux as your Host OS for VMware, we’ve got an in-depth guide on how to install VMware Workstation 16 on Ubuntu that you can follow to get the app working.
Exporting VMware Workstation VM as OVF
Exporting VMware VMs to OVF is an excellent feature, as most virtualization tools work with this format. Thanks to the OVF file format (open virtualization format), you can export a VM from your VMware Workstation as a quick backup, or share with colleges and friends, or even upload online.
In the latest VMware Workstation 16, exporting any Virtual Machine is as easy as ever. To start, open up VMware Workstation on your host OS. In this guide, Linux will be the host OS, but this method works on any OS that runs VMware Workstation 16.
With VMWare Workstation 16 open and ready to use, follow the step-by-step instructions below to learn how to export your VMs as OVF files.
Step 1: Look in the “Library” sidebar for the VM you wish to export, and select it with the mouse.
If you do not see a VM in the “Library” sidebar, you’ll need to create a VM first before you attempt to export it. You cannot export a VM to OVF from VMware 16 without having a VM!
Step 2: After selecting your VM in VMware Workstation 16 with the mouse, find the “File” button in the UI, and click on it. When you click on the “File” button, you’ll see a few options to choose from.
In the “File” menu, select the “Export as OVF” button with the mouse.
Step 3: Once you’ve opened up the “Export as OVF” window, use the file browser to browse for where you’d like to save the OVF file. For best results, save it to a place with no other files, so everything is easy to find.
Also, keep in mind that the OVF export saves more than just an OVF file. It’ll also export the VMDK hard disk file (if you use VMDK), as well as an MF file and anything else attached to the VM.
Step 4: The exporting isn’t instantaneous. It will take time. When the export is complete, open up your file manager and save your OVF file, MF file, and VMDK file somewhere safe, such as Dropbox, and external hard drive, etc.
Importing an OVF VMware VM into VMware
If you’re trying to import a previously exported Vmware VM into VMware Workstation 16 with an OVF, you’ll need to use the “Open” feature.
The “Open” feature, when used with an OVF, will cause VMware Workstation to import your exported OVF VM automatically. To do this on your system, follow the step-by-step instructions below.
Step 1: Launch VMWare Workstation 16 on the desktop. Once it is open, find the “File” menu, and click on it to reveal all of its options inside.
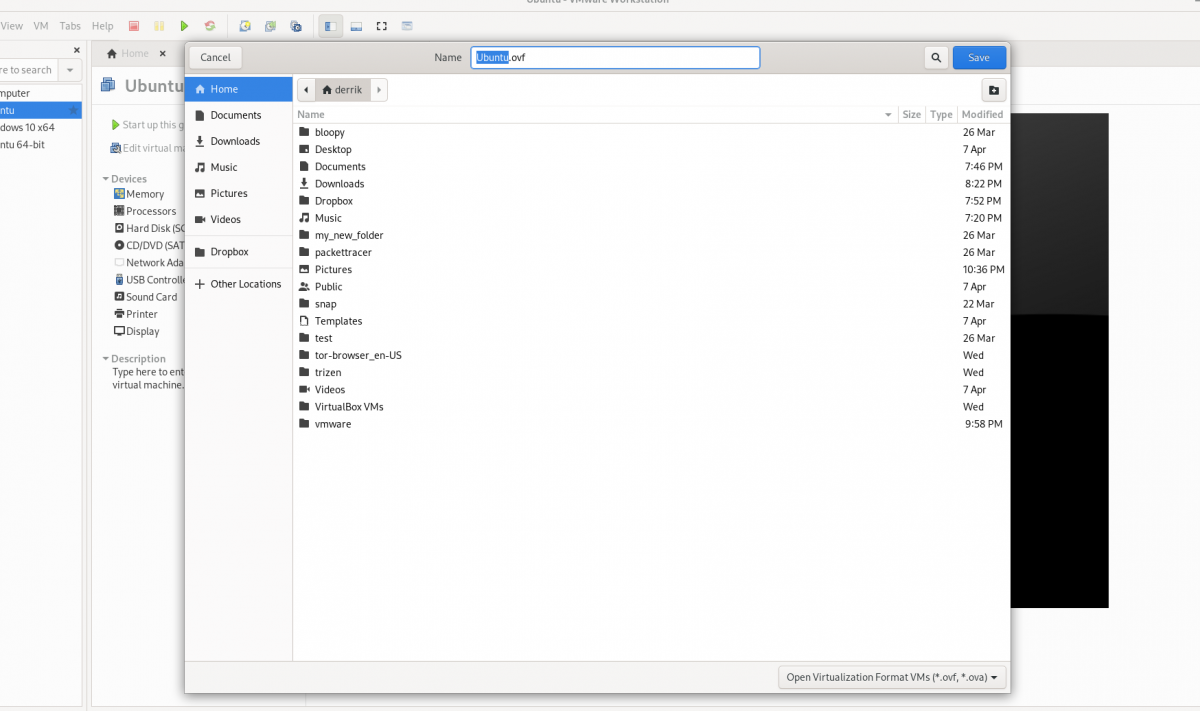
In the “File” menu, find the “Open” button, and click on it to open up the “Open” file browser window.
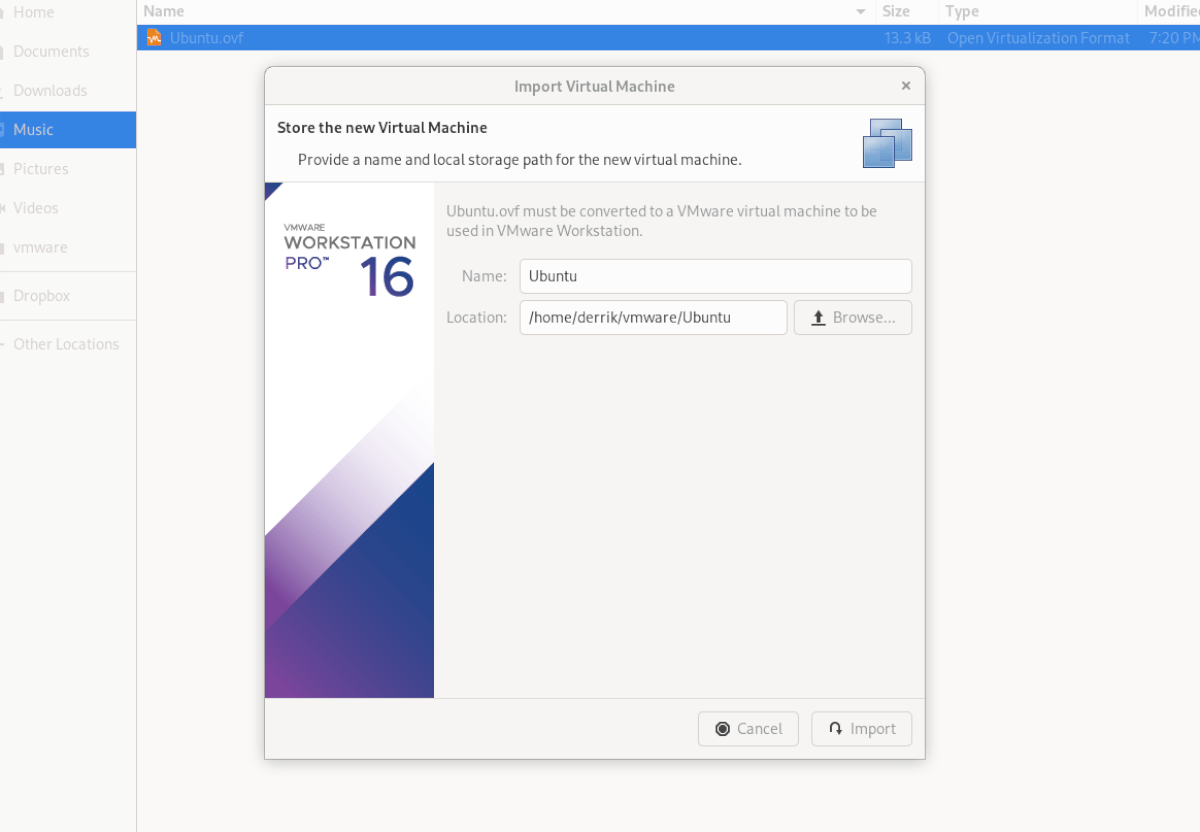
Step 2: Browse for your VM OVF file using the file browser, and select it. When you choose it, the “Import Virtual Machine” window will appear. Select the “Import” button.
Keep in mind, the VMDK file, MF file, and other related VM files must be in the same directory, as VMWare uses the OVF file as an instruction set to create a new VM.
Step 3: Upon selecting the “Import” button, VMware will slowly import your VM to VMware Workstation 16. This process will take some time, especially if your VM has a large hard drive and many files to deal with.
When the process is complete, your imported VM will appear in the sidebar. From here, select your VM in the sidebar. After selecting your VM in the sidebar, VMware will reveal a few options to you.
Among the various options available in Vmware Workstation, locate and click on “Start up this guest operating system” to start using your newly imported VM! It should boot up instantly and be ready to use for all of your virtualization needs!
Import to VirtualBox
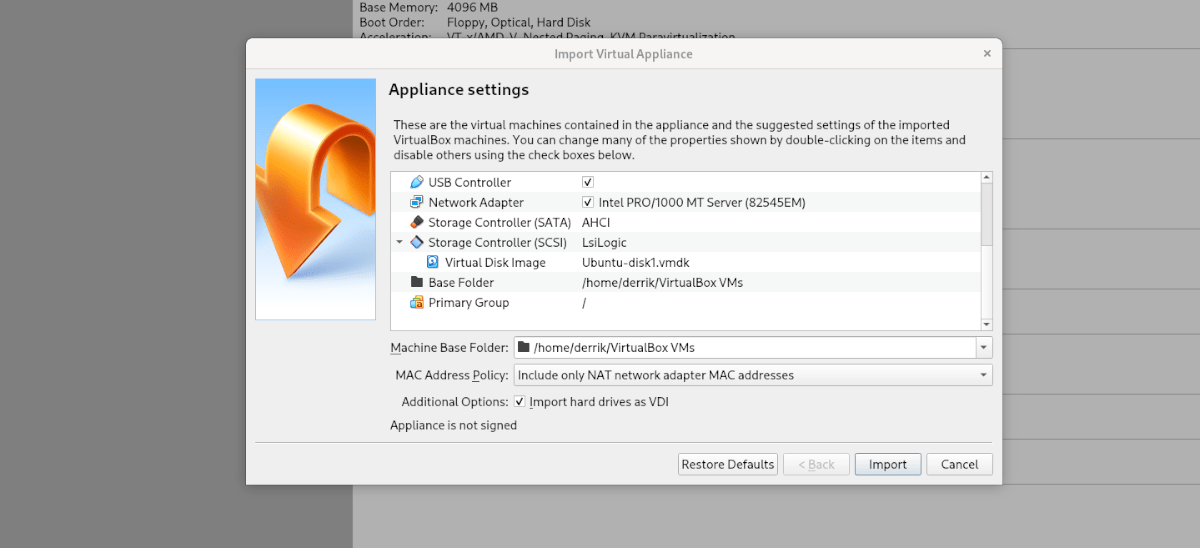
If you’ve exported a VM to OVF from VMWare and want to use it in VirtualBox on Linux, you can. To do it, open up the Linux file manager and right-click on the OVF file. Then, select “Open With,” followed by “Oracle VM VirtualBox” to import the VM!