Manjaro Linux is a derivative of Arch Linux that attempts to make using Arch easier and more stable. Due to this design philosophy, Manjaro is one of the most popular Linux distros on PC. However, it is also available on the Raspberry Pi 4. Here’s how to set it up on your Pi 4.
Installing the Raspberry Pi Imager on Linux
To use Manjaro on the Raspberry Pi 4, you’ll have to download one of the official images from the internet. The best way to download the images from the internet is with the Raspberry Pi Imager tool.
The Raspberry Pi Imager tool works on a lot of different operating Linux operating systems and Mac OS and Windows. In this guide, we’ll focus on how to install it on Linux.
To install the Raspberry Pi Imager application on Linux, open up a Linux terminal on the desktop. Then, follow the command-line installation instructions outlined below that correspond with the Linux distribution you use.
Snap package
The Snap package release of Raspberry Pi Imager is easy to install once you have the Snap runtime on your computer. To enable the Snap package runtime on your Linux system, follow our guide on the subject.
After setting up the Snap package runtime, you can install the Raspberry Pi Imager application using the following snap install command below in a terminal window.
sudo snap install rpi-imager
Flatpak
The Raspberry Pi Imager is also available as a Flatpak package. To get started, you’ll have to set up the Flatpak runtime on your computer. You can set up the runtime by installing the “flatpak” package on your computer. If you need help, follow our Flatpak setup guide.
After the Flatpak runtime is up and running, execute the flatpak remote-add command and the flatpak install command. These two commands will install the Raspberry Pi Imager on your Linux desktop.
flatpak remote-add --if-not-exists flathub https://flathub.org/repo/flathub.flatpakrepo
flatpak install flathub org.raspberrypi.rpi-imager
Flashing Manjaro to an SD card
To use Manjaro on a Raspberry Pi 4, it needs to be flashed to an SD card to use the software. First, start the flashing process by opening up the Raspberry Pi Imager tool. Then, follow the step-by-step instructions below.
Step 1: Find the “Choose OS” button in the Raspberry Pi Imager application, and select it with the mouse. When you’ve selected the button, find the “Other general purpose OS” button, and select it.

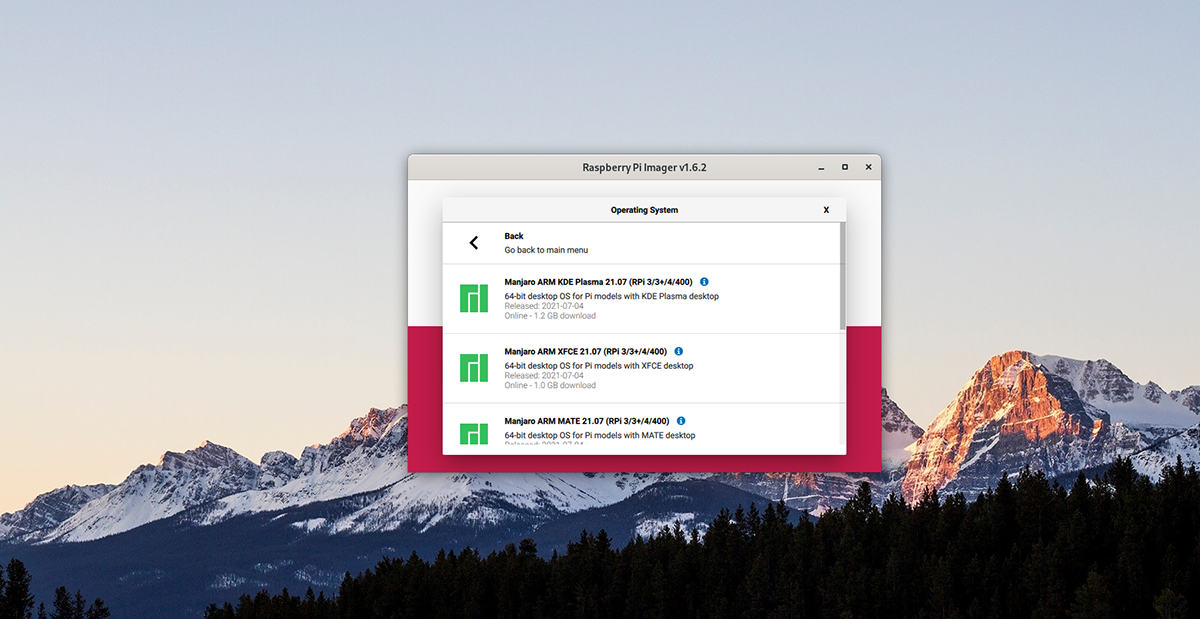
Step 2: Inside the “Other general purpose OS” area, find the “Manjaro ARM Linux” button and select it with the mouse. When you choose this button, you’ll be presented with a variety of Manjaro ARM choices for your Raspberry Pi 4.
Step 3: Look through the Manjaro ARM choices and select the desktop environment you wish to use. The choices are KDE Plasma, XFCE, Mate, Gnome, and Minimal (no GUI).
Step 4: Find the “Choose Storage” button, and select it. After that, select the SD card or SD Card USB reader in the menu to flash Manjaro ARM to the device.
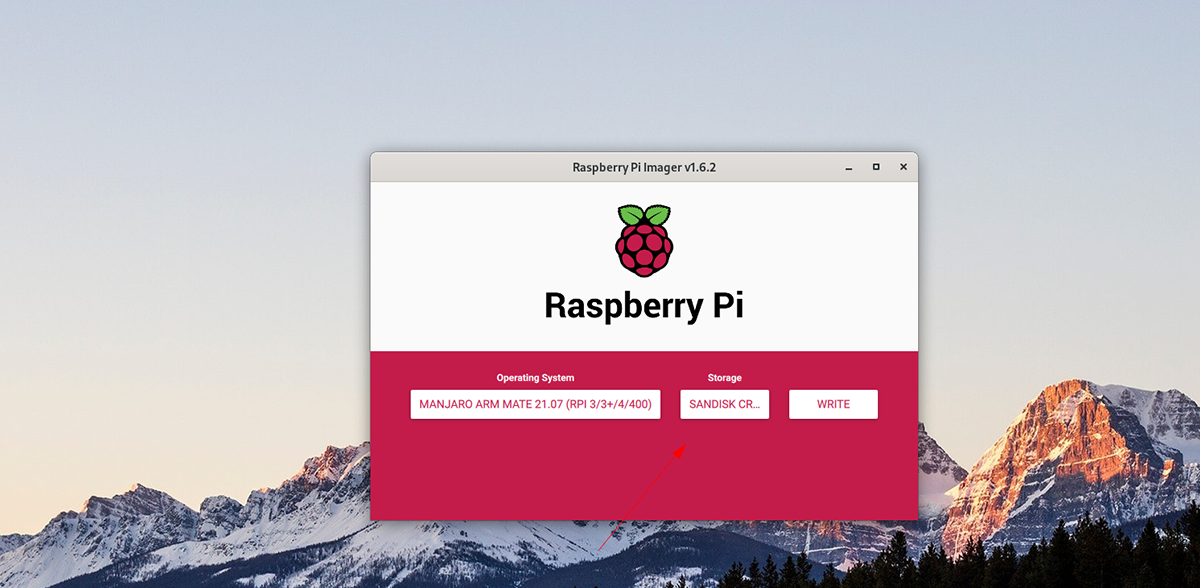
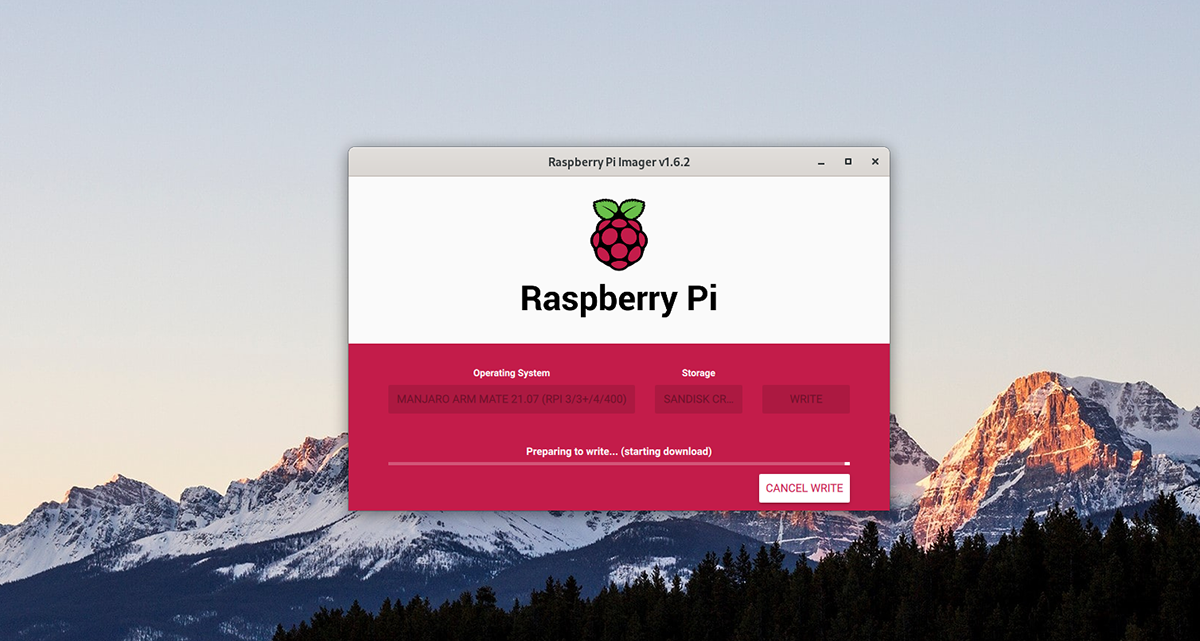
Step 5: Locate the “Write” button in the Raspberry Pi Imager application, and click it with the mouse. When you select this button, the writing process will begin. Sit back, be patient and allow it to finish.
When the process is complete, eject the SD card from your computer and connect it to the Raspberry Pi 4. Be sure also to connect a USB keyboard, mouse, display, and power.
Setting up Manjaro
Setting up Manjaro on the Raspberry Pi 4 is a little involved. To start, turn on the device. Then, follow the step-by-step instructions below.
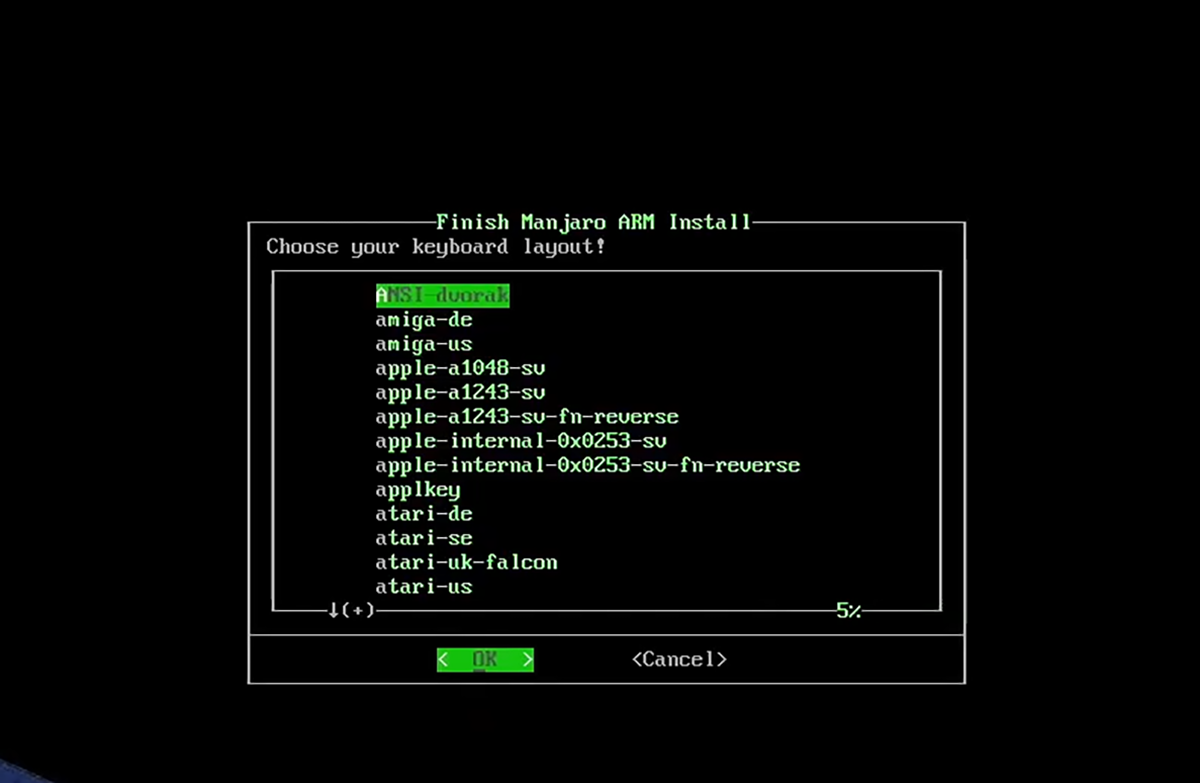
Step 1: You’ll need to select your keyboard layout. Look through the list of options, and choose the layout you prefer. Then, select “OK” and press Enter to continue.
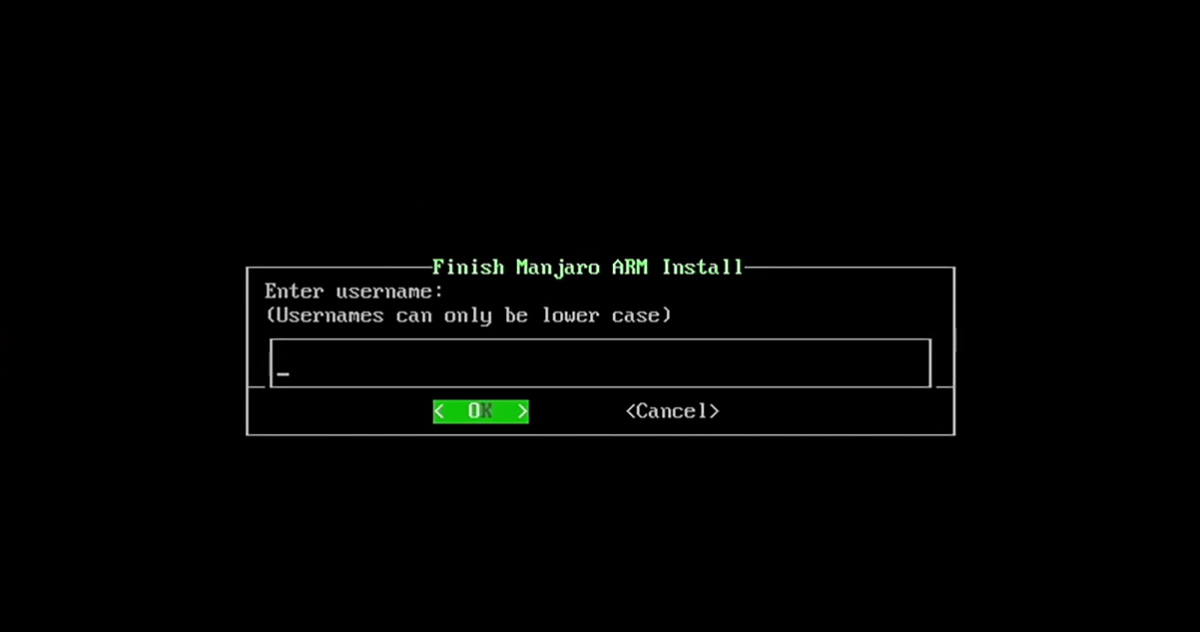
Step 2: You must now set up a username in the text box. Using the keyboard, write in your username of choice. Then, select the “OK” button and press Enter to continue to the next page.
Step 3: Using the keyboard, write in the full name of your user account. Like the first name and last name, or just the first name. Then, select the “OK” option to continue to the next page in the installer.
Step 4: You must now enter a password into the text box. Using the keyboard, type in a secure password into the text box. Then, select the “OK” button, and press the Enter key to move to the next page.
Step 5: After setting up the user password, you’ll have to configure a root password. Using the keyboard, write in a secure password to use as root. Then, select the “OK” button, and press the Enter key on the keyboard to move to the next step.

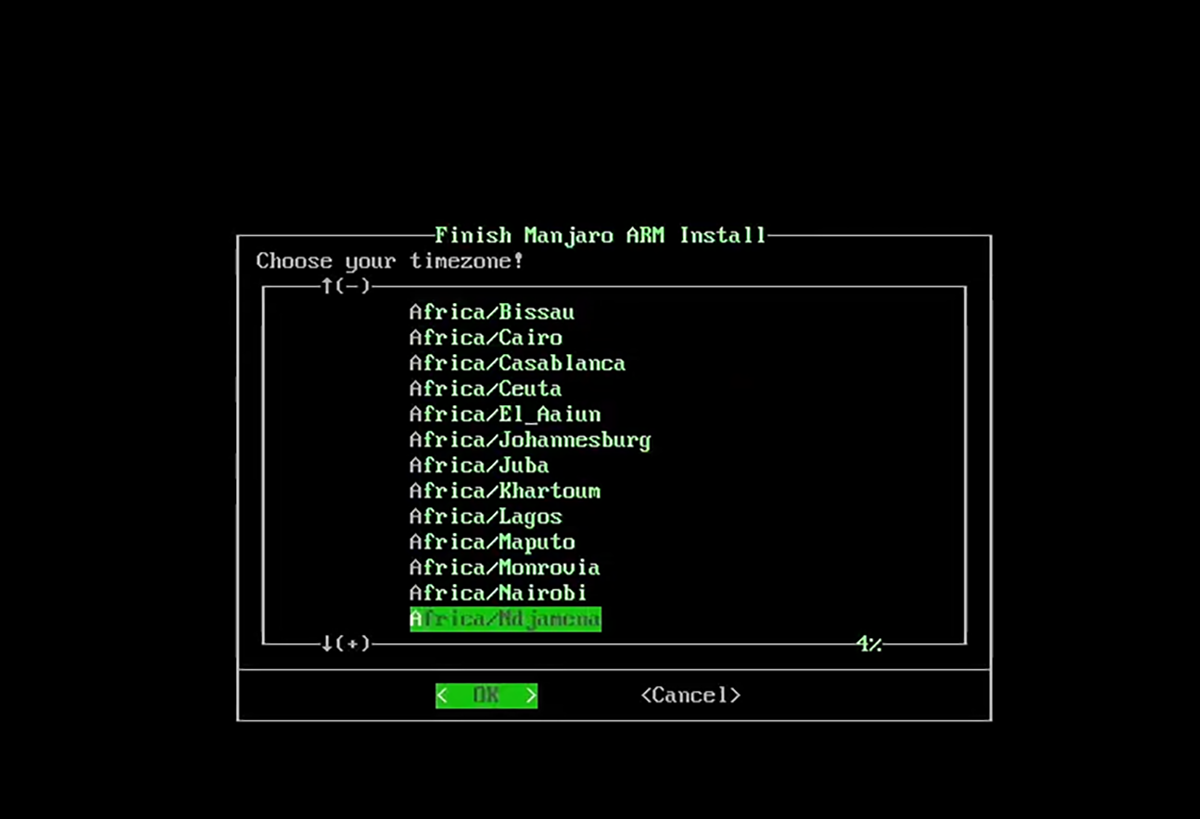
Step 6: You’ll now need to select a timezone as well as a locale. Using the UI, choose both your timezone and locale. Then, select “OK” to move to the next step in the installer.
Step 7: Manjaro will now ask if your setup configuration looks correct. If it is, select “Yes,” and press Enter to move on to the next step.
After confirming your configuration, the installation will finish up. When complete, you’ll be able to use Manjaro on your Raspberry Pi 4!