You can send voice messages over Whatsapp. It’s actually a rather popular feature on the app and people prefer it over sending a text or making a phone call. It’s not the only app to have voice messages; Viber has the same feature and if you use iMessages on an iOS device, you can send voice messages over it as well. The voice message feature is implemented differently on different apps. With Whatsapp, you have to hold down the mic button and keep it held down while you record your message. This isn’t the easiest way to record a message and often, users release the button before they’re done recording. To circumvent this, Whatsapp now lets you record voice messages in hands free mode by locking the mic.
This is a new feature so you will have to update the app. If an update isn’t available in your country, wait 24 hours and it ought to appear.
To record a voice message in hands free mode, tap the mic button. You will, obviously and by habit, hold the button down. After the update though, if you hold the button down, drag it upward, and release it, it will lock the mic.
You can remove your finger from the button and continue recording your message. Once you’re done, you will have the option to send or discard the message.
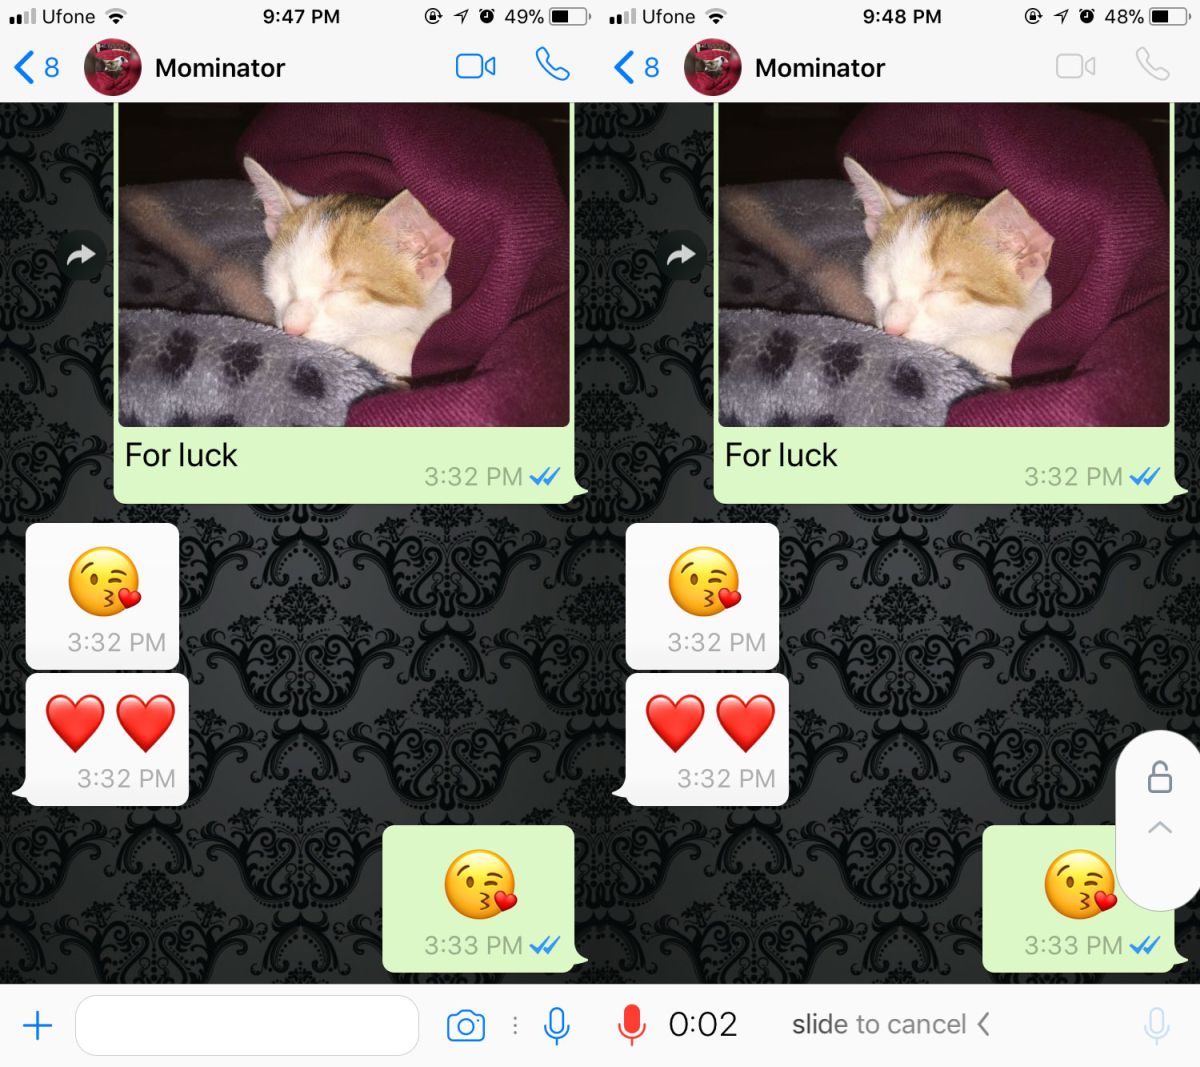
When you lock down the voice message mode in Whatsapp, you will see a pad lock icon appear at the bottom right. If the icon doesn’t appear, it means your upward swipe hasn’t registered with the app. This voice message mode is for one message only i.e., if you record a second, or third message after the first one where you used this mode, you will have to enable it again.
When you’re recording a message, you have the option to scroll through the current chat thread. You cannot browse a different chat thread. If you switch to a different one, the audio message you’ve recorded will automatically be discarded.
This is pretty neat feature and Whatsapp users will no doubt appreciate it but there should have been an option to always record audio messages in this mode. There’s no reason the feature shouldn’t always work like this. In fact, that’s exactly how the Messages app on iOS does it. You have to tap the mic once to record a message instead of holding the button down. Once you’ve recorded the message, you can send it or discard it.