MS Office comes with some very nice cover pages that you can use for official reports, dissertations, assignments etc. The covers provide placeholder elements that make up a cover page in different layouts. Some are picture heavy while others are minimal in design giving you a reasonable variety to choose from. That said, the covers meet generic needs and it’s very obvious when you’ve used one. If you’d like to create and use a custom cover page in MS office, here’s how.
Before you start creating your cover, make sure you do it in a fresh document. Under no circumstances should you try and create the cover on your final, fully formatted document.
Design
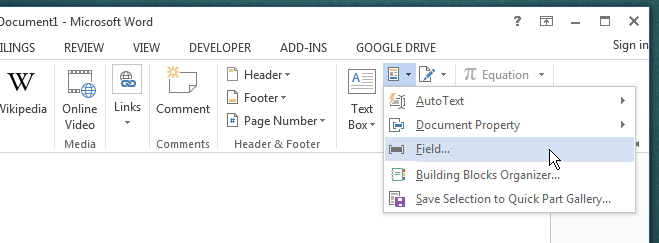
It might be tempting to play around with the different shapes to create a cover page but it’s best you have some general idea of what you want the page to look like. You will find that the shapes available to you are limited. From the ‘Insert’ tab add the shapes and images you want to use. To add document fields like title, author name, etc, go to the Insert tab and in the Text toolbox, select Quick Parts to add a field. You can insert a title and author field among many others.
Saving As Cover
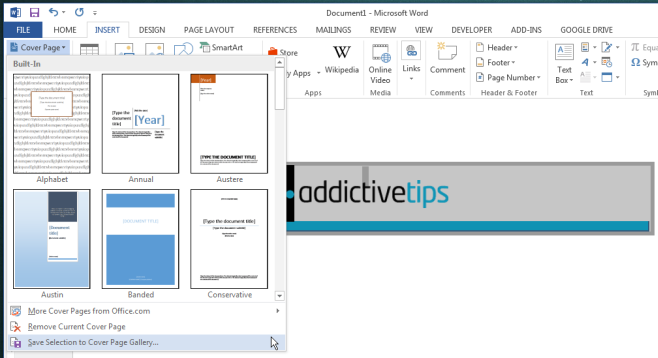
Once you’ve got the document looking the way you want it to, select everything. Nothing should lie outside the one page that will make up your cover. Go to the Insert tab and pull down the Cover Page gallery. Scroll to the very bottom and click the ‘Save Selection to Cover Page Gallery…’ option.
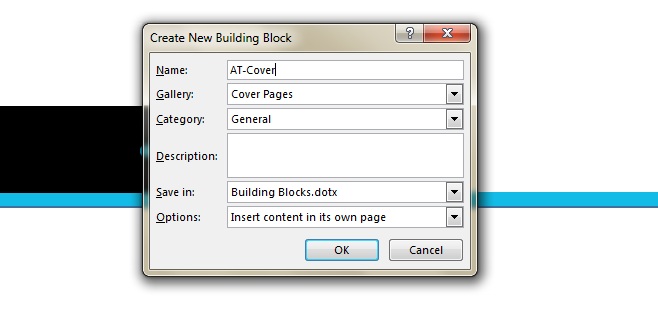
Give the cover a name, and you’re all done.
The cover will now appear in the Cover page gallery under the category you saved it to.

