An Excel sheet isn’t always used to process data. The row and column layout is a useful way to present and manage a large amount of information and Excel’s features make it possible to use a spreadsheet as a data collection tool.
Excel offers some features that allow you to use it as a form that other users can fill in but if you have to enter instructions for filling the form in, into the spreadsheet, it’s going to get messy.
An easier way to make sure you get the right data is to add limits and restrictions to a cell. Any data or value that falls outside the limit will be rejected.
Character limit for cells in Excel
You can set a character limit for cells in Excel. This limit works so that the value entered is a minimum number of characters long, or it is no longer than a certain number of characters.
It’s useful for when a user must input a phone number, or zip code, or similar.
- Open the Excel file you want to add character limits to.
- Select the cells/columns/rows that the limit will be added to.
- Go to the Data tab.
- Click ‘Data Validation’ button on the Data Tools toolbox.
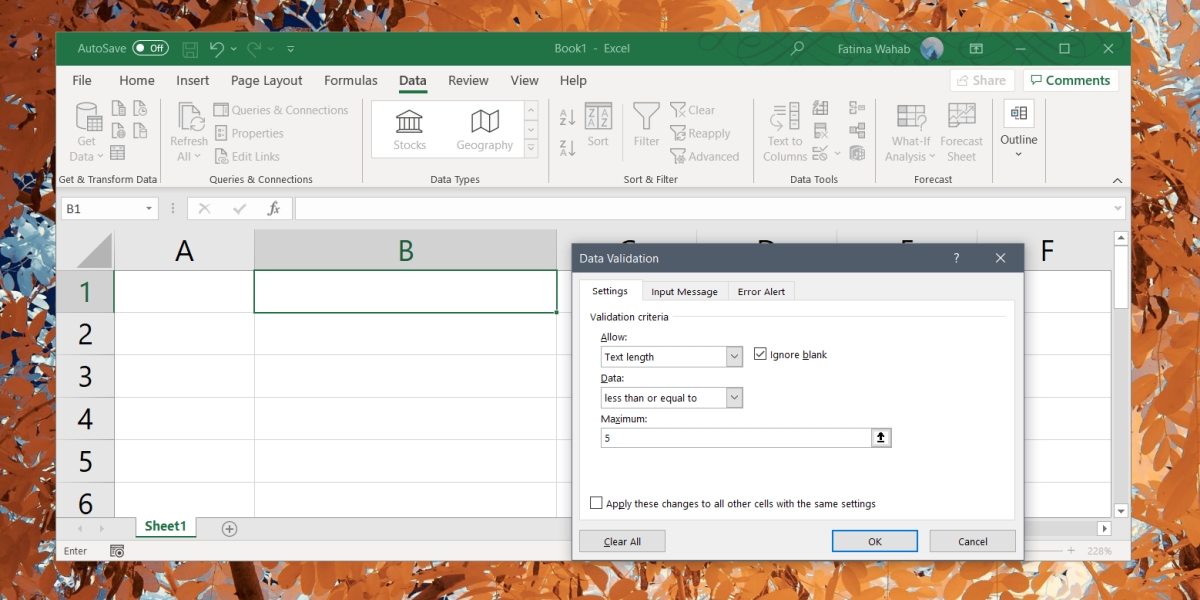
- Go to the Settings tab.
- Open the ‘Allow’ dropdown and select ‘Text length’.
- Open the ‘Data’ dropdown and select a limiting criteria. To limit it to a certain number, select ‘Less than or equal to’.
- To set the maximum value, enter a value in the Maximum field.
- Click Ok.

Add tooltip for character limit
A user won’t be able to tell if a cell has a character limit so adding a tooltip will help them.
- Select the cells/columns/rows with the character limit.
- Go to the Data tab.
- Click Data Validation.
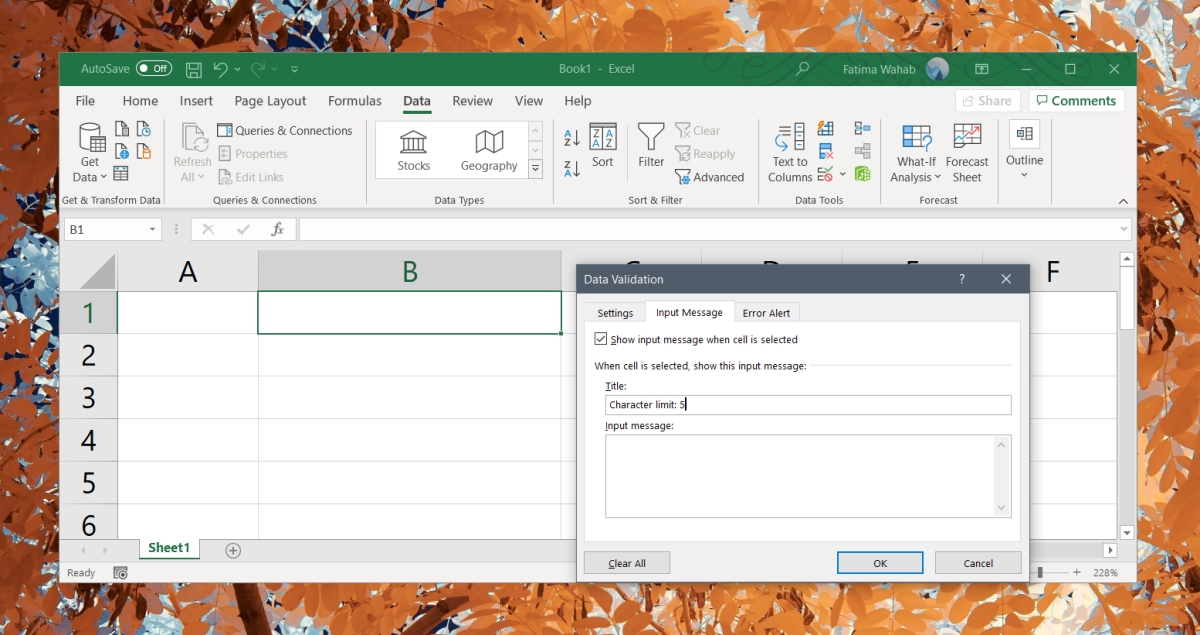
- Select the Input Message tab.
- Enable the ‘Show input message when cell is selected’ option.
- In the title field, enter a subject for the tooltip.
- Enter a message in the ‘Input message’ field.
- Click OK.

Add error message
When a user enters a value that does not meet the character limits of the cell, they will see an error. Unfortunately, the error message is generic and doesn’t tell the user why the value wasn’t excepted. You can modify it so the user knows what’s wrong.
- Select the cell/column/rows with the character limit.
- Go to the Data tab on the ribbon.
- Click Data Validation.
- Go to the Error Message box.
- Enable the ‘Show error alert after invalid data is entered’ option.
- Enter a title for the alert in the ‘Title’ field.
- Enter a message that tells the user what sort of data to enter in the Error Message field.

Conclusion
You can add an upper, or lower character limit to cells, or enter a precise number of characters that a user must enter in order for the value to be accepted. Go through the various options and add the kind of data limit you need for a cell or column or row.


